Conrad's Guide to Adaptable and Stress Free Travel

Traveling has become something I enjoy a great deal over the course of the last few years. I've had a chance to visit some amazing cities and places, try lots of new things and meet lots of new people. I've also learned quite a bit about how to travel, which includes what I take with me, my daily routine, and various other tips that I believe lead to a fun and exciting adventure. Presently I am starting my last week of a two week trip to Germany. I've wanted to visit Germany for as long as I can remember, and so far the trip has been one of the most rewarding travel experiences I've had. Here's a few tips that I think have made the biggest difference.


Travel Light

I really can't emphasize this enough, but for most trips its best to pack as little as possible. For a business or leisure trip, carrying only a single bag is essential. Packing light is what makes a stress free and adaptable travel experience possible. Its what allows you to go where your heart tells you rather than where your wheeled luggage will take you.

Packing light doesn't have to be difficult, or involve many sacrifices. It does require some extra planning, and the acceptance that what you don't have with you can always be bought later.

The main area I focus on while packing is clothes. The core kit I bring almost anywhere includes 4 shirts, 4 pairs of socks, 3 pairs of underwear, and the pants/shoes I am wearing. Added to that, depending on the circumstances, can be workout shorts, a jacket, rain jacket, and a new item I recently acquired: travel pants. Normally I only bring and wear a pair of nice jeans that can double as casual or semi-formal dress. For this trip to Germany, I also packed a very light weight pair of Patagonia hiking/travel pants that dry super fast, feel great, but also look nice enough for walking around town. The key to travel clothes and packing light is making sure everything can serve a dual purpose. A t-shirt as a workout shirt or undershirt, for example. A jacket and a rain jacket as layers for wet and extra cold weather. Carrying items that service multiple purposes saves space and weight so that you can pack less and move quicker.

Doing laundry on the road helps you get away with packing less. Many hotels have washing machines, but I also carry some Tide travel packets just to be safe.

Besides clothes, I carry a Camera, Laptop, iPad, a very limited set of toiletries, and a small electronics kit including some display adapters and chargers, head phones, and a very handy rechargeable battery for my iPhone.

My backpack is the Goruck GR1, which I've written about before. For the last 2 years its served me very well through multiple cities, mountain tops, and across 3 continents. I can't recommend it enough.


Walk Around

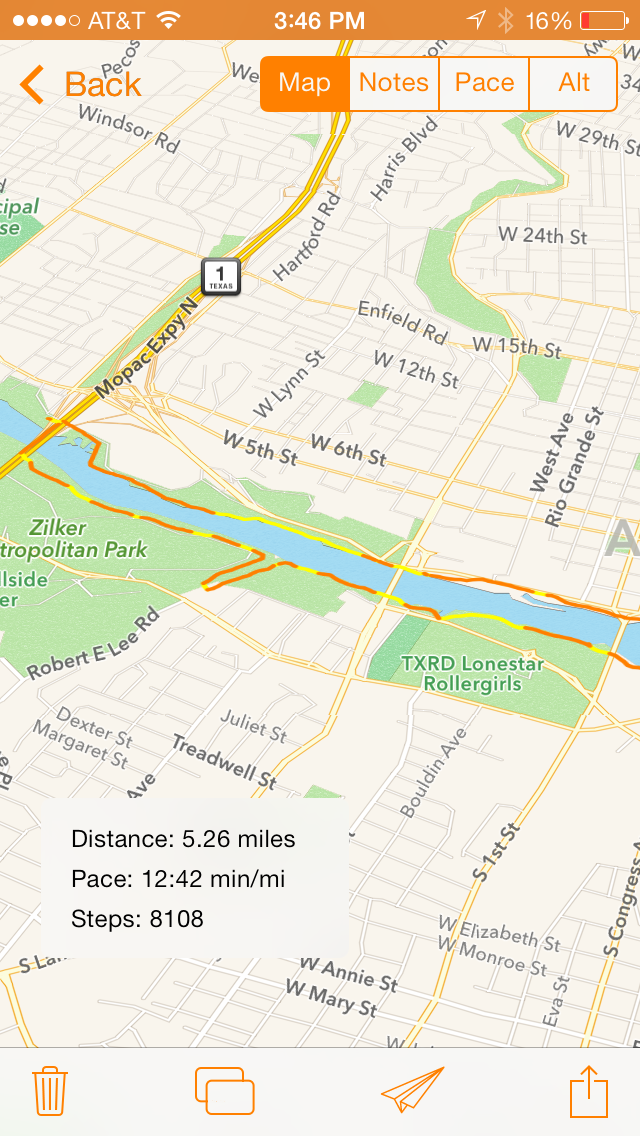
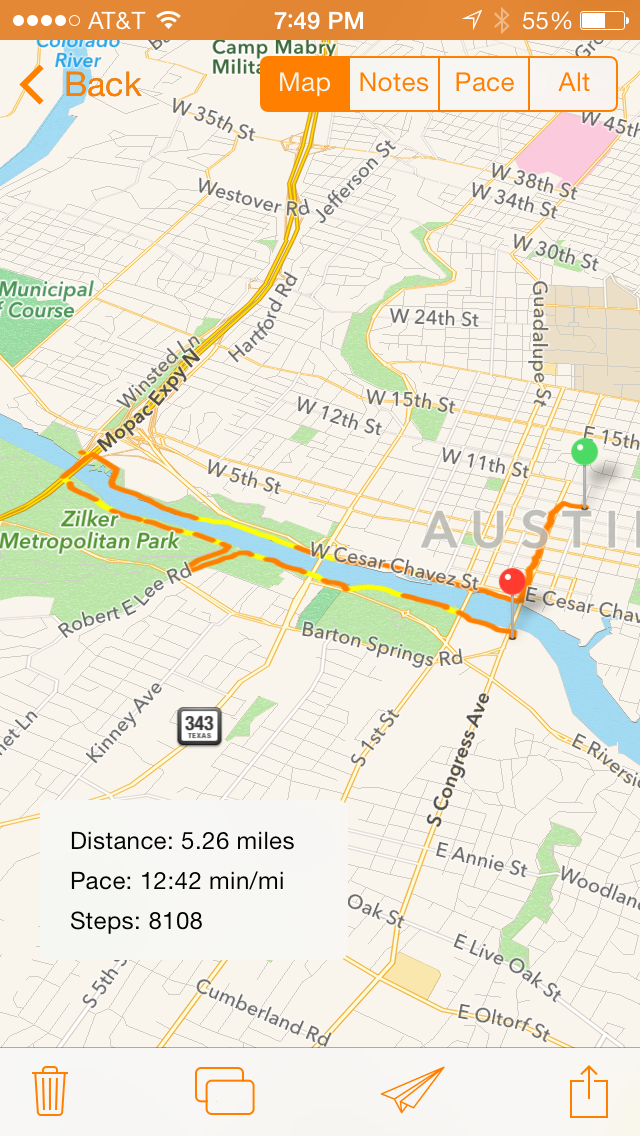
Walking around as much as possible rather than taking a cab or subway can teach you a lot about a city or town. In Munich for instance, I walked about 6 miles the first day I was there, from the train station to a bar and to my hotel. Taking the subway would have been quicker, but in the two hours it took to walk I got to fully understand the lay of the land and spot several landmarks that I'd wanted to visit anyways. It was a super valuable way to observe the city and get to fully experience it. Of course, I took the subway some of the time, but I made sure to walk at least half the time as well so that I could see more of the place instead of just specific sites.

Not every city, including many in the US, are as walkable as Munich. However, I still think this can be applied to most places you are likely to visit.

Following the mantra above and packing light is what enables you to be more mobile and enjoy walking around. Having encumbering luggage limits your free will and options while traveling. Packing light gives you new-found flexibility to go visit a park on the way to your hotel rather than taking a cab there.


Don't Plan Ahead

This may sound counter-intuitive, but I'm completely serious. Don't plan ahead. Read the guide book and talk to some friends in order to familiarize yourself, but stop short of creating an itinerary, especially before you get there. 

There are of course some things that you have to plan, but generally the only thing I plan ahead of time is my mode of travel. I book a flight, or a train, or a rental car...etc. For some trips, including business trips, its also best to book a hotel in advance, but particularly for Germany I decided not to book any hotels in advance. Nowadays its quite easy to book hotels online even the day of or the day before. Booking late in the game gives you the freedom to change your plans without having to cancel or reschedule previously booked hotels.

Planning too far in advance tends to lead to frustration and failure. Its hard to predict whats going to happen while you're on the road. Weather changes. Flights get delayed. Friends get sick. Or you hear about an amazing town to visit, or stumble onto a trail that you want to hike. Having the flexibility to account for those changes can make all the difference in how much you enjoy your trip.

If I had planned my trip to Germany in advance, I wouldn't have visited either Oberstdorf or Berchtesgaden, two of the most beautiful places I've ever been, because I wouldn't have known about them. Hearing about them from friends and people I met in the area compelled me to go there, which really made a huge difference in my trip.


Familiarize Yourself with Where You're Going

Even though I don't create an itinerary, I do try to learn a bit about where I am going and roughly what I want to do there. I usually start by asking a few people that have been there. My goal is to come up with a list of places to start with. A bar, a coffee shop, a landmark, a park, etc. Those are my fallback points if I get stuck, or my places to look out for while roaming around.

Right before I get somewhere, either in the airport or on the train, I'll pull up Wikipedia and read about the city. Read the history, the geography, the key places. Its helpful background information to help you know where to look or when to change directions and head towards something more interesting while exploring.


Have a Routine

I try to keep to a routine when I'm traveling. I like to get up early, most of the time. Sometimes its nice to sleep in after a long day, but don't do this every day. I usually start out with a shower and a good breakfast. Sometimes I'll just eat something small in my hotel to get started, and then find a place nearby that serves breakfast. In the US, this is usually a coffee shop or restaurant. In Germany, this tends to be a bakery.

At the end of the day I make sure to clean out my pack of trash and make sure things are organized. I will unpack things like clothes and leave them in the hotel, but I usually take things like my computer and camera around with me. I make sure all of this is organized so that its both easy to go out in the morning, and also to minimize the risk that I lose something outside or in the hotel.
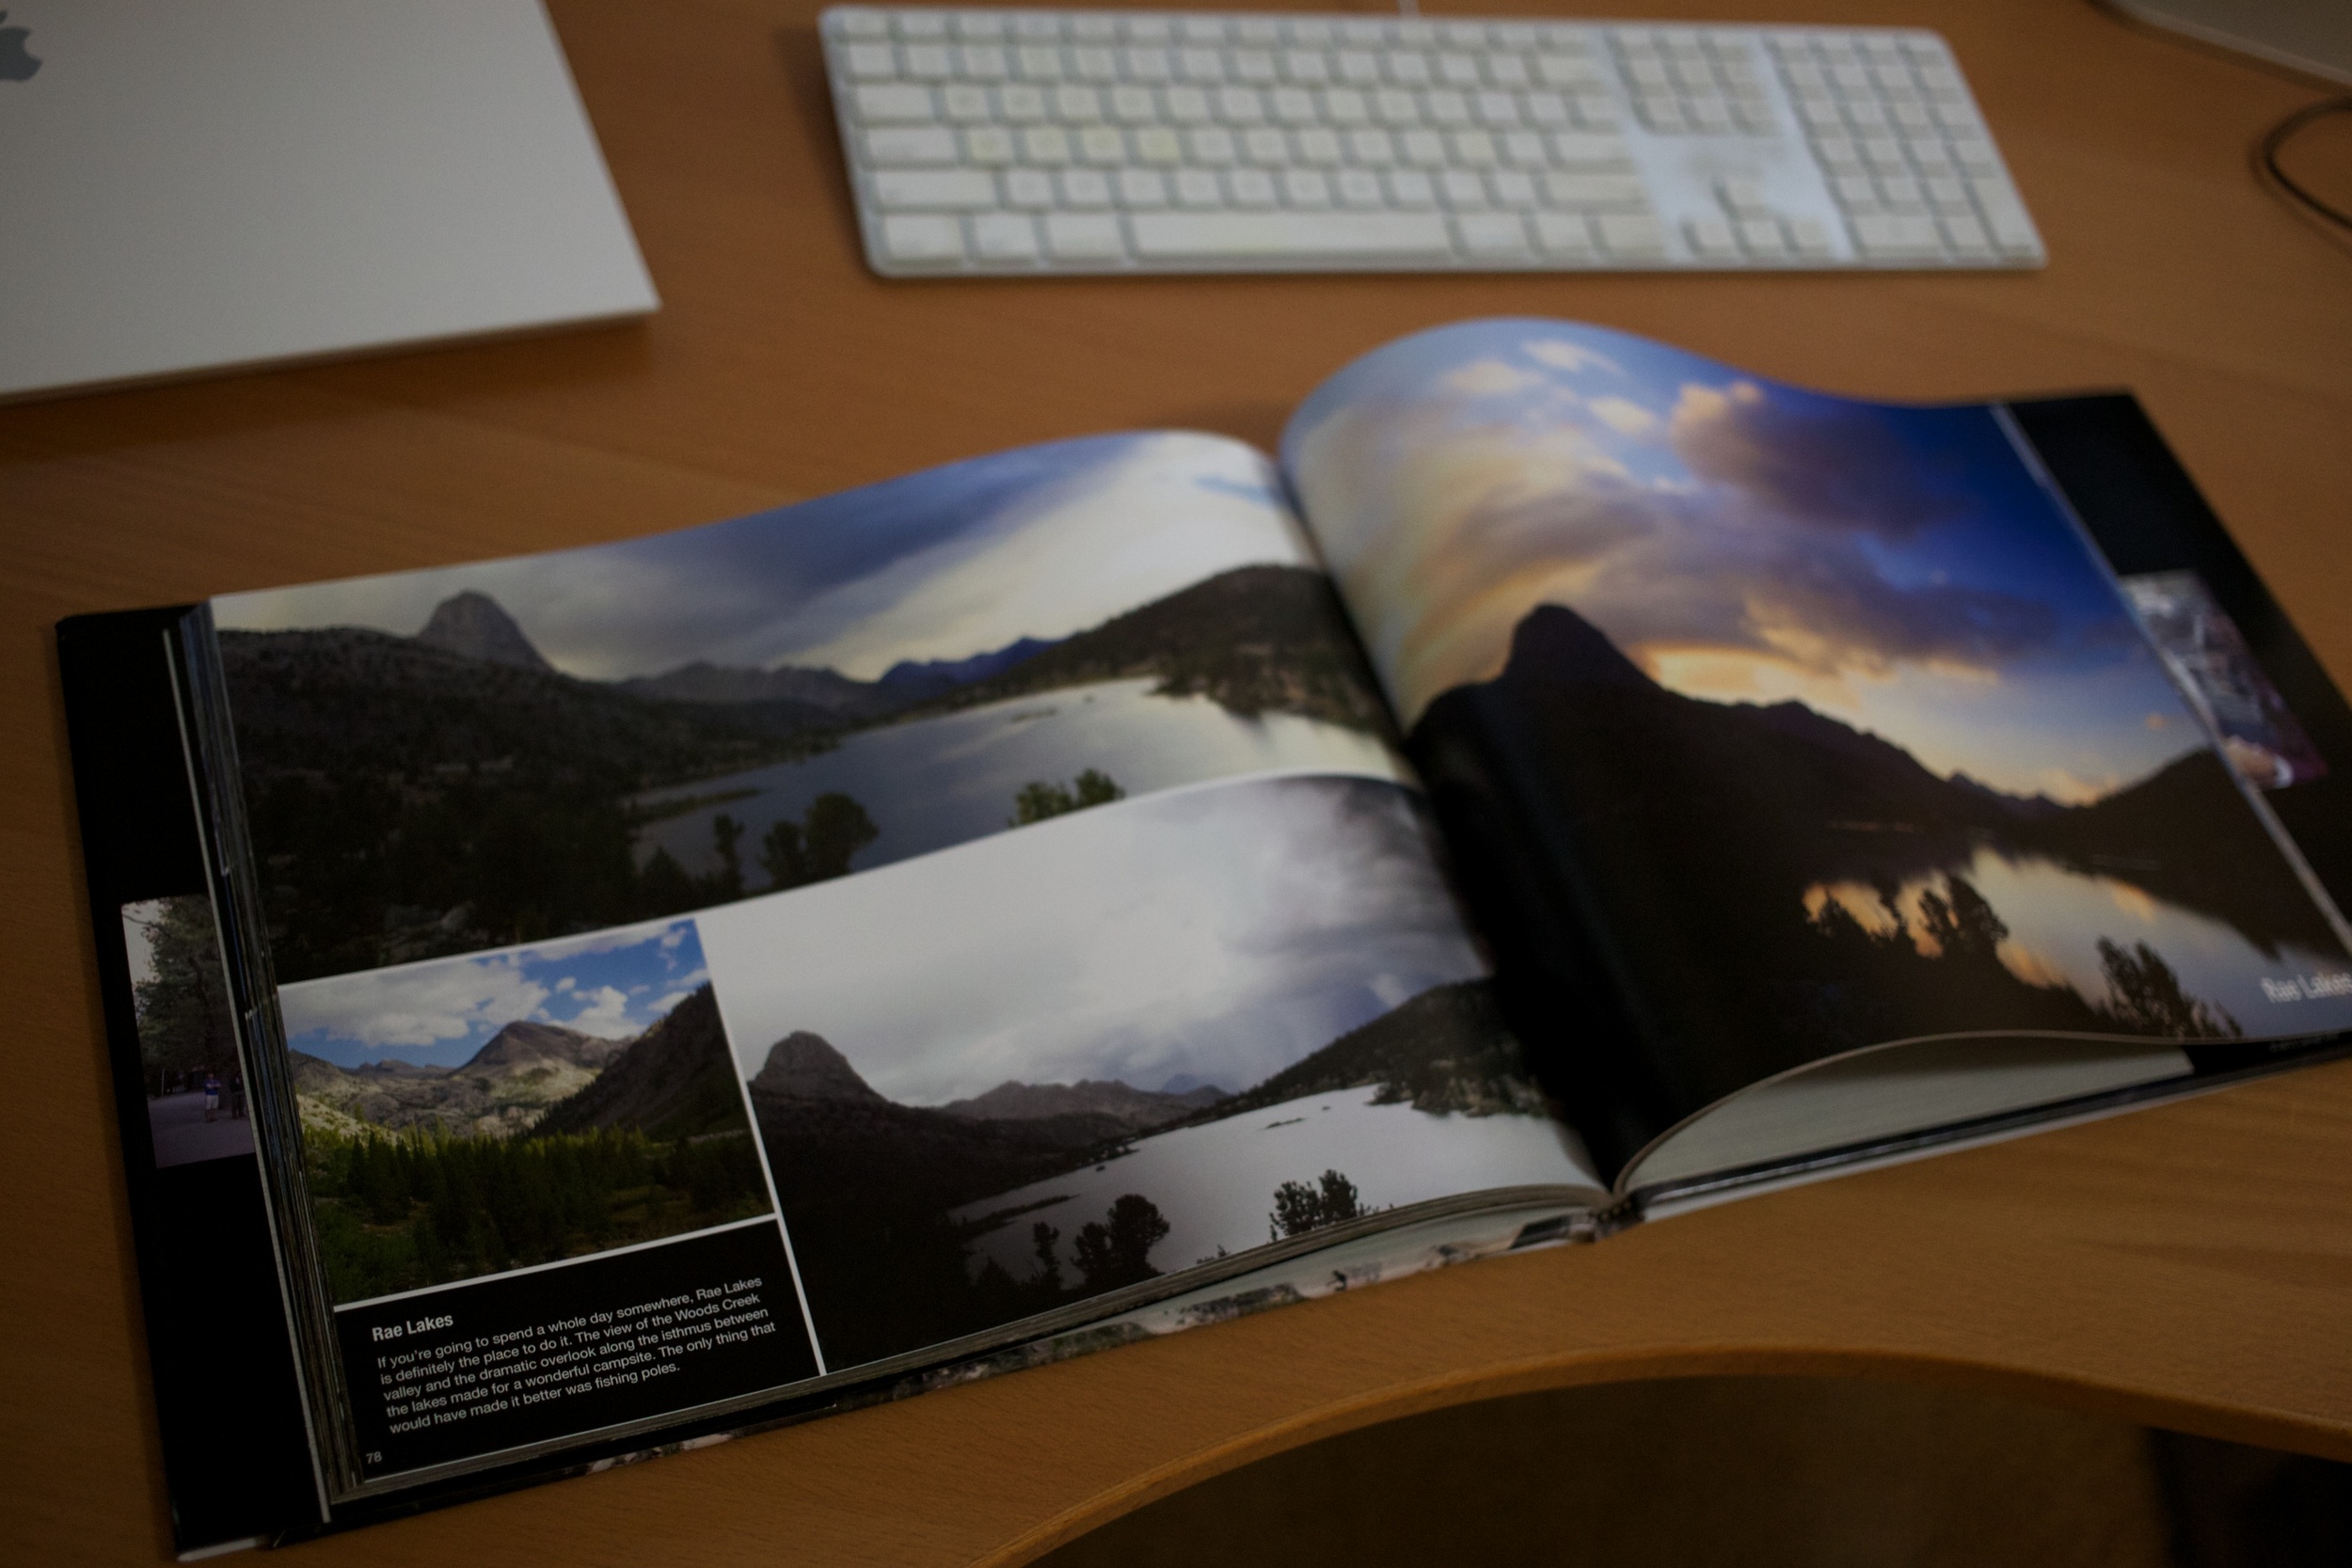
 

Take Pictures

This almost goes without saying, but whenever you're traveling be sure to take some pictures. I like to use both my iPhone and DSLR while traveling. The iPhone helps make sure some of my photos are geotagged, and also makes photos easier to share. The DSLR is higher quality, but not always as quick to access. To make the DSLR a bit easier to access I use a Peak Design Capture camera clip. I've found that its just about the perfect travel accessory for the traveling photographer.


Travel is a very personal experience. Some of these tips may not work for you, and thats ok. But in general, I've found that packing light and keeping an open mind while on the road has helped me to enjoy the experience of traveling a lot more. I hope that it will for you as well.

MMRecord Turns 1.3.0

MMRecord reached another milestone today as it was updated to 1.3.0. This is the second major update in 3 months, and includes a few fixes from 1.2.0 as well as a few handy new features.

A key feature in the latest version is the addition of two new MMRecordOptions blocks. MMRecordOptions is a little-known feature of MMRecord that provides some specialized request parameters that allow you to customize request and parsing behaviors.

MMRecord now includes the ability to inject a primary key for a given record into the request via an optional block. This is a handy option because sometimes an API response doesn’t include a way to uniquely identify the item. Sometimes this happens when you use a certain identifier to request a resource, but that identifier isn’t returned as part of the response. The optional primary key injection block allows you to pass that identifier back into the response parsing process to act as the primary key, or to create your own key if you need to. Most of the time you won’t need this, but when you do need it it should prove very useful :)

A popular request has also been support for AFNetworking 2.0. MMRecord has always provided implicit support for AFNetworking 2.0, because the library is designed to work with any networking library. We’ve used AFNetworking 2.0 and MMRecord on a few projects here at Mutual Mobile, but we haven’t had a subspec or example that specifically shows how these two work together. Thats all fixed in MMRecord 1.3.0, and a new AFMMRecordSessionManagerServer subclass of MMServer has been added as a subspec that implements the MMServer interface using AFNetworking 2.0. You can use this as is for simple use cases, or customize it for more complex ones as needed. And of course, the AFMMRecordResponseSerializer introduced in MMRecord 1.2.0 is still here as well.

Its still great seeing the feedback from folks on MMRecord. Try out the new features and let me know what you think!

Two Things I Learned about Interactive View Controller Transitions

The new Interactive View Controller Transitions introduced in iOS 7 are easily one of the most exciting APIs introduced in a long time, but they've also proven to be one of the most confusing and difficult to use. Part of the problem is incomplete documentation, a lack of solid examples, and unexplained and unknown corner cases. I encountered two of these today that I want with people.

I've been struggling for a long time with an interactive transition in my fitness app, Runtime. The app uses a UIPercentDrivenInteractiveTransition to allow the user to swipe to dismiss a detail view showing a map and other information about their run. The interactive portion tracks your gesture very well. But when you lift up your finger the view then snaps abruptly into place. For several months I couldn't figure out why.

The best information I'd seen on this was the objc.io paper. But even that didn't solve my problem. Then I ran across the Apple Tech Talk lecture on Architecting Modern Apps. This video (part 1) is easily the best explanation of implementing interactive transitions that I have seen so far, and while it gave me inspiration to try again and solve the problem, it didn't provide a definitive answer.

I had a twitter conversation with my friend Elfred today and I became more or less convinced that the issue was in my implementation of the transition itself. So I started going through it and experimenting a bit to see if I could figure out what was wrong. Here's what I learned.

1) UIPercentDrivenInteractiveTransition is so amazing and convenient because it captures your UIView animation block and interpolates the animations inside of it based on the percentage of your gesture. This saves you a ton of math in practice and is actually quite helpful of Apple to include.

However, there's a pretty big and undocumented gotcha. While their implementation will look for and interpolate between any and all UIView animation blocks defined within the animated transition's -animateTransition: method, it will only interpolate between the FIRST animation block it finds when CANCELING OR FINISHING the animation! This means that if for some reason you defined two blocks, and the bulk of your animations were in the second one, then you'd notice an annoying snapping effect.

The fix for this was simple: consolidate the animations into one block (don't ask me why there were two to begin with). But you can imagine how difficult this was to figure out, since the interpolation worked as you would expect while updating the transition. It wasn't until the transition cancelled or finished that the problem occurred.

2) While the new springy UIView animation method is quite cool, and works very well with normal animated transitions, it does not support cancel or finish interpolation within a UIPercentDrivenInteractiveTransition. Again, we see the same behavior as above, where the interpolation whilst updating the transition's progress works fine with a spring animation. But when you go to cancel or finish that transition, the views will simply snap to their places. Using a normal UIView animation results in the desired behavior.

Eventually I hope to open source the transitions I'm using in Runtime. They're still a bit too specific to the app itself, but once I have them cleaned up I'll post them. Until then, I thought I'd share what I learned today in the hopes that it will help someone else struggling in the murky waters of this delightful yet confusing API.

Runtime Updated to 1.0.4

Runtime shipped a few months ago and its gotten a great response. Its been featured on the App Store's Best New Health and Fitness Apps for nearly two months now. Its very exciting to see many people are actively using it. Ive gotten some great feedback from folks which has been the driving force behind the new update to 1.0.4.

One of the earliest feature requests I got was for exporting GPX files. Initially I only supported KML files because thats what Google Earth uses, and naturally I assumed this was the standard for GPS route file formats. It turns out thats not really the case. GPX files are much more widely used for all sorts of things, ranging from adding routes to a backpacking GPS device to geotagging your photos. 

Fortunately, adding support for GPX files was very straightforward because I had actually already built this for myself :)  Xcode supports simulated location tracking using waypoint-based GPX files, so I had already written a GPX file exporter for my own testing purposes while building the app. I just hadn’t chosen to publish it as a feature.

Many other apps (including some popular geotagging apps) use a track-based GPX file. So I ended up adding support for both waypoint-based and track-based files. You can now export your Runtime routes as a waypoint file for use with Xcode location simulation, or as a track file for use with many popular geotagging utilities.

Another request I got was to add a privacy policy to the app. Runtime uses very basic analytics to see how certain features are used in an anonymous way. This is a pretty common practice that helps developers better understand ways to improve their app. I was very careful not to record any personal information. Locations are the most sensitive and they are not recorded at all, and neither are names of run locations, notes, etc. What is being recorded is data about how often each feature is used.

Here’s an example to give you an idea of what happens with this data. I know that less than 5% of users are using the interval timer feature. I was thinking about spending some time working on that feature when I got some requests for GPX file export support. It was easy to use those requests to make the decision to build that feature, instead of spending time on intervals, because I knew the interval timer wasn’t being heavily used.

Another feature I added is one that I created mostly for myself, but which I imagine will delight many people. About a month ago I went for a hike and I pulled my phone out to take a picture. Runtime was recording my hike in the background. When I opened the Camera app my phone crashed and restarted itself. As a result my entire hike (which was about half way over) was lost.

I felt pretty bad about this, not just because I had lost data, but because I knew if this frustrated me it would definitely frustrate other people. There’s plenty of reasons an app could close in the background. Lets say someone was going on a 12 hour hike, and their phone ran out of power at 12:01. Its not fair to them to jettison all of their data from the last 12 hours because their phone turned off. Users don’t expect for an app to lose their data, no matter what happens.

To address these issues I implemented a form of State Restoration in Runtime. Runtime will now continuously record your route and save it to disk periodically in the background while you run. If the app is closed during a run, the half-saved route is detected when the app next launches, which gives you the opportunity to either save what you have, or resume from where you left off.

For the technically curious, this feature uses a separate Core Data persistent store for the route thats in progress. That way, if the user cancels their route, you don’t have to do any management of your primary store to remove that data; you simply throw away the temporary persistent store. When the user saves their route, the objects get migrated over from the temporary store to the main one. This is a practice that was highlighted this year at WWDC which seems to work quite well.

I’m just as proud of this feature as I am some of the little UI flourishes in the app. Its something most people will never notice, but that if they do will prevent them from being heavily disappointed.

The last thing I changed is fairly minor, but bears mentioning. Initially I had the Tweet and Facebook sharing options include an @mention to the app’s Twitter account or Facebook page. I decided that this bit of self-marketing is kind of silly, and unnecessary, and so I removed it. The Facebook and Twitter sharing options should really be all about what the user wants to share: the run they just went on. I still want a way for people to tell others about the app, so I added a new “Share Runtime” option in the menu. If people like the app, they can use this to specifically tweet or post about it. I also added a link next to it for writing a review, so that if people like the app they can easily do that too.

Runtime 1.0.4 is now available on the App Store. Please check it out, and if you like it tell your friends and rate it on the App Store. If you'd like to try it for free before you buy, feel free to check it out here at app.io.

MMRecord 1.2.0

2013 was a great year for MMRecord. The library transformed from internal tool to successful open source project and has received some great feedback by many people using it in their applications. It continues to be widely used within Mutual Mobile for our projects that use Core Data. And its almost up to 400 stars on GitHub (w00t!).

I'm releasing a new version with a couple of new features and improvements. Please check them out below.

1) AFMMRecordResponseSerializer

The details of the AFMMRecordResponseSerializer are described in detail at the Mutual Mobile engineering blog, but in short, this is an extension to MMRecord and AFNetworking 2.0 to provide a response serializer that returns parsed and populated MMRecord objects in an AFNetworking success block. AFNetworking is a fantastic networking library and this extension makes it even easier to use MMRecord alongside it.

2) Orphan Deletion

Orphan deletion has been a long time coming. This is actually a very hard problem to solve in a generic way, but I think we have a good solution. The way it works is users of MMRecord can supply an orphan deletion block that will be called once per orphan that MMRecord detects. An orphan is defined as an object of a given entity type that exists in Core Data but was not returned by the API response that MMRecord just parsed. Instead of deleting all of these orphans categorically, MMRecord will call the orphan deletion block and allow the user to return YES or NO if it wants that orphan to be deleted or not. The block contains plenty of data to allow the user to make an informed decision. 

Advanced users will note that the NSManagedObjectContext is also passed into this block. This allows you to gain direct access to the context after population and before it gets saved - allowing you a very high level of control over the results of a parsing operation. With great power comes great responsibility, so think about your problem twice before resorting to context manipulation.

The new version also includes a subtle change to the MMRecordMarshaller class. The marshaller now exposes a new method called valueForAttribute:rawValue:dateFormatter:. This method is intended to be subclassed and can be used to more easily customize the way the marshaller formats data that gets populated on a record. Before you would have had essentially copy paste the contents of the original marshaller implementation into yours in order to do this, which is obviously not ideal. Hopefully this change will better address that need of some users.

Finally, I wanted to thank some of the community members who have been so generous of their time and thoughts in helping to make MMRecord better. Thanks very much!


Lars Anderson

Rene Cacheaux

Kevin Harwood

Swapnil Jadhav

John McIntosh

Luke Rhodes

Matt Weathers

Alex Woolf


Cameras as a Means to Create Long-form Photography

People always ask me if I think the camera's days are numbered. As both an iOS developer and semi-professional photographer, you can bet that I have an opinion on the matter.

Watching the progress of photography through the last 15 years has been extraordinary. I started out shooting film, owning both a Canon AE-1 and the great-grandfather of Canon's consumer DSLR's, the Rebel G. I started shooting College Football at the peak of the transition to digital in 2005. My favorite picture of Vince Young was made with a Nikon D70 and a Sigma 120-300 f/2.8. Now when people see it on my lock screen, they ask if I took it with my iPhone.

There is no doubt that the quality of smartphone cameras, especially the ones on the iPhone, have become very good. But certainly the key to their success has been connectivity. Everyone who uses Instagram, Twitter, Facebook, Flickr, etc. has noticed this, but Craig Mod describes the phenomenon well in his article Goodbye, Cameras in The New Yorker.

One of the great joys of that walk was the ability to immediately share with family and friends the images as they were captured in the mountains: the golden, early-morning light as it filtered through the cedar forest; a sudden valley vista after a long, upward climb. Each time, I pulled out my iPhone, not the GX1, then shot, edited, and broadcasted the photo within minutes.

The smartphone has been key in enabling the short-form of photography. As Mod describes earlier in his article, photography used to be a painstaking process. Ansel Adams would work all day to capture a single image. The smartphone camera is always with you, is easy and fast to use, and enables streamlined sharing with friends and family. In the same way that mobile has enabled us to share our thoughts quickly in short-form, the smartphone camera has made it easy to quickly share a short-form image.

I'm using the analogy with long-form and short-form writing intentionally, because it is commonly agreed that one is not better than the other. They simply serve different purposes, which is exactly how I feel about photography. Smartphone images are not bad images. They are artistic, emotional, provocative, engaging. All of the qualities of any good photograph taken in the last hundred years. But they serve a different purpose than the long-form version of photography where images are made with a purpose built camera. Quoting from Craig Mod again on the shift to networked cameras.

In the same way that the transition from film to digital is now taken for granted, the shift from cameras to networked devices with lenses should be obvious. While we’ve long obsessed over the size of the film and image sensors, today we mainly view photos on networked screens—often tiny ones, regardless of how the image was captured...

The distinction of a long-form photograph is how the image wants to be remembered. We view millions of images on our phone's small screen, but how often do we view them a second time? Will we cherish the images taken with our phones five years from now? Speaking personally, I rarely spend time with my iPhone images on a computer after I've shot them. I enjoy and share them on my phone, but thats it. I don't return to them later.

Cherished memories are a very important function for a photograph. This article from Manton Reece on Quality Photos really hit home for me.

We don’t use our DSLR every day. It’s for big events, birthdays, school performances, and the iPhone suffices for the rest of the time. But it’s worth every penny and more, to look back on these photos years later and know we have captured them at their best.

This summer I spent 16 days hiking the John Muir Trail in California. I carried with me a Canon 6D, Canon 24-105 f/4L, Canon 300 f/4L, a variety of filters, remote timers, batteries, and 178GB of SD cards. That added about 10 pounds to my pack. I was already carrying my iPhone 5, so why bother with all the extra gear? I considered leaving it, but in retrospect I could not be happier that I kept it. The trip turned out to be one of the most creatively stimulating experiences I've ever had as a photographer. I came away with dozens of images that I will cherish forever. I ended up printing two books and a dozen large canvases, enough to decorate my home-office with memories of the trip.

I did still take pictures with my iPhone along the way. And on the few fleeting moments that we got a cellular connection I managed to share some of those images on Twitter. But when I look back through the images of the trip, none of those are the ones I cherish. I was happy to be able to share my trip immediately with my friends and family, but they are not the images I want to go back and enjoy later. They look great on my phone, but they don't compare well on a large monitor or in print.

There are plenty of examples in photography where the DSLR will remain essential for a long time. Sports and Wildlife are good examples, as they require very specialized lenses that will not be available on a smartphone. But even for other photographic genres that are less dependent on focal length I continue to believe that there is a place for both short-form and long-form photography. Mobile has opened up the short-form and made it accessible to everyone, but it has hardly killed the long-form. There is still a place for cameras that enable long-form photography, as long as people have memories that they wish to cherish.

Challenge

When I was younger I was really intimidated by the prospect of hiking ten miles. Much less twenty, or thirty miles. I would say to myself, a year ago I hiked ten miles and it took all day. Why would I think about hiking twenty? But I learned that as long as I was willing to start, that all it took to finish was having the enthusiasm to continue.

Hiking a mountain doesn't start off as a painful process. The foothills are usually shallow, and you usually have to cross a few streams and meadows to get to there. But once you start going up the pain eventually finds you. Your legs tire and your back starts to ache. Breathing is harder and your feet become sore. Eventually, your entire body is telling you to stop. But if you want to finish you have to keep going.

Putting aside physical pain and mental discomfort is an incredible challenge for many people. It's also an essential part of overcoming a mountain. Climbing a mountain takes hours, or even days, and much of that experience will not be comfortable, and some of it may be quite painful. The only way to overcome it is to become so singularly focused on your objective that you can ignore the parts that are telling you to stop. How you confront that challenge will tell you a lot about who you really are. 

This summer on the John Muir Trail I met a fellow thru-hiker at the top of Seldon Pass. She was a 68 year old grandmother and mother of 3. And she was hiking all 211 miles of the John Muir Trail by herself. We talked for a while that day. She kept up with us down to Muir Trail Ranch. At that point, another hiker asked if she wanted someone to hike with her for the rest of the trek. But she said no. She explained that this challenge held a special meaning for her. Her whole life she had been surrounded by people, by family. So when she set out to hike the JMT she told her husband of 40 years that this was a challenge she had to undertake alone. She wanted her challenge to include the feeling of isolation, and discover on her own how to face it, even if others thought it impossible. 

Sometimes overcoming a challenge yields a very tangible reward. Passing a test. Improving a score. Finishing a project. Shipping an app. Life is full of these sorts of challenges. But sometimes these challenges that seem simple become the hardest to overcome. It's at these times that we need confidence. Confidence that anything is possible if you set your mind to it. 

Completing a physical and mental challenge like climbing a mountain is all about gaining that confidence that you can overcome any challenge. It will remove the notion from your mind that something is impossible.

Mind over Mountain

I've always enjoyed the outdoors. The solitude that can be found in nature is nearly impossible to find in the city. But even more than solitude I find strength in nature, an inner strength that has little to do with physical ability. Its a mental strength that can only be found when one has gone beyond what is comfortable and finds themselves alone in the wild.

Standing above the clouds where the air is thin and the trees are scarce is an experience known only to a few. It's a feeling of serenity, solitude, exhaustion, and triumph. Knowing what you overcame to get here, to be standing on the tallest point for miles and able to look out at the valley floor below you, and at all of the other peaks that stand nearly as tall around you. But sadly your journey is only half finished, because you still have to make it safely down.

Climbing a mountain is a challenge unlike any other. It's a test of endurance as well as strength. It requires agility and also speed.  The trail is generally very long, often 10 or 20 miles. To many that number may seem impossible to overcome. Climbing a mountain is more than a physical test. Your muscles alone will not save you from the fear and uncertainty that come from even contemplating this trek. The greatest challenge is not having the strength to finish, but simply having the will to start. Then you look up and see the towering mass before you rising up thousands of feet into the clouds. This is definitely a challenge worth starting. 

Your first step into the outdoors will be an uneasy one. You won't be sure what you should take with you, or how far you can go. This is where it's important to start pushing yourself. Leave your extra shirt at home. Don't take two jackets if you only need one. Soon your pack will be lighter, and while you may be nervous that you aren't prepared, you'll be able to travel farther. Then one day the temperature will drop and you'll wish you had that extra jacket, until you realize that wrapping up in your sleeping bag keeps you warm by the fire. How you handle an uncomfortable situation is often more important than the gear you bring with you.

What I've found while climbing mountains is the mental strength that tells me one simple thing: that I can do anything I set my mind to. Climbing mountains is intimidating. It's scary. But overcoming that fear is so rewarding, and it will change your life forever. All it takes is the will to start.

Forward - Climbing Mountains

I started writing this article about two years ago. I’ve spent so much of my life hiking and backpacking, and I wanted to write about what it means to me. But I struggled with it, and kept delaying finishing writing the article.

The wilderness is a wonderful place. The beauty that can be found in nature is almost impossible to describe. Even photos really don’t do it justice. But whats harder to describe is the impact the experience can have on you. Ultimately, it was this impact and what it means to me that I wanted to write about.

I decided to publish the article in two pieces. Mind over Mountain, and Challenge. The first one, Mind over Mountain, describes the challenge of climbing a mountain. The second one, Challenge, explains why that challenge is worth attempting and overcoming.

The mountains are a wonderful place worthy of exploring. If you have the chance to go there, I highly recommend it. You may find more there than you initially expect to.

Building my own New Mac Pro Part 1: Storage

For over a decade Mac power users have dreamed of an "xMac", a cheap bare bones Mac tower that users could buy and customize however they wanted. Its been clear for years that Apple has no interest in building such a device, as evidenced now by the "New Mac Pro", in its tubular design that pays homage to the much beloved G4 Cube.

Usually that left Mac power users opting for whichever pro tower Apple was currently shipping, be it a Power Mac or a Mac Pro. But with the new Mac Pro we are seeing a different trend. The Mac Pro line is no longer the best choice for power users of all sorts. In many ways it truly is the first "pro" Mac targeted directly at users of pro apps like Final Cut Pro X.

I've been a Mac tower user for almost 10 years. I used a Power Mac G5 for over 6 years, and I'm at over 3 years on my 2010 Mac Pro. 3 years can be a long time for a computer of any sort, but one thing I love about the Mac towers is that they tend to remain useful for quite a while. Part of that is their expandability and upgradability. You can add all sorts of new gizmos and gadgets to a Mac tower, including hard drives, graphics cards, tons of RAM, PCI cards, etc. I upgraded my G5 a few times, and now I am in the process of extending my Mac Pro's life as well.

The key for me in deciding to upgrade my current Mac Pro rather than buying a new one was realizing that this Mac Pro is already my "xMac". It already has everything I want (and you can't beat the price)! Tons of internal storage. A fast processor. Lots of RAM. What it doesn't have, though, is a modern graphics card and fast PCIe internal storage. The main differentiators on the new Mac Pro (other than being the first Mac tower to have Thunderbolt or USB3, of course) are its incredible standard dual GPUs and blazing fast storage. Those happen to be two of the easiest upgrades to add to an existing Mac Pro, so I decided to turn my xMac into a New Mac Pro.

Once you compare cost of upgrading versus buying a new one, the decision becomes pretty easy. The new Mac Pro I would buy from Apple would cost around $6000 dollars. That gets you a 6-core processor, 1TB PCIe SSD, 32GB of RAM, and the D700 graphics card. And that doesn't include any of the additional cost of purchasing Thunderbolt enclosures for my existing internal SATA hard drives (another $700+ dollars). Not to mention a new keyboard and another DVI adapter.

Alternatively, the cost of adding a 1TB PCIe SSD to my Mac Pro is $1400. Internal storage speed is one of the weakest links in the old Mac Pro, and OWC's Mercury Acceslsior solves that problem in a very elegant way. It also adds fast eSATA connectivity as well. Upgrading the Mac Pro's graphics to a modern Nvidia GTX 780 is around $500. It wasn't always the case, but thanks to modern graphics drivers and recent OS X updates PC graphics cards are now plug-n-play in recent Mac Pros. The GTX 780 actually performs about as well as the D500 and D700 in the new Mac Pro, as can be seen by some of the recent benchmarks. Its a bit of an apples to oranges comparison, since the 780 is a gaming card, and the FirePro cards are workstation cards designed for maximum compute power, so it really depends on your application for which will perform better.

I haven't ordered the graphics card yet, but I've received and installed two PCIe SSDs from OWC. I installed them in a RAID-0 stripe configuration for maximum read and write performance over over 1000MB/s. Mac Performance Guide has an excellent review and guide for how to do this. Its also worth noting that when I move away from the Mac Pro to something else, I can bring these two ridiculously fast SSDs along with me!

The two apps I use the most for my work are Aperture and Xcode. I'm an avid nature and wildlife photographer and a part time freelance sports photographer. I'm also an iOS developer. Both of these tend to be fairly computationally demanding jobs, so having a good system is certainly of high value. I came up with a set of basic tests for both apps and ran them on my 3.2GHz 2010 24GB Mac Pro with its old SSD (OWC Mercury Extreme Pro 3G) and with the new PCIe SSDs. I also ran the tests on a 2.4GHz 2012 16GB Retina MacBook Pro as a control. 


Blackmagic Disk Speed Test

First, the speed test. Here's the original OWC Mercury Extreme SSD in the Mac Pro.

RAID.png

The results from this SSD really are not that impressive. Its entirely possible that this SSD is nearing the end of its life, though I have no way to tell. Its an older generation SSD which is no longer sold by OWC.

Here's one of the OWC Mercury Accelsior PCIe SSDs.

SSD.png

Wow. Thats a huge difference! More than 5 times faster. But thats only one of the PCIe SSDs. What about when you put two of them together in a stripe?

SSD STRIPE.png

WOAH! Thats almost twice as fast as a single drive, and almost 10 times faster than the old SSD. Thats a pretty serious upgrade in performance right there.

One quick note about striping. A RAID stripe can be a bit dangerous because of one drive fails, then the whole array fails. That makes it absolutely critical to have a reliable backup strategy. I use a combination of SuperDuper clones, offsite backups, and Backblaze to keep my photo library and data safe. If you're thinking about building a storage setup like this, please please please make your backup strategy a top priority!

And finally, here's what the MacBook Pro's SSD looks like. 

rMBP.png

400MB/s is very fast storage. And this isn't even a 2013 retina MacBook Pro, which also includes super fast 600MB/s+ PCIe storage. Apple's latest Macs are very impressive. This upgrade is all about getting the older Mac Pro up to the same level of whats possible with the latest hardware.


Aperture

My typical workflow with Aperture is simple. Import a set of photos into a new project. Organize, rank, and edit those photos. Then export them to send to a client, post on 500px, etc. So I built a basic test suite around those tasks, similar to what I did to test my original SSD nearly two years ago.

Aperture Import

For this test I imported 866 RAW images shot with a Canon 6D and 7D at the Formula 1 Grand Prix here in Austin Texas.

Import.png

The new PCIe SSD definitely helped, representing a 20% improvement for the Mac Pro. However, the Retina MacBook Pro still won in this test. If I had to bet, I would guess that the reason is due to the superior memory throughput of the rMBP, though I do not know for sure.

Aperture Preview Generation

For this test I forced Aperture to re-generate all 866 of the JPEG previews for the RAW files from the Formula 1 race. You can force preview generation by holding down option when selecting the "Update Previews" command in Aperture.

Previews.png

I added a 4th comparison for this test, placing the test Aperture library and photos on an internal 4TB RAID Mirror that represents my photo archive. That volume experienced the slowest results. In this test the new PCIe SSD volume made a huge difference, besting the others by nearly a full minute.

Aperture Image Export

JPEG image export with Aperture is a strange test. Its not immediately clear what helps improve the results on this test, but my hunch is graphics. The CPU is almost never maxed out on this test, but graphics RAM, and system RAM, usually is. I was curious what impact, if any, fast storage would have here. For this test I exported all 866 images as full original quality JPEGs.

Export.png

The MacBook Pro won again, but the SSD upgrade did make a bit of a difference. This marginal gain is about what I was expecting. I'll be more interested in the results of this test after completing the graphics upgrade in the near future.

I ran a few other informal Aperture tests. In my original SSD Aperture test last year I tested how long it took to load all photos and all projects. Starting up Aperture on the SSD took 10 seconds. On the PCIe SSD thats cut down to 3 seconds. Loading all photos took 12 seconds on both an SSD and a HD. Well, guess what, it took 12 seconds on the PCIe SSD as well. Loading all projects, however, was dramatically faster. On the original SSD it took a very perceptible 8 seconds, but on the new PCIe one it was a barely noticeable 1.85 seconds. These changes don't show much except that to point out that a very fast random access volume makes a perfect storage system for an Aperture (or I assume Lightroom) library to sit on. Browsing through projects and images is extremely quick because the database lookups are so fast. Thats one reason that these PCIe SSDs are game changes for the server industry, and why I feel like they will improve the responsiveness of my computer by a good bit.


Xcode

The only real test I could think of for Xcode was how fast does it produce a clean build of a project. For a test project I selected a fairly large and complex project I've been working on. It includes well over a thousand source files, several third party libraries that are built from source, plenty of assets to copy over to the bundle, etc. Here's the results.

Build.png

Thats a pretty nice boost with the new SSD! Almost 6 seconds off a 30 second build. Informally I decided to boot up off of one of my backup volumes to see how this test ran on a spinning disk. One minute and 3 seconds! Fast storage seems to make a pretty big difference as far as Xcode compilation performance is concerned.


Photoshop Speed Test

The last test I ran is the 'Real World' Photoshop speed test that can be found here. The test uses a test photo of an eagle and runs a series of photoshop actions on it.

Photoshop.png

Photoshop very clearly benefits from super fast storage that it uses as a scratch volume.


Gaming

I didn't run any formal gaming benchmarks, but I did fire up a few games to see if there was a perceivable difference. Level loading performance felt much faster, and on the few games I have that can display a frame rate, I was noticing 10-20 fps higher than I typically do. That was on the same medium-high settings that I am accustomed to on the older Radeon 5870 graphics card.


Conclusion

In reality, a new Mac Pro would probably still be faster than what I've built. But I'm not convinced that it would be a better value. By upgrading my old machine I've been able to measurably improve its performance at a reasonable cost while maintaining some of the attributes of the machine I most appreciate, like massive internal storage. With an affordable graphics upgrade this performance may improve even more, and with a OS X graphics drivers update I might be able to run 4k displays with that card as well! Only time will tell, but for now, I am quite happy with my new xMac that I built :)


Developing for the M7

I was already well into developing Runtime when the iPhone 5s was announced and we learned about the new M7 "motion co-processor" from Apple. There have already been a few good articles talking about what the M7 does and how we believe it works, but essentially from a developer's perspective the M7 provides a great way to track a user's steps and type of activity while they are moving. Instead of writing about what the M7 is or how it works, I wanted to write about what its like to use as a developer.

The M7 API is part of the Core Motion framework. Tracking a users steps and activity has always been possible by using Core Motion, but it was much more difficult, and required much more power. Instead of trying to calculate this information ourselves using data directly from the accelerometer and gyroscope, we interact with two new classes that give us this data directly.

Steps

The first one, CMStepCounter, provides us with the number of steps the user has taken while carrying the device. There are only a few methods here. There's a class method to tell you whether or not the device supports step counting, aka whether or not the M7 is installed. There are two methods for starting and stopping step updates. And then there is a method to query the history of steps taken with a  start and end date.

Lets talk about getting step updates first. While your app is running you can ask iOS to execute a block every time a certain threshold number of steps is reached. Runtime uses this method to update the Stopwatch screen while the user is running. From my experience, the updates are delivered about when you would expect them to be.

Stopwatch.png

There is also a query method to look up the number of steps during a certain time frame. The M7 stores 7 days worth of data, so the window can be any period during that 7 days. The most surprising thing to me about this API was how fast it is. Querying even an entire week worth of step data takes virtually no time. Despite this, you still have the option to specify a specific queue to have the block executed on. You can specify the main queue if you want the callback to be synchronous. If you're going to be updating the UI with the result, you might as well just do that. If you're performing some other type of calculation with the result, then perhaps you might want to use a background queue.

Activity

Next up with activity tracking are two new classes, CMMotionActivityManager and CMMotionActivity. The activity manager follows the same pattern as the step counter, with a class method to determine availability, and block-based methods for updates and queries.

In this case though, the query and update callback blocks behave slightly differently. The query block returns an ordered array of CMMotionActivity objects. The activities are ordered by time based on when they occurred in the specified window of time. This is very similar to the new CoreLocation deferred location updates method, which returns a list of location updates in a similarly ordered fashion. The update callback block instead returns a single CMMotionActivity object, and gets called repeatedly each time the activity changes.

CMMotionActivity objects encapsulate what type of activity has taken place, be it running, walking, standing, driving, or an unknown type of activity, as well as the system's confidence level that it has correctly identified that activity. One thing that can be kind of funny when you start looking at the data is when you see an Unknown activity type with a low or high degree of confidence. That means that iOS is either sort of sure, or absolutely sure, that it has no idea what you are doing :)

One pattern I've noticed with the data is how it transitions from low, to medium, to high degree of confidence for something like walking or running. There tends to be about 5 seconds worth of low confidence, about 5 seconds worth of medium confidence, and then an extended period of high confidence if you maintain the same type of activity for a long time. Below is a screenshot of a test app I wrote to take a look at the at a being returned when running a query for activities over a certain period of time. Red represents low confidence and green represents high confidence. The period of time below is me shuffling through the throng of people at Circuit of the Americas after the US Grand Prix last Sunday, which is why its slightly chaotic.

Activities.PNG

Overall I feel like the activity data is extremely accurate. I've tested it out pretty thoroughly with Runtime on a few runs here in Austin, and out in New York's Central Park. I've stuck with the low thresholds for running and walking, because even that seems to be pretty accurate for my needs. Here's a screenshot from Runtime showing the different activity types during one of my runs. The time I spent running is highlighted orange, while the time spent walking is highlighted yellow.

RuntimeActivities.PNG

To build this feature in Runtime I used the query API, and simply query the activity type for the start and end time of a user's run. I can then iterate through the returned activities to determine how to highlight the route the user took out on the trail.

Conclusion

Both APIs are very nicely designed block-based interfaces. In some ways I look at this as the next evolution of Apple's API design patterns. A class method to determine whether or not access is available. Update methods with a callback block. And query methods with a callback block. They're very clean, functional, and easy interfaces to use.

The data also appears to be highly accurate. The activity detection in particular is basically dead on for distinguishing between walking and running. I think the accuracy may vary slightly based on how you hold your phone, but with it in my pocket or in an arm band I have noticed very high accuracy levels.

If you're considering adding support to the M7 to your app, hopefully this will help point you in the right direction. I think its great that more apps beyond fitness apps are beginning to use the M7. One example is Day One, the excellent journalling app for iOS and Mac, which lets you add your step data to your journal entries in their latest update. I desperately wish I'd had an iPhone 5s during my John Muir Trail hike this summer, so that I could have used this feature!

The M7 is a great new feature for iOS and something that can help build a better experience in your app by giving the user access to move information about their physical activity. Its a great new feature, and a fun API to use.

Bringing Existing Users Along for the Ride

Its become common for iOS developers to release a completely new app when releasing a major new version of a product. One reason for this is the lack of paid upgrades in the App Store. Another is to support older OS versions while allowing the latest version to advance beyond them.

Whatever the reasons may be, its a good idea to make it as easy as possible for them to use the new app. Many existing users will be active users of the product, and will want to move to the new version. You want to treat them with as much respect as possible and make it easy for them to move to the new version of your app should they choose to upgrade.

When I was finishing up Runtime I was trying to decide how to migrate existing users off of my older app, Workout Logbook. The apps share the same database system, so their data is compatible. I knew there would be other people like me who had several years worth of runs stored on the app, so I wanted to create a way to bring those users along for the ride with Runtime.

It turns out that iOS actually has a great way to do just that. My good friend Kevin Harwood suggested using custom URL schemes. That gave me the ability to detect if a user had Workout Logbook installed, and if so, allow them to visit that app and export their data back to Runtime. Here's the screen a new Runtime user will see if they already have Workout Logbook installed.

Import Workout Logbook.png

Tapping Import sends the user out to Workout Logbook. There I can use the following code to detect that the user opened it via a specific URL scheme, and take action to allow them to export their data.

if ([[url absoluteString] isEqualToString:@"runDataExport://"]) {
    [self promptExport];
}

After prompting the user to verify that they want to export their data, its a relatively simple matter to package up their data into a plist file that can be read by Runtime. Sharing that file with Runtime is also pretty straightforward. We make use of the UIDocumentInteractionController to open the plist file in Runtime.

- (void)handleRunDataExport {
    NSString *plistName = [self.runListDataController writeRunsToPlist];
    NSString *rootPath =
        [NSSearchPathForDirectoriesInDomains(NSDocumentDirectory,
                                             NSUserDomainMask,
                                             YES) objectAtIndex:0];
    NSString *runPlistPath = [rootPath stringByAppendingPathComponent:plistName];
    NSURL *fileURL = [NSURL fileURLWithPath:runPlistPath];

    UIDocumentInteractionController *controller =
        [UIDocumentInteractionController interactionControllerWithURL:fileURL];
    controller.delegate = self;
    [controller presentOpenInMenuFromRect:self.window.bounds
                                                              inView:self.window.rootViewController.view
                                                              animated:YES];
    self.documentInteractionController = controller;
}

Of course, there has to be a contract between the two apps so that the data is in a format they understand. In this case we are transferring real user data, but this method could also be used to transfer app settings and configurations, preferences, and other meta data to give the user a better experience when making the transition to a new version of a product.

Workout Logbook has been updated to support this functionality, and I hope that existing users will be able to use it to make the transition over to Runtime. I really appreciate the people who purchased Workout Logbook over the last few years, and I want to make it easy for them to move over to Runtime. Workout Logbook will cease to be supported soon, and I'll be removing it from sale  once the majority of users have updated to the latest version that supports this feature. I'm happy that I'm able to do what I can to support them with a new product. I hope that other iOS developers will consider this when releasing new versions of their products. Make it easy for existing users to use your new app.

Building Runtime for iOS 7

Today I am launching Runtime, the new app I built for simply tracking where I run on iOS 7. I'm really excited that its finished and now I'm looking forward to writing about how I built it. This post will focus on the origin of the product, some of the decisions I made along the way, and give an overview of the tools used.

Runtime-v01.jpg


Origins

 Runtime is not my first fitness app for iOS. I used the fitness genre while originally learning iOS development. I continued using the original app I created myself. After installing iOS 7 at WWDC I fired the app up, and to no surprise it didn't work at all. The app was originally written to support iPhone OS 3, and though optimized for iPhone 5 and iOS 6 it was still not fully functional on iOS 7.


After using iOS 7 for a few days it was clear that simply stabilizing the app wouldn't cut it. The app and its basic interface were really showing their age. If I wanted the app to be something I was proud of I would need to start over and imagine a completely new product.


New Beginnings


I wanted to reuse as much underlying code as possible so that I could spend most of my time building the new user interface and new features I wanted to include. Because of that, deciding what to keep wasn't difficult. I'd recently updated the original app to use Core Data, so all of that stack came over. In fact, almost 100% of the model is reused between the original app and Runtime. At the controller layer I brought over a few key pieces that I knew would be helpful. The UI was where the big divergence was. I brought over some of the views as starting points or if I knew they would be helpful, but overall the UI is where I chose to start from scratch.


The harder part was deciding what to leave behind. The original app supported more than just run tracking. You could use it as a log at the gym, or for tracking your body weight. In the end I had to decide what I wanted to focus on. I had a vision for how I wanted run tracking to work on the iPhone. I didn't feel nearly as passionate about any of the other features. Because of that, I made the difficult decision to cut them so that I could focus Runtime on the area I felt most passionate about.


New Tools

So I hit Shift-Cmd-N and created a new project. I started from a new project because I intended to use CocoaPods to manage my dependencies. Bolting that on to the existing project would have been problematic. I've been extremely happy using CocoaPods for the past year in other projects, and I love bringing it to my own project. 


I also decided to switch from using SVN to manage the project to using Git for the new project. Instead of migrating the old SVN repo I just switched to a new Git repo for the new project. The first commit to that repo was September 29th and there have been 130 commits since then.


Deference


The decision to build Runtime was really solidified when I started think about how the user interface could embody the principles of iOS 7: Clarity, Deference, and Depth. The principle that speaks most to me is deference. I love the idea of the app and its interface deferring to the user's content. So when you go for a run at your favorite trail or track, what is your content? I've been using an app to track where I run for over three years, and I always love going back to it to see where I ran, or hiked, jogged, etc. I spend a lot of time hiking, and I have some routes recorded from Big Bend, Colorado, and most recently from the John Muir Trail in California. So your content is actually the places that you go, and the routes that you take when you run there. Once I realized that I decided to center the user interface around providing the user with the best experience possible for saving and viewing that content.


3D Maps


I spent a lot of time making sure that the app could produce high quality map images for the places and routes that a user records. There are a lot of challenges here. Try adding a few dozen MKMapView's to a table view and see how scrolling performs. There needs to be an efficient way to snapshot and cache these map images without trying to render them on the fly. Introducing MKMapSnapshotter - a class for creating map image snapshots introduced in iOS 7. This method of creating map snapshots works great, especially with iOS 7's exciting new 3D map features.

But it didn't quite suit my needs. There currently isn't a way to include overlay's in the snapshot image (rdar: 15390104). I wanted to show the user's route on the map image, so this meant I had to write my own map image renderer. I spent a lot of time making this performant and reliable, and may eventually release it as open source if its something people would find useful.

3D Maps.png


Transitions


I really believe that technology is there to enable the user experience. In this case though, the user experience I wanted to create enabled me to try out some really amazing technology :) UICollectionView became the heart and soul of Runtime from day 1. I wanted the core UI to be a collection of places and routes, which would be represented by map image thumbnails. UICollectionView has been around for a while now but its even better in iOS 7 with the new transition APIs. Building the transition between places and routes couldn't have been easier:

    routesViewController.useLayoutToLayoutNavigationTransitions = YES;


I love working with transitions and so I was very excited about that as well as the new animated and interactive view controller transitions. Writing about these will easily be another whole post, but for now I'll say that my experience using these has been extremely rewarding and that they were a crucial part of creating the new experience for Runtime. The transitions from the routes screen and the route detail screen are all done using the animated and interactive custom view controller transitions.


M7


I was still in the early concept phase of Runtime when the iPhone 5s was announced. One of the things that sold me on buying the 5s was the fact that I was already thinking about building Runtime. The M7 is such an awesome addition to the platform for developers. I've been using it for a while and so far I think that both the activity tracking and step counting features are very accurate. They have no noticeable affect on performance for me either.

And as a bonus, their APIs are incredibly easy to use. In one of my next posts I'll be going into more detail about how to use these in your apps. The key starting points are the CMStepCounter and the CMMotionActivityManager. For now, the image below is an example of how I am using both of them. The yellow portions of the map represent walking, while the orange portions represent running.

Route Detail.PNG


Deferred Location Updates


One of the least known features of iOS 6 and the iPhone 5 is Deferred Location Updates. The feature is also available on the iPhone 5c and 5s. The feature got about a 30 second shout out in this year's Core Location session at WWDC, and a slight honorable mention in the Core Location docs. Deferred Location Updates is a way for the system to deliver location updates in a batch instead of continuously. It uses special hardware to store coordinate sets in a buffer, spin down the A6 or A7, and spin it back up periodically to deliver some updates before putting it back to sleep.

According to Apple this can result in a roughly 40% power savings over long periods of activity. Thats a pretty big deal! In practice its likely going to be less savings than that, since the phone's processor won't shut down if you're listening to music or using other apps in the background. I did get a chance to use it this weekend though. On a 3 hour hike with my phone sitting in my backpack I noticed a much lower power drain than I used to before. For how useful this app is for hiking long distance I am really glad I was able to support this feature!


One of the hardest things about shipping Runtime was choosing a name. I struggled a lot with this. There's all sorts of descriptive names out there, like Running Log, Run Tracker, Jaunt Journal. I really wanted something simple, ideally just a single word. I even thought of Trails, which is actually the name of a very good hiking app I've used. The original name I settled on was Runs. I liked that name because it was simple and accurately described what the app was used for. Thankfully, I embarked on a bit of user testing, and the feedback I got on the name was universal. Runs doesn't make people think of running, it makes them think about sitting on a toilet. So I went back to the drawing board and came back with Runtime. I love the new name both for its simplicity, and its subtle utility as a programming joke :)  Those that have read this far will likely get the reference. Thanks for reading and thanks for your interest in Runtime. Check it out on the App Store!


Introducing Runtime, Simple Run Tracking for iOS 7

I'm excited to introduce you to Runtime, a simple run tracking app that is beautifully designed and built for iOS 7. Runtime came about from my passion for running and my desire to build a product on iOS 7. Let me show it to you.

Runtime-v02.jpg

The central themes in Runtime are Places and Routes. Places are where you go to run, hike, jog, etc. Routes are periods in time that you've gone to run there. Runtime allows you to create places that you go and then record routes each time you go to one of those places. 

iOS Simulator Screen shot Oct 25, 2013 4.38.34 PM.png

Also central to Runtime is the notion that your content comes first. Each of your routes are displayed as a rich 3D map thumbnail with the route overlaid on top along with the date and time of the run. Places are represented as stacks of routes. Tap on a place to view each of the routes recorded at that place.

Routes.png

Runtime also records detailed information about your routes. Tap on a route's thumbnail to view all sorts of additional information, including an interactive 3D map, pace, distance, altitude, and a user-editable note. Runtime also supports the M7 in the new iPhone 5s, which on supported devices will track your step count and also show when you were running and walking along your route.

photo.PNG

Sharing is a big part of fitness and mobility. Runtime lets you share your routes on Twitter and Facebook, as well with other iOS users using AirDrop. Your data is very important and Runtime also supports Dropbox so you can export your routes as Runtime data files or as KML files that you can open in Google Earth. 

The Runtime stopwatch also includes the ability to define a custom set of interval timers for creating custom workouts. Some people like to alternate their intensity level while running. This is generally known as HIIT and is fully supported by Runtime. 

Runtime is the run tracking app that I have always wanted to use. It has a simple and elegant user interface and solves the basic problem of tracking your routes when you go for a run. It works great on iOS 7 and on the new iPhone. I hope you'll check it out the next time you go out for a run!


Key features include: 

- Beautifully designed for iOS 7

- Add Places that you go to run/hike/jog/etc. 

- Record routes each time you go to a place

- Support for high-intensity interval training

- Support for the M7 motion co-processor

- Add notes to each run 

- View a cinematic 3D flyover of each of your routes

- AirDrop or email your route to friends 

- Share your run on Twitter and Facebook 

- Deferred Location updates can help save battery power on long runs (iPhone 5 and up)


Check it out on the App Store


Follow @runtimeapp on Twitter

Like Runtime on Facebook

Announcing Runtime

I'm very happy to announce Runtime, a simple run tracking app designed for iOS 7 and optimized for the iPhone 5s.

It was a busy summer for me (as I imagine it was for many iOS developers). In between WWDC and the launch of iOS 7 I also took some time off to hike the John Muir Trail. I haven't had time to write about the trip yet, but don't worry. I will soon. In the mean time, there are plenty of pictures up on 500px.

But really this summer was all about iOS 7. A lot of us spent the summer speculating on how iOS 7 would be received and how developers would adapt to it. Well, we don't have to speculate any more. Many apps have been updated and today Apple released new versions of many of their apps as well.

As I spent time talking to people about iOS 7, writing about it both here and for Mutual Mobile, and using the beta versions I couldn't help but want to get started building something with it. I saw iOS 7 as the opportunity to build better products for our users. I wanted to put that feeling to the test by actually building something with it. Runtime is the result of that experiment.

I intend to write a lot over the next few weeks about the process of building Runtime. I'll write about both the product and engineering side of the development process. Part of the motivation for building Runtime was to learn as many of the new APIs in iOS 7 as quickly as possible. I've always learned better by doing, and so using all of the new tools to build a product was the best way for me to learn. I'm looking forward to writing about my experiences with those APIs, especially the updates to MapKit, CoreMotion, and CoreLocation.

What I will say for now is that iOS 7 has been an absolute joy to develop for. The decision to go iOS 7 only for a new product was a very easy one. iOS 7 now has 64% share of the iOS install base. Thats a huge market for the delightful experiences we can build with it.

Runtime is in its final round of testing and should be ready soon. I can't wait to show it to you. 


A Thru-hiker's Pantry

Another key part of planning a thru-hike is preparing your meals and food pick ups. You don't have to carry all of your food for the entire trip. Usually you can mail some ahead to a camp or post office, or buy extra along the way. Picking what to eat is important because your body needs fuel while you're hiking. There's different estimation formulas for how many calories you burn per hour of hiking, but its a lot. If you eat 2000 calories in a normal day, plan on nearly double that during a strenuous backpacking trip. The last thing you want to do is be caught starving because you didn't bring enough food to keep your body going.

In addition to packing plenty of food, it needs to be light enough and compact enough to fit in your pack without adding too much extra weight. In many cases when you are traveling in bear country you are required to pack your food in a bear canister like the one in this picture on the top left.

IMG 0882

The bear canister is both a blessing and a curse. Its heavy, and difficult to pack, but it also forces you to think critically about all of your food items.

The food in the image above is everything I'm bringing for the first 8 days that I am on the trail.

1) Breakfast

The first meal of the day is always important. You generally want to eat something large to get your metabolism going. When I am hiking though I tend to bring something to eat right when I wake up, and then a few things to much on during the first few hours of the day. I find that having a constant stream of energy keeps me going longer and feeling better.

For breakfast I'm bringing a combination of pop tarts, clif bars, and various energy foods like Stinger gummies or energy gels. I'll eat the pop tarts or clif bars first, and keep the other smaller items for later.

2) Lunch

Lunch is usually pretty simple. I'm bringing plenty of crackers, and a mix between summer sausage and chicken. Getting protein out on the trail is hard, so anything like chicken or tuna that can be packed along is a great value.

3) Snacks

I want to always have something to snack on when I need more energy. Nuts are a great snack food because they're so calorie dense. So are raisins, beef jerky, and of course extra Clif bars.

4) Dinner

I'm taking a mix of cold dinners that require no cooking, and hot dinners that require you to cook or boil water. The cold dinners are pretty simple: Tortillas, Peanut Butter, and Nutella. The hot dinners are a bit more exciting. Tortillas are also an essential ingredient in making quesadillas, so that will be one meal. I'm also a big fan of Mac and Cheese and Chicken (MCC), which gets you plenty of protein and tastes delicious on a cold night after a long hike.

5) Coffee

Unfortunately taking coffee on a low impact backpacking trip is a bit of a nonstarter. You can't leave the used grounds out on the ground to attract animals, so your only option is to pack the grounds with you. Instead of worrying about that, which would be extremely messy and frustrating, I'm just taking some espresso beans that have been covered in chocolate. This'll get me my coffee fix and my candy fix at the same time. This is a great trick if you're looking to bring coffee on the trail but unsure of what to do about brewing and grounds.

All of this then gets to fit into that bear canister and into my backpack. There's an identical set of food waiting at my resupply point too. Of course, this won't stop me from buying a cheeseburger in town along the way, if I can find one, and I'll absolutely be craving a taco when I get back, but this should be enough to keep me going along the way. In the backcountry, food is fuel to keep your body going, but you can still have a little fun with it if you want to.

16 Days, 210 Miles, 1 Bag

I'm about to set out on an exciting adventure to hike the John Muir Trail, a thru-hike from Yosemite Valley to Mount Whitney in the California high sierras. I've been on plenty of backpacking trips, including several very long ones, but this will be my first thru-hike. Thru-hiking means you hike an entire trail start to finish. While the JMT isn't quite as long as the Appalachian Trail, the Pacific Crest Trail, or the Continental Divide Trail, it still presents the same challenge which is you need to carry everything you need for the while journey with you, as well as plan your food resupply stops along the way.

Selecting gear for a long backpacking trip, especially a thru-hike, is very important. There needs to be a balance between weight, size, utility, and at least a modicum of comfort. Here's a breakdown of the gear I'm planning to bring with me, as well as some explanation on the purpose and thoughts behind some of the items.

IMG 1049

1) Accommodations. 

When you're backpacking you have to bring your home with you for the whole journey. For the 16 day trip my home will include a Big Agnes Copper Spur UL2 tent, a Western Mountaineering UltraLite sleeping bag, and a Thermarest NeoAir sleeping pad. I picked these items because they're the lightest, most compact at a good price, provide great protection from the elements, and are warm and cozy.

2) Clothes.

You don't have many chances to do laundry on the trail, but you also can't be carrying many changes of clothes either. Because of this, I'm bringing one change of clothes only - plus a third pair of socks. Socks are one of the most important items when you're hiking long distance and I'm very particular about the ones I bring. I've got three pairs of Teko socks, which is a brand thats served me well for many hundreds of miles.

One other important point about clothing is the notion of layering. When the temperatures change the easiest way to control your body temperature is through adding or subtracting layers. My clothes system consists of 4 layers.

- Baselayer, Capilene t-shirt

- Midlayer, Capilene zip-neck t-shirt with long sleeves

- Shell, GoreTex rain jacket which is wind and water proof

I'm bringing two mid layers on this trip so that I can double up on long sleeves, which also allows me to leave the bulky/heavy fleece behind. The zip-t also lets you control your body temperature even closer, since you can zip up/down the collar and roll up/down the sleeves to adjust warmth. This should be fine as long as the temperature doesn't drop below freezing during the day. At night, I can just jump in my sleeping bag to stay warm.

I'm bringing two bandanas, which also serve many purposes. You can use them for first aid, towels, cooling rags, wash cloths, etc. They are extremely useful.

3) Camera

One of the main reasons I go backpacking is to take pictures. I'm bringing a Canon 6D DSLR, which has a full frame sensor that will be ideal for landscape. My workhorse lens will be the 24-105 F4L, but I will also have a 300 F4L for wildlife. Keeping the camera powered will be difficult, so I'm packing 7 total batteries as well as the charger, which I may be able to use periodically at staffed camps. I'm also bringing plenty of memory cards, in small-medium sizes so that my risk of losing photos is low if a card fails. Camera gear represents the bulk of my pack weight, but capturing memorable images is worth it so I am bringing it all with me.

4) Electronics

Normally when I go out in the backcountry I put aside technology and avoid the outside world. On this trip I intend to do things a bit differently. I'm bringing my iPhone, which I intend to use for a few purposes, and a Kindle Paperwhite with plenty of books stocked up on it. I'm also bringing a GoalZero Nomad 3.5 solar charger to keep both devices powered. There won't be any cell coverage where I'm going, so I won't have to worry about disconnecting from the outside world. But I am interested in seeing how I will use those devices in the wilderness. I've got a few apps that I'm excited to try, like Peaks, Night Sky, and Project Noah (an app for tracking the sightings of plants and animals). There are also practical reasons to bring the phone and Kindle. A Kindle weighs less than one paperback, so its a major savings in weight. An iPhone is also a virtual swiss army knife. It can double as a backup flashlight, GPS if you get lost, First Aid manual, emergency contact device, backup camera, voice recorder, backup map, etc. For the extra few ounces its absolutely worth bringing it on the trail.

5) Miscellaneous

The rest of what I am bringing are the simple odds and ends to keep me going on the trail. I have a basic first aid kid with pain medication and an ace bandage. A cut-in-half tooth brush and a micro tooth paste (you really don't need that handle on the tooth brush). Micro Pur, a set of small tablets, for purifying water. Chapstick and Sunscreen. Some cash for buying food along the trail, or hitchhiking in an emergency. A headlamp, watch, knife, sunglasses, and water bottles round out the smaller items. And of course, a map and compass too :)

One of the best items to have in your kit is concentrated camp soap. Just one drop of "camp suds" can wash a whole pot. A whole bottle can wash a 747. Just a little goes a long way, which is important if you want to do laundry or take a bath out in the wild.


IMG 1054


Carrying all of this will be my Osprey Variant 52 backpack. The Variant is more of a climbing approach pack and winter ski/snowboard pack than a long distance hiking backpack, but there's two main things I like about it. The first is that it has a flat back panel, which is more my style. The mesh panel curved packs don't fit me well. The second is that it's fairly minimalist and simple. It's a standard internal frame sheet pack, which is very light weight, with a single large compartment for arranging all of your gear. It carries well, looks great, and is very durable.

If you're ever out in the wilderness for a few weeks, this should be all you need to survive and have a wonderful experience in the outdoors. I can't wait for the trip, and I'll be sure to post plenty of pictures once its over.

Look and Feel

Today Apple unveiled what's going to become a whole new world for the iOS ecosystem. Alongside an impressive update to OS X and new hardware announcements like a refreshed MacBook Air and long-awaited Mac Pro came a complete re-thinking of iOS from what seems like the ground up. No stone was left un-turned with this new beginning for iOS. I wanted to talk about what that may mean for the iOS ecosystem's users and developers.

Apple has always been a champion for great design. That's apparent in the look of their products. The iconic Macintosh for example, or the elegant and attractive iMacs and MacBooks. The iPhone 5 may be the most attractive device Apple has made yet, with details like the chamfered edging and matte black finish. But in many ways, more important than how it looks is how it feels to hold, and to use. An iPhone just feels right to many of us, the same way that a Mac felt right to us before smartphones.

My favorite Steve Jobs quote, which received a mention today at the keynote, is that 'design is how it works'. What Apple has done with iOS 7 is a true testament to that. The design of iOS is no longer about the appearance of rich controls and detailed artwork and buttons. The focus has shifted to how the software makes the experience feel. Instead of rich textures, the layers in an application show through to provide depth and context and keep the focus where it should be: on content. The chrome becomes more muted and gets out of the way when you don't need it and comes back when you do.

But more than just the depth and translucency, we can see a big emphasis on motion and interaction. Shifting a background image based on how you hold your phone. Changing the angle of tabs in Safari. Even something as small and simple as shrinking, but not hiding, the URL bar in Safari as you scroll up. All of these are delightful touches that help bring an app to life through interaction. Parallax, blur and many of these techniques have been possible on iOS for some time now but this shift in iOS 7 shows which direction Apple sees the design winds blowing and I am excited to see them embracing it and taking the lead on the future direction for the platform.

At Google I/O a few weeks ago, I was disappointed with the lack of focus on developers building immersive experiences centered around great look and feel. Design is clearly important to Google. The polish and design in many of their own recent products is a testament to that. And while there were some good sessions around animation technology and UI design, I don't think you could say that it was a major emphasis from them to developers.

And that's why I am so excited about iOS 7. To me, it's not just about the lack of skeumorphic elements or linen backgrounds. It's about a focus from all angles on delightful user experience and engaging motion design in applications. Like with the introduction of iOS, Apple has set the bar for developers with iOS 7, and is giving us great tools to build these same kinds of experiences on the platform. I'm excited that they are pushing us forward and can't wait to see more of what everyone is going to build on the new version.

MMRecord 1.0.2

About 6 weeks ago I released MMRecord: a simple way to build a web service request that interfaces with Core Data in an iOS or Mac application. Since then the feedback has been amazing. I never expected to see so many postitive comments about the library or so much involvement from community members. Thank you!

At release time I wrote an article on the Mutual Mobile Engineering Blog that introduced the library, including how we built it and what it's good for. I wanted to touch base here on the changes that have been made to it since then and what the future may hold.

Many of the issue reports and subsequent fixes came from members of the community. The 1.0.2 update includes a few bug fixes and one new feature: Unix timestamp date parsing support. You can check out the full release notes and changelog here.

As for what's next, there's a few possibilities. There's been requests for two features that seem valuable to me: progress blocks, and deleting orphan records. I'm also interested in adding better logging support for easier debugging, and support for record insert and update validation checks.

Is there a feature you'd love to see? Get in touch on Github or on Twitter! And yes, we do accept pull requests :)