CocoaConf Yosemite

When I first heard about CocoaConf Yosemite I couldn't believe there was a conference designed around three very different things that I love: Apple, Photography, and the outdoors. I enjoyed the experience so much that I went back for seconds this year and had an even better time. The conference is returning for 2017, and I'm very much hoping to attend next year.

It's hard not to feel inspired in Yosemite National Park. Spending time outdoors has always been a great way for me to recharge, but the serenity you can experience in Yosemite Valley is quite unique. There really is nothing else like it. If this were just a tech conference then Yosemite would still be a very special setting that people would get a lot out of. But CocoaConf Yosemite is more than that. It's a place to focus on the human side of working in the technology industry and why what we do with technology matters to other people.

When I came to Yosemite last year I spent some time after the conference exploring the park. I had a chance to hike around by myself, which was a unique experience for me: I almost never go out hiking on my own. But it lead to some of the most amazing things I've had happen to me on the trail, like getting snowed in above Yosemite Valley!

Snow! I woke up around 6am with a foot of snow outside my little backpacking tent.

Snow! I woke up around 6am with a foot of snow outside my little backpacking tent.

Getting out and hiking by myself was actually pretty far outside my comfort zone. But that also fits the theme of the conference, which really focuses on learning more about yourself. Pushing myself lead some amazing experiences, including witnessing the most amazing sunset I've ever seen, above Half Dome. A picture of the sunset from Cloud's Rest is my favorite picture that I've ever taken. But it's not just the picture I like, it's the experience that it represents. Talking to people in the valley to get ideas on where to hike to. Planning the hike and determining if I could make it safely to where I needed to go. Being totally isolated, knowing I was the only one witnessing this in person up in the snow, but being able to share the experience with people later through photographs. And knowing the whole time that I was out there doing something new that I enjoyed. Such is the power of exploring the outdoors, that just one sunset can mean so much to you.

Sunset from Clouds Rest, overlooking Half Dome in Yosemite National Park.

Sunset from Clouds Rest, overlooking Half Dome in Yosemite National Park.

While I was exploring Yosemite that first year I had a few books with me. I read Becoming Steve Jobs by Brent Schlender, as well as Creativity Inc. by Ed Catmull. Both books taught me a great deal about leadership that I don't think I would have understood as well outside of a place like Yosemite. The conference and the environment were the perfect backdrop for listening to these types of stories.

This year leadership was a central theme at the conference, as well as another trait I wasn't expecting: vulnerability. I had started reading Daring Greatly by BrenĂ© Brown before the conference and I kept marveling at the similarities between what was being discussed in the conference talks and the themes of BrenĂ©'s book.

Daring to be mediocre. The only thing between you and what you want to do is doing it. Be a little wild because we are in the wilderness. Be your own replacement. Challenge yourself. Having empathy for the point of view of others.

Many speakers told stories of using 31 day challenges as a way to coach yourself into doing something you were interested in but not comfortable getting started with. It takes courage to start something new, especially something you don't know you'll be good at. Daring to be mediocre helps you take a step towards something you want to achieve but are having trouble getting started with.

But the biggest takeaway I had from Yosemite this year was community, and how important it is. Sometimes it's easy to forget in the interregnum between WWDC's just how special the community is around the technology industry. The tech community is one that I think can be of immense service to others. I was so impressed by the talk Christa Mrgan gave on Civil Comments, a tool that is actually helping change people's behavior and positively influence the nature of discussion online. That's the type of impact we can have on the world, and I think it's a perfect example of why CocoaConf Yosemite is so great. It's about inspiring you to make a difference, in your team, in your company, in your community, in the world.

CocoaConf Yosemite is the best experience I've had at a conference. If you haven't been I highly encourage you to go. I'm hoping to return again next year.

Review: Nifty MiniDrive

IMG 9819

Having plenty of computer storage options available has always been important to me as an avid photographer and computer user. On the desktop thats easy to accomplish using both internal and external drives. But now that I've been using a laptop for work it's been harder to have more options for storage. External drives are a hassle, and additional internal drives are not an option on the next generation of Mac laptops.

I was really excited when I saw the Nifty MiniDrive on Kickstarter. The Nifty MiniDrive extends the onboard storage on a Mac laptop by utilizing the SD card slot to house a Micro SD card. This is a genius solution for elegantly adding a fair bit of flash storage to your laptop. I had always viewed the SD slot on laptops with skepticism because I use Compact Flash cards for my photography work. But this solution seemed like a great way to utilize that card slot while also giving me more options for storage.

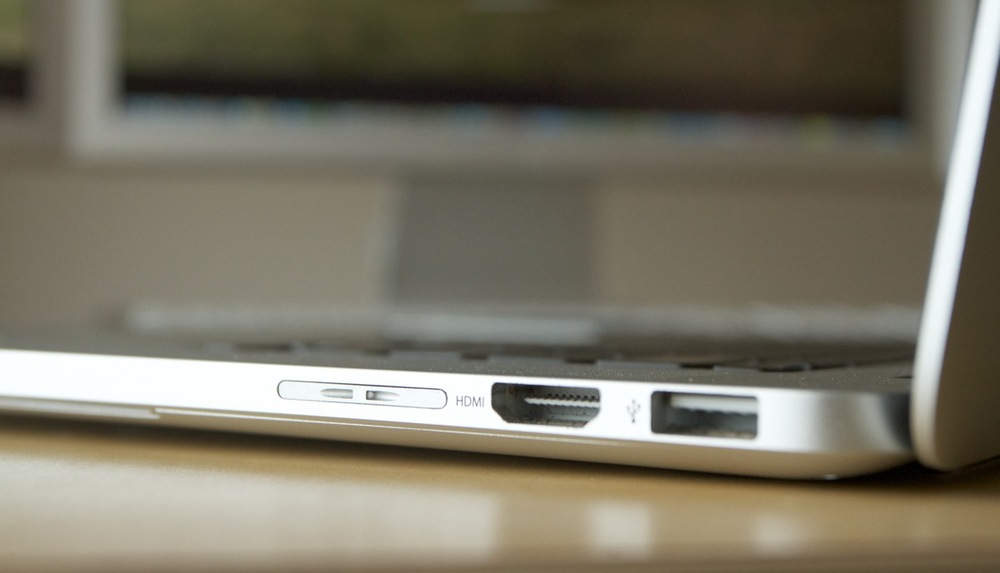
The instructions for installing the drive on the Nifty website are very helpful. Installing the drive was straightforward. I did have to re-seat the Micro SD card once on my first installation to get it to seat correctly, but since there there's been no issues. The drive lines up very nicely on my laptop, as seen in the image above.

The Micro SD card I purchased for my MiniDrive is a Samsung 64GB drive. The other option I considered was a SanDisk 64GB drive. I typically use SanDisk drives for my photography work, but I decided to try out the Samsung because it was on sale and showed similar performance characteristics to the SanDisk. Straight read/write performance for the Samsung has been about what I would expect. Essentially it's similar to a USB 2.0 external drive for reads, and perhaps a bit slower for writes. Not all flash storage is created equal, and you're not going to set any speed records with SD cards like you might with USB 3.0 and Thunderbolt externals or newer SSD drives.


Screen Shot 2013 02 26 at 9 44 39 PM


The Nifty Team lists a few possible uses for the drive on their Kickstarter page. I decided to use my MiniDrive as a Time Machine backup for general documents, settings, and works in progress. The practical consideration behind this is that the largest currently available MicroSD card is 64GB - too small for backing up my entire startup drive. But the reality is that this is still large enough for what I need to back up. Source code is backed up by an SCM, and applications are easily replaceable. Photos I keep backed up using other methods, so any photos stored on my laptop are disposable.

After my initial tests, I set up the drive as my Time Machine backup volume. I configured Time Machine to exclude all of my apps, repositories, system data, caches, and any other large files that don't need to be backed up. That placed my total backup size in the 10-12GB range.

I use Time Machine as part of my Mac Pro's backup system too. I recently switched backup volumes on my Mac Pro and performed a 400GB initial backup of my startup drive. That backup took about 3 hours. I knew that an SD card is no where near as fast as an onboard SATA drive, but I was still expecting that the initial backup wouldn't take more than a few hours.

Screen Shot 2013 02 27 at 9 15 41 AM


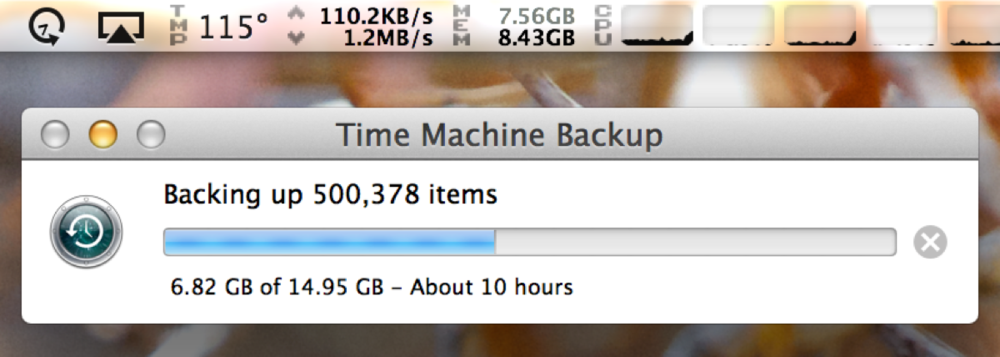
In the end, the initial backup to the SD card took almost a full day to finish. I'm assuming that this is because of how many small files were included in the backup. The random small write speed of the SD card is not very fast compared to the large consecutive write speed that I was testing above. The screenshot of Activity Monitor above was while writing a single large file. Now, here's another screen shot while the backup was in progress. As you can see, the drive isn't maintaining a constant speed and so the backup ends up taking longer to finish.

Screen Shot 2013 02 26 at 9 46 56 PM

I finished the initial backup about two weeks ago, and I've been using the drive as my Time Machine volume ever since. The subsequent backups have finished much faster. I haven't noticed any performance issues while the backups are going on. Performance within the Time Machine is good as well with the MiniDrive. Scanning through file and folder versions for the past few weeks was fast and easy. I have not yet needed to recover a file from the ether of time yet, but backup isn't only about that. It's about the peace of mind you get by knowing that your data is safe. The Nifty MiniDrive gives me that, and in a stylish and elegant package to boot. In the end, that's what matters, and so I am very happy to have my Nifty MiniDrive.

Wildlife Photography

Woodpecker

I originally got into photography when I started camping. Visiting great state parks in Texas and venturing out into Canada, Colorado, and New Mexico was the perfect motivation to pick up a camera. But as I continued getting more into photography I became more and more interested in shooting sports. Like camping, I was very interested in sports and absolutely loved getting to shoot all kinds of events. I still love shooting sports, but it's not a regular part of my life, nor is it something that's very accessible. The wilderness, however, is very accessible to those who want to venture out, so I turned my photographic attention back towards the outdoors.

Shooting wildlife was really an accident for me. I went on a trip this summer to Colorado and decided to take my brand new Canon 300mm F4/L. I wasn't planning on doing a lot of wildlife photography, but I did want to experiment with the lens a bit. I knew it was good for flowers and compressed landscape scenes, and that it was very light (for a 300), so I brought it along.

Marmot 1

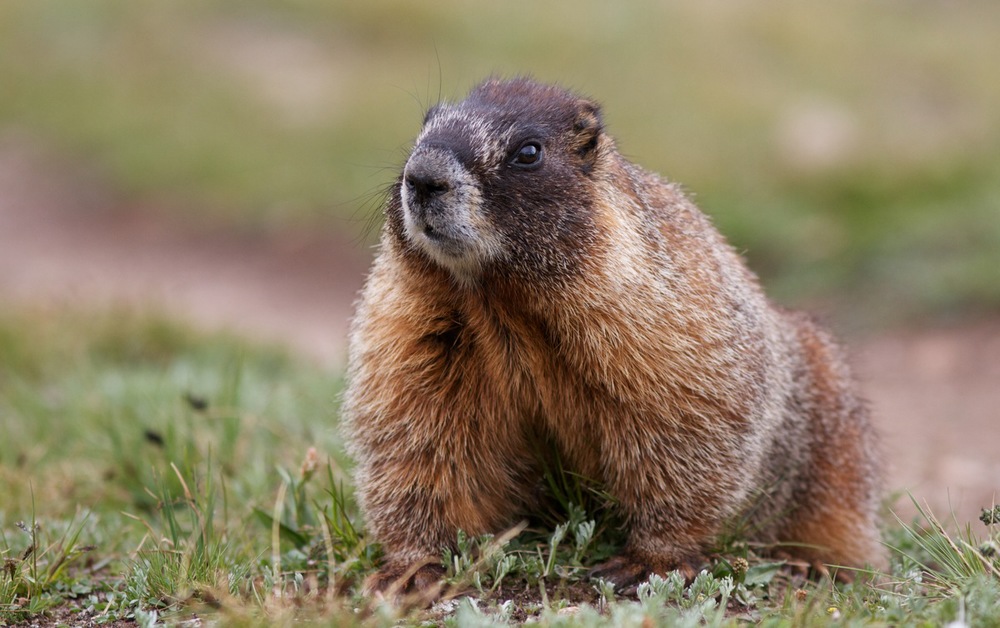
Along a few hikes I happened to run across some great wildlife. I saw several marmots and other small critters, and a few gorgeous birds. I hadn't planned to focus on wildlife but quickly that became my photographic focus on the trip. Much of the credit to that goes to the 300 F4/L (which I originally bought for sports). The lens is perfect for wildlife, by being both light enough to hand hold yet sharp enough to create stunning images of close up animals isolated with a gorgeous background blur. Just seeing a few of the images on the LCD was enough to get me hooked.

But there were a few other reasons why shooting wildlife was so appealing. For one thing, it's a lot like shooting sports. A large part of shooting sports is anticipation and fast reflexes. You have to understand the game and be able to predict what's going to happen, and then act instinctively by focusing on the right spot and quickly releasing the shutter. It's the same thing with shooting wildlife except that it's even harder to predict what animals are going to do, especially birds. There's no white lines that animals have to stay within, or goal to reach.

There's so much opportunity to experiment when photographing wildlife. You can try shooting at different angles to get different perspectives, or framing the scene differently to use a different background. You can get down low and shoot from ground-level for smaller animals, to see what things look like from their perspective, or hike up higher and shoot down on birds, to see what things look like from above. Like many types of photography, the background is very important when shooting wildlife. A lot of times an interesting background will really make a photograph more than an empty sky will.

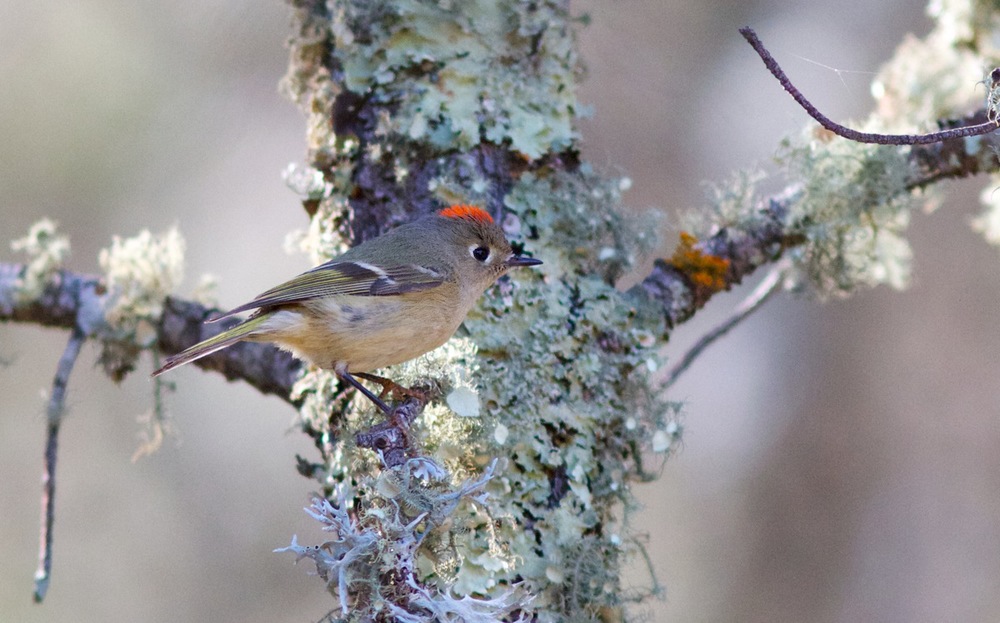
Ruby Crowned Kinglet

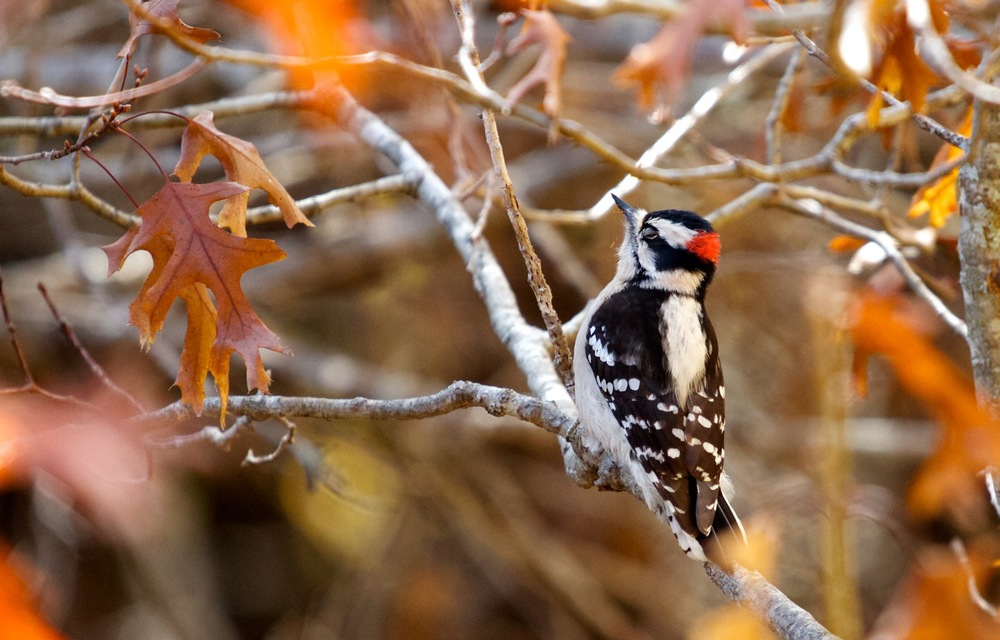
Shooting wildlife is also the same kind of drug as shooting sports. Part of what makes shooting sports so addictive is waiting for the perfect shot. Photographers will often wait an entire game, or even an entire season, for that perfect shot of an outfielder diving to catch a ball, or a receiver diving across the goal line with the football. Capturing those images is rare but it's something everyone wants to do. Likewise, looking for that bird that you can hear in the trees and trying to catch an in-focus image of it in flight is just as addicting. But even without that goal, just being out in nature and enjoying the scenery is enough motivation to make wildlife photograph an outstanding pastime. The same way just watching a game makes shooting sports that much more enjoyable.

If you're interested in taking up wildlife photography, then treat it like any other hobby. Just start doing it. Like sports photography, wildlife is also fairly gear intensive, but before you invest thousands in equipment make sure it's something you enjoy doing. You can easily get by with any DSLR and a medium-long range zoom lens. Go out in the back yard and take some photos, then go out for a hike at a state park and take some more. You'll see birds, deer, squirrels, rabbits, etc. If you're up north maybe you'll see some elk, or even a bear. Remember to respect whatever wildlife you do see though. When you're in the wild you're in their home. Don't feed animals or do anything to antagonize them. Just watch, take pictures, and enjoy the experience of observing nature.

Canon 300mm F/4L IS Lens

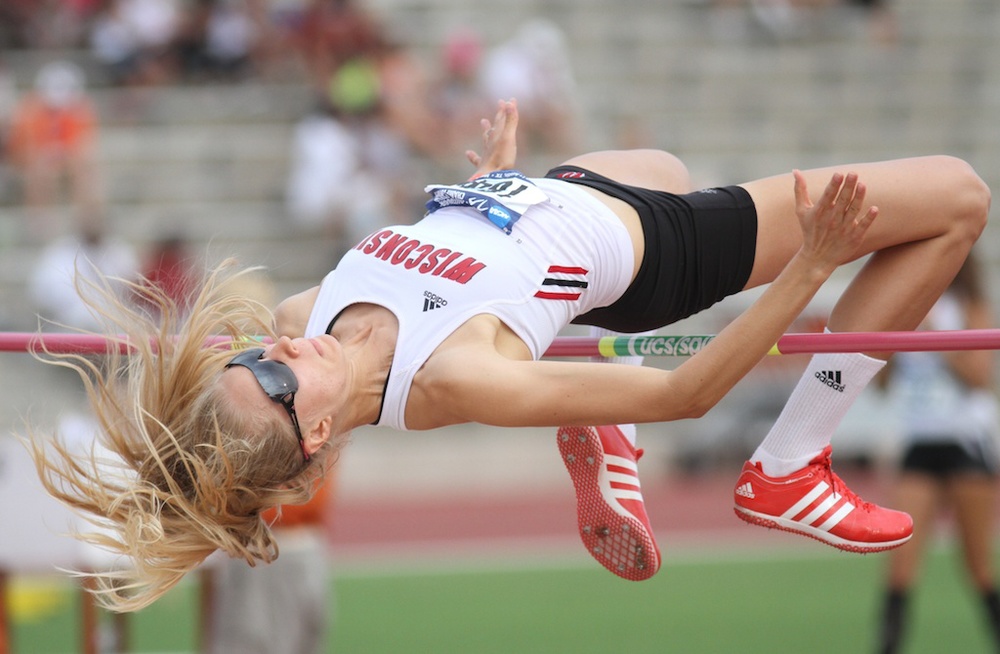
I've been testing out the Canon 300mm F/4L IS lens this weekend and so far the results have been amazing. It managed to handle low-light situations just fine at the NCAA Track and Field Regionals, and compared favorably to the 300 F/2.8L IS (which costs and weighs about three times as much). Below are two images of the same athlete photographed two years apart, one with the 300 F/4L and one with the 300 F/2.8L. See if you can guess which is which.

The top image was shot with the 300 F/2.8 and the bottom one with the 300 F/4. I actually prefer the bottom one, but either way, both results are perfectly usable.


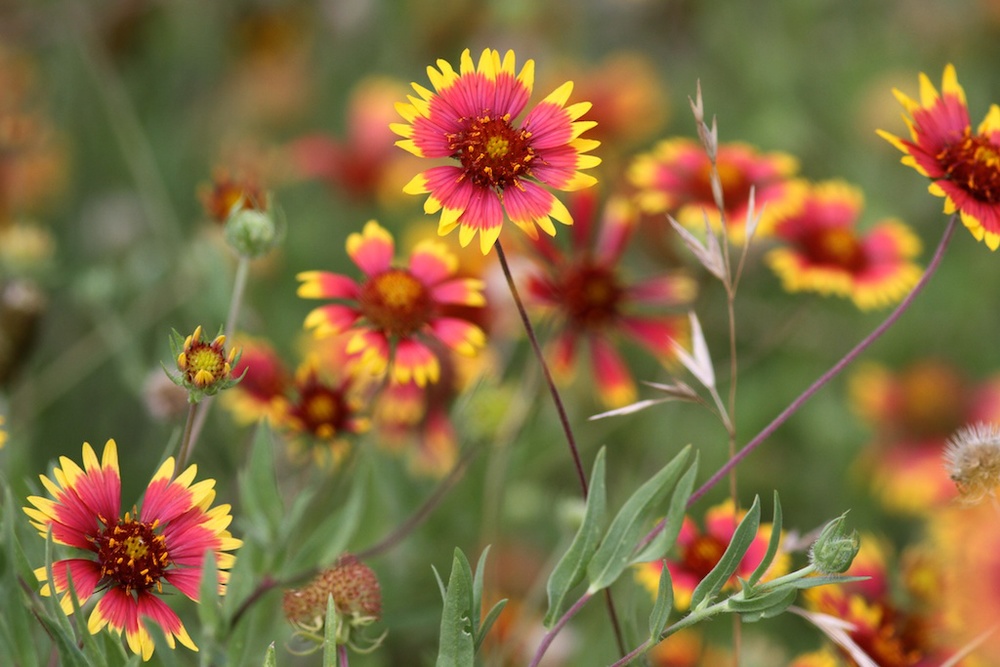
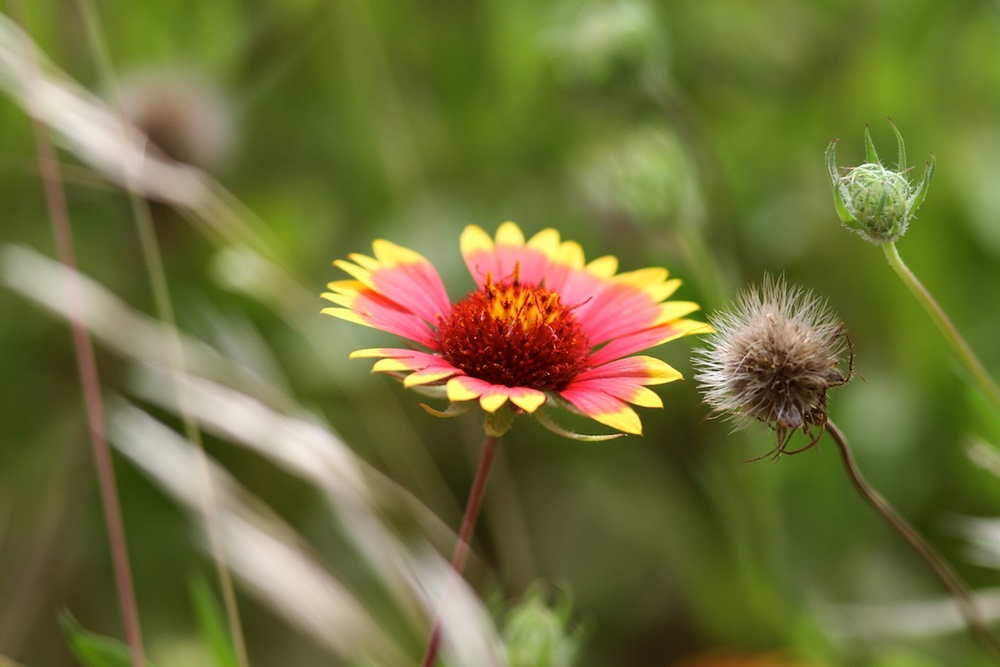
It also turns out that the 300 F/4 is an EXCELLENT macro lens! I spent the morning shooting wildflowers with it and I was blown away by the results. The lens focuses down to a mere 4ft (amazing for a 300mm lens!) and the results are also very good. The lens is incredibly sharp. I was also impressed with the shallow depth of field with a smooth and pleasing background blur. This is an excellent nature lens.

I'm very happy with what I've seen from the 300mm F/4L IS lens that I rented for the weekend and I think I will be extremely happy adding one to my kit in the near future.

Check out more shots at 500px.com/cnstoll.

This review also helped inform my decision.

Thoughts on Lenses

Recently I've been thinking about upgrading my photography kit and trying to decide which lens to buy.  Canon is currently running a great special on their professional-level bodies and L-series lenses so there are some great deals right now.  It's always important to consider your use-case when purchasing camera equipment.  My work covers a broad range of categories but primarilly I shoot sports, nature, and landscape.  I'd been debating between upgrading either my 17-40 F/4L or 70-200 F/4L to their 2.8 cousins, or buying a lens in a completely different focal length range.  

I use Aperture for all of my photo management, which means that I not only have access to all of my photos but a complete database of all of my photo metadata.  I decided to run some analysis on that data to see which lenses that I have used produce the best photos.  These results don't necesarily say anything about the quality of these lenses, meerely my own preferences for which lens to use in a given situation and my own satisfaction with the results.  Note that I only own two of these lenses, the rest I've merely borrowed.

Out of all of the 5 star images in my library (1300 out of 162655) here is the breakdown per lens:

300mm F/2.8L IS: 305

400mm F/2.8L IS: 151

17-40mm F/4L: 280

70-200 F/2.8L IS: 98

70-200 F4L: 84 

The rest are the 600 F/4L IS, the 16-35 F/2.8L, 24-70 F/2.8L, the 28-135 F/3.5-5.6 IS, and point-shoots.

Sadly only three of these are from my iPhone :(

That tells me that the 17-40mm F/4L is by far the best value I've ever gotten out of a lens (600 dollars for hundreds of good shots) and that 300mm is my most used-per-good-shot focal length.   

These ratios are about the same if I lower to 1 star images and above (sample size of 25000 photos).  The only exception is that there are far fewer 400mm images here (roughly 1800) meaning that the 400mm produces far more exceptional results per-image-shot (which is to be expected since it costs about $8000).  I would love to own a 400mm F/2.8L if I could afford one.  I think it's the best lens I've ever used.

Overall I think this shows that the 17-40mm F/4L is an incredible lens for the money that has served me well, and that I need to invest in a lens in the 300mm focal length range for my own use.  It also shows that my usage of the 70-200 focal length range, even though it's an exceptional range (and both are exceptional lenses) is limited and that my results in that range don't tend to be as good as those in the wider range (landscape, etc.) and at the farther end of the range (closer to action).  I'll continue to rely on my 70-200 F/4L for mid range shots, and probably invest in a 300mm F/4L IS for future long range needs.

Aperture SSD Performance

I plan to write a lot about iOS development on my blog but I wanted to kick things off with some articles about photography.  I've been a photographer for more than 12 years and I've been shooting sports professionally for 5 years.  Photography is one of my passions and it's even better when it synergizes with my other passion: computers.  Below is an article I posted on Macrumors to test my hypothesis that an SSD would improve performance in some areas of Aperture usage.


I finally made the jump to an SSD for my primary volume, so I thought I'd share some of my experience with using it for Aperture so far. A while back, a lot of people told me that they thought SSDs would have no bearing on Aperture performance. The assumption was that most Aperture tasks are CPU bound (preview processing, exporting) so the SSD wouldn't offer much benefit. I decided to put this to the test using my own setup and workflow.

First, my setup. I'm using a 2010 3.2GHz Mac Pro with 13GB of RAM. I am using a referenced master's library configuration. The library package resides on the main volume (MacPro HD) and the masters reside on a 2TB RAID-1 mirrored volume (MacPro RAID). 

My basic workflow with Aperture is this. After returning from a shoot I import everything from the CF card (using a FW800 CF reader) into a new project. I mostly shoot sports, which is on a deadline, so I am typically editing immediately without waiting for the import to finish. This means that I am scanning through thumbnails and full size images before they are processed or cached. It's critical that this process doesn't hang or lag at all because I generally don't want to wait for the import to finish (especially on projects involving 2000+ photos). 

For the test I used a 1000 photo set from a trip I just took to India. I completed my import and basic editing process first with my library on a 1TB HD, and then again with the library on a 480GB SSD. In both tests I downloaded all the images from the CF card during the import. While the import was in progress I timed several benchmarks using a stopwatch (I admit this is not very scientific). I also continually scanned through thumbnails and full sizes to gauge the overall "feel" of each system. I also took a few other non-import related measurements that I feel are worth including.

So, here's the results.

HDD:
Mac Startup Time: 56s
Aperture Startup Time: 39s
All Photos Load Time: 12s
All Projects Load Time: 22s
Import Thumbnails (and metadata): 1:28
Copy All Images to Masters Directory: 1:50
Total Import Time: 3:20 (sum of two previous steps)
Process Embedded JPEGs: 2:57
Process All Images (previews): 14:25
Load 10 Previews (select an image, wait for it to fully load, right arrow to the next, wait, repeat): 17.4s

Notes: during this process scrolling locked up frequently. It was difficult and frustrating to flip between images. Tapping an image often resulted in a 4-5 second beach ball cursor. 


SSD:
Mac Startup Time: 21s
Aperture Startup Time: 10s
All Photos Load Time: 12s
All Projects Load Time: 8s
Import Thumbnails (and metadata): 12s
Copy All Images to Masters Directory: 1:51
Total Import Time: 2:20 (sum of two previous steps)
Process Embedded JPEGs: 1:57
Process All Images (previews): 12:30
Load 10 Previews (select an image, wait for it to fully load, right arrow to the next, wait, repeat): 15.1s

Notes: There were never any hangs of any sort while flipping between images during the import process. Tapping on an image resulted in an instant preview followed 2-3 seconds later by a full quality image.


I think the summary is that there is definitely a performance benefit to having the Aperture Library metadata on an SSD. I think the initial project import time is the best example. From 88s to 12s, a 6x improvement in performance. I have no doubt the hangs in performance with the HDD during this time were a result of the disk head moving back and forth writing metadata, previews, etc. and then having to seek back to find some bit of metadata from the library for a given image before showing it's preview in the viewer. For me, the lack of hangs and freezes during import make the SSD a huge win. I also like the faster startup time for Aperture, as well as more-quickly loading large projects (or multiple projects, like all photos). So yes, while exporting (or as shown in this example, preview generation) don't really benefit from the SSD, I still think it's worthwhile to use one with Aperture.


Original:

http://forums.macrumors.com/showthread.php?t=1357118