iPad Week: Monday

Today was the first day where I tried to use an iPad for all of my work.  Here's a link to my post outlining the experiment: /blog/2012/10/14/going-on-a-pc-diet.html  Overall the experience was good.  It feels very inspiring to attempt something like this.  But it's clear that I am still a ways away from being as productive on the iPad as I am on a Mac for software development.

Let me start with what went well.

Email.  Email has always been great on the iPad and the iPhone, so I really wasn't that concerned with this one.  I am a heavy user of email though, so my expectations here are high (for more on my thoughts on email, see: /blog/2012/8/19/email.html).  Search worked well when I needed to find some specific messages.  Conversation threading was a deal saver of course.  The improved flagging and VIP support in iOS 6 were very noticeable for me.  What surprised me is how much I miss always seeing that red notification dot on my dock.  Most people hate it, but I like staying up to date with what is going on during the day.  Without that icon I felt like I had to constantly look over my shoulder and check email.  But in terms of functionality email was no problem.

Chat.  I used Verbs for chat and it's a pretty good experience.  There's some quirks in the user experience but overall it's a great app.  What I loved though was Google Hangout.  We use hangout extensively at Mutual Mobile for communications.  We have a very realistic office hours policy, and a lot of people work from home every so often if they need to go heads down on a problem, aren't feeling well, or need to wait for a repairman to come.  My friend Sean McMains and I were working on a project together but he was at home.  I ended up conferencing with him via Google Hangout on my iPhone, while working on a shared document on Google Drive.  It was actually a great experience, and one which really wouldn't have been any better on a laptop.

Music.  The coolest thing I've noticed so far is that the play/pause/volume/next buttons on the Apple Bluetooth keyboard control the Music app.  How cool is that?  The app seems to have gotten some solid performance improvements in iOS 6 too (perhaps thanks to UICollectionView?).  Listening to music today was a great experience.

Keyboard.  Speaking of buttons, the Apple Bluetooth keyboard is really great.  I was really impressed by the amount of keyboard shortcuts that work, and even more impressed by this find by my friend Kevin Harwood.  It turns out that you can enable keyboard shortcuts for Apple-Tab app switching by turning on VoiceOver.  How cool is that?  Here's a link to the details: http://the.taoofmac.com/space/blog/2012/06/22/0023

Screens.  The reality of this experiment is that there are some things you simply cannot do on the iPad.  For those things I am using Screens connected to my Mac at home.  Screens is probably the best app I have ever used on iOS.  It is extremely powerful, thoughtfully designed, and very feature rich.  To give you an example of a task that you can't do on an iPad, the first task I had to do this morning was build and sign an app for submission to the App Store.  I was able to complete this task, including setting up all the keychains and provisioning profiles, using Screens on my iPad.  I can't imagine a better testimonial :)

So what didn't go well?

Does the fact that the iPad charger isn't powerful enough to charge the iPad while operating at full brightness count?

I really didn't have any task specific problems.  I was able to do everything I attempted to.  But I did encounter a lot of frustrations with editing text.  I enjoyed using the external keyboard to type.  Like a lot of developers, I can type extremely fast on a keyboard.  But that doesn't help when it comes to cursor placement, text selection, and general interaction.  Having to reach up and constantly touch my screen to push a button, select a sentence, or insert a square bracket was fairly taxing and not enjoyable.  Clearly this is not the iPads strong suit, which really is by design.  The iPad isn't designed for that type of workflow.  It is great evidence for the case against a touch screen Mac though.

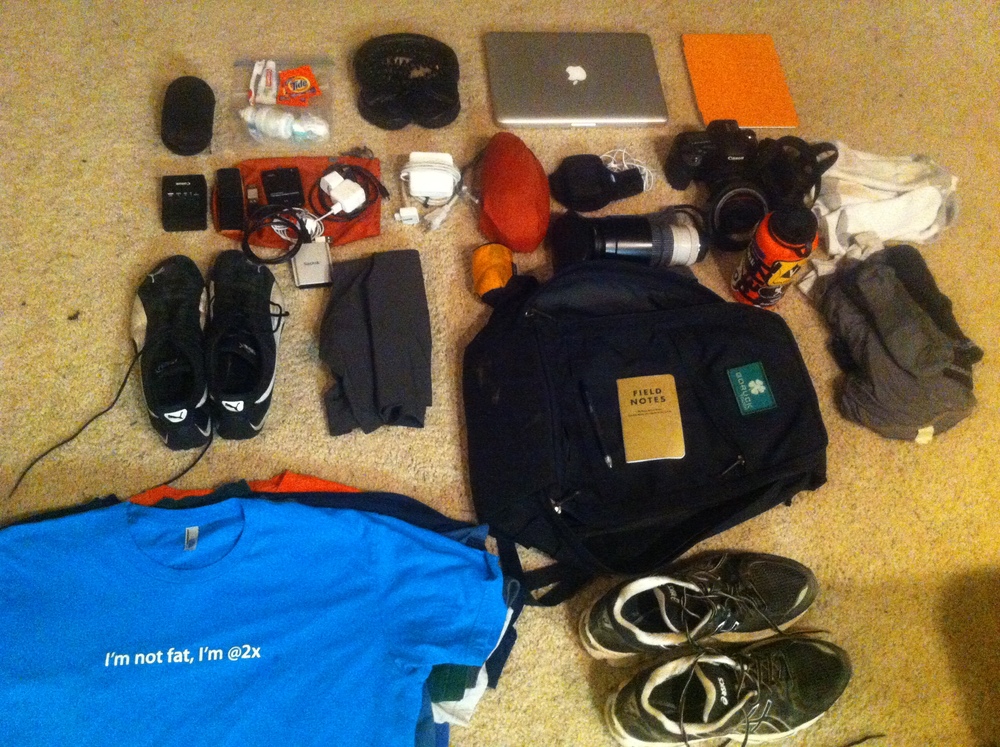
I left my laptop at home to force myself to use the iPad for everything.  I'll admit that for the first couple of hours it was pretty stressful.  It was very much a case of being taken out of my comfort zone.  I've used a Mac for my whole life, and trying to do work without it was pretty strange at first.  A mainstay of my work environment is using dual monitors to view multiple pieces of information at once.  That doesn't work with the iPad. I think I may try using two iPads later this week to see if it makes a difference, but for today it took me a while to get past it.  

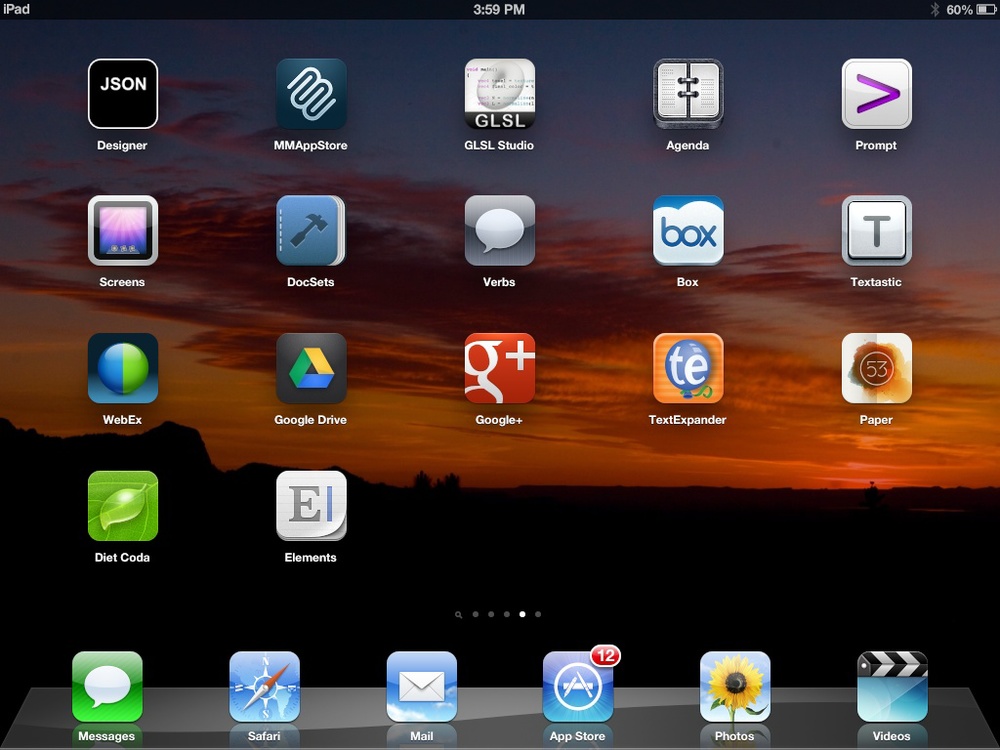
I didn't get to write much code today, but I did get to test out my actual development setup.  The three primary apps I am using are Diet Coda, Prompt, and Textastic.  My basic strategy is to use a combination of those apps to edit code, and then a remote build server to build the app and allow me to download and install it on my device.  I'll post more information on this setup in the coming days, but I did enough work today to know that while this system does work that it isn't an efficient way to develop iOS apps.  The workflow for writing code is very much centered around a mouse and keyboard, and so far doesn't seem to lend itself well to a touch interface.

After spending a day in this experiment the biggest question on my mind is what is better about the experience of developing software on the iPad than the experience on the Mac.  Its clear to me now that it is indeed possible to do all of your software development on the iPad, but what is it about that experience that will make people prefer to write code on an iPad?  What is the value that the iPad brings to the table?

We all know the kind of value that the iPad brings to other types of software.  Touch interaction removes the layer of abstraction between you and the content.  With a full screen system where the device is essentially a piece of glass the device literally becomes your content.  That's lead to wonderful apps like Reeder, where it becomes fun to manipulate your articles and feeds as you read them.  And iPhoto, where the iPad becomes your photo that you can view on the gorgeous display while tweaking its color and exposure.  Those apps really play to the strengths of the platform to create an amazing user experience.  That's the bar that the software development experience has to reach for anyone to want to use their iPad to develop apps.  We'll see over the rest of the week how close it is to getting there.


Going on a PC Diet


We used to hear this all the time, about how the iPad was only for consumption.  About how it's not a real computer if it doesn't have word or excel.  The doubters are mostly silenced now, but many of us still don't use a tablet as our primary computing device.  Everyone uses them in the airport and on the couch, but how many people use them at their desk at work?


I didn't buy an original iPad.  I was skeptical at first about what I would use it for.  I read news and used twitter on my iPhone, and I did everything else on my Mac.  Where did the iPad fit in for me?  That all changed when I got an iPad 2 on launch day.  It turned out that I could use it for almost anything.  Within a week I was using it extensively for reading, with apps like Instapaper and Reeder.  It nearly replaced my Mac for checking email.   Its great for checking scores, looking up recipes, and watching movies.   I even use it to fly a remote control helicopter around our office at work.  I'm even using it to write this article.  But where I really started to see its potential to replace my Mac entirely was games.  I love playing games on the iPad, to the point where, having been an avid computer gamer for most of my life, I didn't play a desktop computer game for more than a year.  


I still love my iPad and I use it everyday, but there remain two areas where it has not replaced my Mac: editing photos, and writing software.  I shoot sports semi-professionally, and I take a lot of landscape and wildlife pictures.  I use Aperture to manage my photo library because of its power to organize, catalog, and quickly select and edit shots from a large shoot.  There are many excellent photo editing apps on the iPad, such as iPhoto and Snapseed, but none of them are capable of solving the mass storage problem.  I don't expect this to be the situation forever though.  The time will soon come when we will have enough storage in the cloud to host hundreds of thousands of RAW photos, and when that day comes I am confident that I will be able to use the iPad for editing photos.  Which leaves...writing software.


If you think about it, it's really a shame that you can't develop iPad apps on the iPad.  It's like a step back to the early days of PC's, when PC's lacked the power and tools for developing software.  In many ways, being able to develop software for a computing platform on that platform is a right of passage.  You have to think that the iPad will get there eventually too, but we are still a lot further off than we are for other types of content creation, like editing photos, writing, painting, drawing, and making music.  The biggest show stopper is the lack of a compiler.  Sure you can create and edit source files, but you can't build them without the help of a Mac.  You still need a truck for all of the heavy lifting.


Nevertheless, I want to see how far away we really are from being able to use the iPad for developing iOS apps.  A few weeks ago, we had the idea at Mutual Mobile to give this a shot.  We wanted to allow interested team members across the company to go on a PC diet and use a tablet for ALL of their work for a week.  For a lot of tasks, we are already at a point where an iPad is a great substitute for a Mac, but for writing software it's going to be a big challenge.  So for the last two weeks I've been getting ready and preparing my arsenal of apps for editing documents, chatting with colleagues, taking notes, looking up class references, writing code, and of course...remotely logging in to a Mac at home in case anything goes wrong :)


I'll be writing more about how it goes everyday, but in general I am optimistic.  A lot of the apps I have been trying out for this experiment are truly amazing.  That gives me tremendous confidence in the future of the iPad platform.  Which leads me to my hypothesis for this brief experiment.  I expect that there will be snags, but that I will be able to do all of my work on the iPad this week while my Mac remains at home.  I also expect that while the day where the iPad will completely replace my Mac isn't here yet, that its not as far off as It may seem now.

Mass Storage

Being a photographer has always meant that you need a lot of storage. I still have boxes and boxes of photos and negatives sitting in a room in my parents house. But in the digital age it means you need hard drive space, and lots of it. And it's been the case for the entire digital age too. Even when a large image size was 3MP hard drives were barely large enough to hold a complete library. But it's getting to the point now where camera technology is outpacing storage technology. The RAW files that my Canon 7D produces are close to 30MB, which has resulted in my storage system being overwhelmed. Several months ago I started the search for alternatives and here is what I learned.

My current storage system is almost as simple as you can get. I use two 2TB Hitachi Deskstar drives in a RAID-1 (mirror) format. The mirror RAID gives me slightly improves read performance, but it also gives me redundancy. It's important to note that RAID is NOT a backup. The other part of my system is a rotating off site backup strategy. Once a month I clone the drive to a copy I take to an off site location. Any new system I consider will have to support a similar backup strategy.

There's a few advantages to this system. The first is that it's simple. It takes less than a minute to open Disk Utility and turn two drives into a RAID mirror. Literally anyone can do it. The second is performance. For disk performance, SATA is still king. You can get upwards of 140 MB/s of read/write access to good hard disk drives over SATA. Compare that to 20 MB/s for USB 2.0, 60 MB/s for FW800, and 75 MB/s for iSCSI. It really is no contest, and with huge RAW files that performance really does matter. And finally, there's redundancy. A mirror RAID can tolerate the failure of a single drive and it will still be both accessible and performant without that drive.

There's disadvantages too. For starters, your volume capacity is limited to the size of the largest hard drive available. When I bought my Mac Pro two years ago, that was 2TB. There's also no easy way to upgrade the size of the array without rebuilding it, which means its not very future proof. Finally, mirror RAID provides no benefit at all for write performance.

So as my RAID volume filled up I researched the following options for increasing my storage capacity and set out to make a decision before I ran out of space.


1) Drobo
The storage robot has been hailed as the holy grail of storage for years. Drobo aims to take the complexity out of managing RAID systems by essentially eliminating the management part. It's as simple as plugging drives into the box and watching your available storage grow. It's not all magic of course. Drobo is basically a modified version of RAID-5, a parity striping RAID format where information necessary to reconstruct data on a disk is stored across the rest of the disks. That means Drobo can tolerate the failure of 1, or possibly even 2 drives (at the cost of total capacity).

It's not all warm and fuzzy though, Drobo benchmarks are very poor. Even iSCSI and eSATA Drobos max out under 70 MB/s, and others are closer to 15-20. There's also some risk in terms of device failure. If a single hard disk fails you are fairly well protected, but if the Drobo itself ails then you must buy a new one to see your data again. Not only that, but you need a Drobo with the same firmware version as your previous one. In 4-5 years, that may be hard to find. For these reasons it's pretty difficult for me to consider Drobo for primary storage. It is definitely a good solution for backup though, albeit an expensive one at $600+ without drives.

Cost: High
Performance: Poor
Simplicity: Great


2) RAID-5 NAS/eSATA/iSCSI Enclosure
These enclosures are available from tons of companies. They are typically 5 hard drive bays coupled with an Intel Atom processor which powers a Linux Software RAID system. The big benefit from these systems is really the networking they give you. For a large home or small office they provide a very cost effective way to setup a file server. The boxes cost anywhere from $400-$1000 depending on interaces, quality, and features.

There are still problems though. It turns out that software RAID-5 isn't going to win any speed awards. These systems tend to be faster than Drobos, but still slower than single, striped, or mirrored drives. They also don't have a very good reputation for quality. There's lots of stories out there on the Internet about failures, especially about drive failures since some of them aren't well ventilated. Then there's the non-starter: the write hole problem. This is an issue on lower end RAID systems that can result in undetected loss of data. Couple that with having to manage RAID software and this was the first system to get crossed off my list.

Cost: Medium
Performance: Poor
Simplicity: Average


3) DAS/SAS (Hardware RAID)
A direct attached storage system composed of SAS (Serial attached SCSI) or SATA drives offers best of breed performance. A DAS/SAN can easily break 600 MB/s, a speed only recently achieved by SSDs. The key here is that at the heart of this system lies a hardware RAID controller operating on the very fast PCI Express bus of a Mac Pro. One of the advantages to having a Mac Pro is that you can actually consider a system like this. In addition to incredible performance, that hardware RAID controller also makes it possible to solve the write hole problem! I spent several months researching this system and I narrowed it down to a few components:

Areca 1880-series RAID card
Sans Digital SAS Expander Enclosure

But all that performance and reliability comes at a price. Good hardware RAID cards are over $700, and SAS enclosures are at least $1,000 (no drives). But there's more. Hardware RAID systems also require enterprise class drives, which are usually twice as expensive as normal ones. You can use non-enterprise drives, but timing issues mean that there's a huge risk of ruining your data. If you buy into this system you really have to go all-in on the best drives you can get.

Hardware RAID is also damned complicated to set up. It took every bit of my nerd IQ and CS background to understand the basics here, and I still feel like a novice after months of research. I learned a lesson last year when my Linux media server started to sputter out: the last thing I want to be doing is scouring low level system forums while the safety of my data hangs in the balance. Despite my enthusiasm at the high performance and expansion that this system offers, the complexity involved in setting up and maintaining it coupled with high costs ultimately made me very skeptical of investing in it.

Cost: Very High
Performance: Excellent
Simplicity: Poor


Backup
The idea with all of these systems is that they combine multiple drives into a single huge volume. This gives you the flexibility to store literally everything on one device, but also to simply add more drives when you need more space later. This sounds wonderful of course but it's a huge challenge for backup solutions. RAID isn't backup, remember? Once the space of the volume exceeds that of a large single disk drive then your options for backup start to evaporate. Once we get into this realm of storage time machine is no longer an option so we typically turn to cloning and online backup. I use Backblaze for online backup and I am very happy with it. But I still view it as a cataclysmic disaster recovery tool, not a primary backup. The largest option for hard drive recovery from Backblaze is 1TB, which is half my photos, and it would take literally months to download my photos. A reliable local backup is still required. But with the above three solutions my only option for local backup is a second RAID enclosure to clone to. That effectively adds $1000+ to any of the options above for an extra Drobo or RAID-5 enclosure with drives to use just for backup. The third option is the only good one, and that puts the total cost of that system at nearly $4,000. That's just too hard to justify.

So queue the drumroll...my new mass storage system is:


4) A larger version of my current system.
I decided to keep my same system, but to rebuild my mirror RAID array with larger drives. So this week I bought two 4TB Hitachi Deskstar drives, built a new RAID-1 mirror out of them, and copied all of my data over. A big reason for this was cost. Those two 4TB drives were a tad under $600 dollars. And backup isn't an issue either, since I only need a third bare drive to use for my backup.

But the best reason to keep using this system is simplicity. From start to finish it took less than 14 hours to completely transition from the old RAID to the new one. Most of that was SuperDuper copying the data over. The rest was fixing Aperture master file references. iTunes and most other apps reference files using a path with the drive name, so since I used the same drive name none of those apps were perturbed. But Aperture is too smart (or too stupid) for this because it associates files with the unique identifier of the drive. So even though all my masters were there, Aperture couldn't see them. Fortunately there's a tool in Aperture to fix this (see: locate masters), but fortunately this was the only issue I saw with the switchover.

Hopefully this system will buy me another 2-3 years of storage. The bet I am essentially making is that there will be a better solution to this problem in 2-3 years. That will likely be near the end of life for my MacPro, and if Apple is moving away from towers then perhaps Thunderbolt mass storage will be cost effective by that time. Or maybe there will be 8TB HDDs then, and I'll just upgrade to two of those :)

Finally, I want to give a special thanks to macperformanceguide.com for all of the wonderful articles about Mac performance and photography workflows that helped inform my decision.

Email

A while ago I read this article http://mattgemmell.com/2012/08/05/managing-email-realistically/ by Matt Gemmell about email and I thought it provided a lot of good insights. After Sparrow was aqcuired by Google many other people who I respect started talking about email as well. I've also thought a lot about email, and how to manage it, so reading those articles prompted me to share some of my own thoughts on email.

I get a lot of email. I probably don't get as much as some people, but it's a good size load. I get between 50-100 emails per day from various teams and projects I work on, from friends and family members, and from various mailing lists at work. It would be easy to get overwhelmed by this load but there's one basic assumption that helps me use it to stay informed while enabling myself to remain productive.

Messages have a shelf life of 24 hours. I want all of the email I receive on a given day to be marked as read that same day. When I go to sleep I want for my inbox to read zero. The first thing some people will say upon reading that is "if you subscribe to that logic all you'll be doing is reading email!". I disagree. I think it's possible to keep your inbox empty without harming the rest of your work. In addition, I think that keeping your inbox lean enables you to better spot the messages that are actually important so that you can be prepared to respond to them.

Consider this. If you don't have time to respond to a message you received this morning today, why do you think you will have time to respond tomorrow? My premise, and the key to the above assumption, is that if a message isn't important enough to respond to today, then it's not important enough to respond to tomorrow. If its not important, then I don't want to waste time with it, and so it's marked as read and that's that. I don't archive my messages, I've never seen a reason to. I just mark them as read and move on.

Triage is certainly a good way to handle email. I see four categories of email message importance.

Junk. LinkedIn messages, Facebook, travel promos. All of these are completely and safely ignored.

Informative. These are messages that may not be directed at you, but that should at least be skimmed to see if they contain information relevant to you. This is probably 3/4 of the mail I get. These messages are typically easy to handle. I give myself about a minute to lance at them, mark them as read, and move on with what I was doing. These messages are still valuable for keeping abreast of situations you should be aware of.

Directed. These are the messages that are directed directly at you, where someone is generally asking you a question. These are easy to handle too: answer them immediately. Being polite is so important for building strong relationships with people, and promptly answering an email from someone you know or work with is just the polite thing to do. There are certainly cases where this isn't practical. For example, prominent bloggers and Internet celebrities get hundreds of personal emails a day from people they don't know. Sadly it's not practical for them to answer those, and that's fine. If they can't answer them in one day, they should still mark these messages as read and move on. Taking the time required to respond to those emails would obviate the reasons those people emailed them in the first place.

General. These are discussion messages, typically where the topic is interesting, but that maybe you don't have something to say immediately but would like to think about and contribute to later. These are harder to handle. Generally I leave these marked as read until I'm ready to reply. This may violate my 24hour rule sometimes, but I am ok with it in this circumstance.

That's my strategy for managing my email inbox. I don't feel like managing email is a hindrance to my work. My strategy fits perfectly fine within my work flow. As far as software, I use Apple Mail on my Mac, iPhone, and iPad. It suits my needs well.

I do have some final thoughts on replying to email. The assumption I make here is that too much communication is better than too little. If I think a message is worth replying to then I always try to reply to it. I'll happily let the recipient decide if my response is worth reading. I do try to make my replies clear and short to be respectful of other people's time, but I would always rather give someone information than leave them wishing for information that they don't have.

I also think its important to thank people. If someone sends me something I need or responds to one of my messages, I always try to thank them. Being polite is important, and being thankful is a great way to be polite. Thanks for reading :)

Thanks,

- Conrad

One Month, One Bag, Postmortem

I didn't get a chance to write much while living in NYC for a month, but now that I'm back I wanted to relay my experience of a single backpack in the big apple.

My packing list wasn't very large: /blog/2012/7/14/one-month-one-bag.html. I mostly brought with me clothes, camera gear, and computers. Let me start by saying that the experience was very good. I not only enjoyed New York I enjoyed not having to carry much with me.

Most people pack more than they need because they worry about needing something that they don't have. There were a few things that I missed, but none of them were major items. I managed to forget finger nail clippers and cough medicine, but thankfully there was a pharmacy next door where I could buy some.

If I had it to do over again, the main change I would make is to swap a few shirts for extra jeans or shorts. I ended up having to do laundry about twice a week. That wasn't hard, since my hotel had a washer/dryer, but the extra jeans would have been convenient to have.

There were a few things I brought that I could have done without. I did use my 70-200mm lens, but only a few times. Surprisingly enough my camera battery lasted a full month! If I won't be taking many pictures I could probably survive with just batteries and no charger. I could also have left my second pair of shoes and only taken my sneakers. If you are walking a lot in a big city it makes sense to only bring and wear your most comfortable walking/running shoes.


On the performance of my Goruck GR1.

The GR1 is certainly the best pack I've ever owned. Carrying it everywhere in the city was a great experience. it's comfortable to carry and safely holds my laptop and camera for long walks to central park or various coffee shops. Highly recommended.


The only problem with my scheme was I didn't account for bringing back items from my trip. I managed to squeeze in the t-shirts I got at WWDC, but when it came time to bring back the growler I bought at the Gingerman in Manhattan I was completely hopeless. I ended up carrying it on in a large shopping bag, but lugging it through the airport on the trip back wasn't nearly as enjoyable as being bag free on the trip there.

All things considered, I'm now hooked on traveling with one bag, and I would highly recommend it to anyone who travels for business or pleasure.

One Month, One Bag

Having been a Boy Scout for most of my life, I approach everything like a camping trip.  So when I'm told that I'll be travelling to New York City for a month on business I immediately start thinking about what to bring with me, and what to leave behind.  There's plenty of articles out there on minimalism but my philosophy is essentially this.  Think about what you'll absolutely need and leave everything else.  You already have the best tool with you for every situation: your brain.  If you're going to freeze to death in the wilderness then you can find a way to build a fire.  If you spill coffee on all of your t-shirts you can either wash them or go to the store to buy more.

With this philosophy in mind I set out to pack only the essentials and see if I could live out of one backpack for a month in New York City.  Here's what I'm bringing with me.

MacBook Pro, iPad, Headphones (I am an engineer afterall)

Sunglasses, Glasses, Contacts, Half tooth brush, Toothpaste, Laundry soap

Camera, iPad, iPhone, MacBook chargers

Firewire 800 Card Reader, Extra camera batteries

Rain Jacket, Pack Cover

DSLR, Wide angle lens, Telephoto lens

Socks and underwear, Workout clothes, iPhone arm band

Field notes, Pen

T-Shirts and a couple nice shirts, Jeans, Shoes

Nalgene Bottle

Here's what I didn't take.  Most toiletries.  I can pick those up locally, and for a long stay there's no point trying to fit large sizes on a plane.  More than a week's worth of clothes.  I can do laundry at the hotel every weekend for free.  Food.  Again, I can buy food when I get there.

In some ways the iPad is the key to all of this.  One thing that you'll definitely need on a long trip is a source of entertainment.  The iPad solves that in so many ways.  You can fit dozens of books, movies, TV shows, and plenty of games on a device that's smaller than a folded t-shirt.  Before the iPad, all of that could easily have taken up an entire suitcase.


A few notes on the items I did bring with me.  I brought the rain gear because I plan to walk almost everywhere in New York.  I'd prefer to not have to worry about getting wet while I'm wandering around.  My Goruck GR1 does perform very well in the rain, but with all of the electronics I decided I'd rather be safe than sorry.  I'm actually bringing my camera charger this time (I forgot it at WWDC).  I absolutely cannot wait to run around Central Park, so workout clothes are essential.  And of course I'll obviously be taking tons of pictures so the camera has to fit some how.

You may be wondering how all of this fits in one backpack, well, there's a few tricks to that.  Thankfully I have two feet so only one pair of shoes needs to fit in the pack...in this case, the smaller pair.  The Nalgene I can carry in my hand onto the plane.  The Jeans I'll wear since they are the bulkiest clothing item.  The shirts actually fold very nicely into one bundle.  Simply fold the sides towards the middle and fold into thirds.  That turns the shirts into one nice bundle that fits well in the bag and also keeps them from wrinkling too much.  I'll also wear two t-shirts onto the plane to keep this bundle a bit smaller.  The headphones thankfully fold flat, so they are easy to fit on top.  Everything else squeezes into any small space it can fit into.

This may not be much to live off of in a city I've never been to, but I think it should be enough.  If there's anything I forgot then I'll borrow it from a friend, find an alternative, or buy it at a store.

Goruck GR1

On July 6th I hiked over 14 miles on Mt. Harvard with my Goruck GR1. Inside it was nearly 30 pounds of water, food, clothing, and camera equipment. I've carried a lot of packs, and many of them have been uncomfortable under similar loads, and especially on tall peaks. Not the GR1. Despite having no hip belt I barely noticed the weight at all. While climbing over boulders and talus fields the pack stayed glued to my back and protected my gear. I slipped and fell twice along the way with no damage to the pack or my gear (or myself, thankfully). It rained on the way down, and while I do have a pack cover, it didn't seem necessary in the light drizzle. My only complaint so far is that while wearing a rain jacket I sometimes wished for a sternum strap. The straps had a tendency to spread further out with the reduced friction of the jacket. I have definitely found the day hiking pack that I'll use for the rest of my life. Here's a shot of the GR1 up on Mt. Elbert a few days earlier. To learn more about this great piece of gear please visit goruck.com (and if you like what you see, also consider visiting goruckchallenge.com).

Packing Light: WWDC Edition

Packing light is a skill I've learned the value of many times when hiking in Texas, New Mexico, and Colorado. It's a lot easier to climb a mountain without a bunch of extra stuff you don't need on your back. The same is true for traveling as well. If you don't have to worry about extra luggage you can make it through airports faster and easier and not have to worry about managing belongings on your trip. I think this is especially important for conferences, and also easier, since you are focused so much on the event at hand. So here's my packing list for the best conference ever: WWDC.


- Backpack
- 5 Mutual Mobile t-shirts
- Underwear and socks
- Running Shoes
- Workout Clothes (you never know)
- Jacket
- Rain Jacket
- Battery Pack
- iPad
- iPhone
- MacBook Pro
- Chargers
- Sunglasses
- Headphones
- Toothbrush, travel soap, deodorant
- Canon DSLR with wide and telephoto lenses. I am a photographer after all.

Thats it, and it all fits in the one backpack. A few notes on individual items:

1) Shoes. You're going to be walking a lot in San Francisco. Bring shoes that are comfortable to walk in.

2) Bring the long cable along with the charger to reach farther power outlets.

3) A jacket is definitely required for June in SF. The rain jacket is optional, but it's nice for a windbreaker while waiting in the keynote line at 4am.

4) The telephoto lens may be overkill, but I get a kick out of playing photojournalist during the keynote.

Thanks for reading! If you want to say hello at the conference feel free to @ me on the twitters.

WWDC Tips and Tricks

WWDC is an amazing experience and an incredible opportunity for developers.  It's so exciting to be around all of the other great members of the iOS and Mac development community who are just as excited about the state of the platform as you are.  With such an exciting event I feel that it's important to plan ahead in order to make the most of the opportunity.  Below are some notes on how to be prepared to get the most of the conference.

1) Prepare lab questions along with sample code. If you've got a specific question consider creating a sample project that effectively explains your issue. You want to be able to explain your problem to an Apple Engineer as quickly as possible, so be sure to think about the best way to get your point across.

2) If you're interested in attending the UI Review lab go straight upstairs to the 3rd floor in the morning to sign up for a spot. All of the other labs are first-come-first-serve but the UI and App Store Review labs are scheduled time slots.

3) Plan on arriving to sessions (especially popular ones) at least 10-15 minutes early. This isn't just to get a good seat, but for some sessions it may be just to get in at all. Ushers will close the doors to some sessions when they are completely full, so if you're really interested in attending a specific session plan to arrive early.

4) If a session isn't interesting to you, leave. You're there to get as much out of the conference as possible and if you're not getting anything out of a session you should walk out and head to another one or go to a lab. No one will be offended if you walk out.

5) Talk to other developers. If you are standing next to people you don't recognize then try to introduce yourself. If you see people whose work you admire, tell them. If you see people you recognize from the internet but haven't met, go up and introduce yourself. The Mac/iOS community is so great and everyone there will be very friendly and willing to talk to you if you make the effort.

6) Bring a card with your Twitter name on it. Twitter seems to be the best way for developers to stay in touch since it's something that everyone uses. I still keep up with several developers I met last year via Twitter. Paper cards do seem outdated but they still are the most effective way to pass out contact information at a conference.

7) Choose your seats wisely. Seats near the isle usually have power strips. Try to sit near the front or the center if possible. I usually tried to sit near the isles because I wanted to have an easy exit to get a good seat for the next session.

8) If a session is really interesting or important to you go up and talk to the presenter afterwards. They usually hang out for 10-15 minutes to answer questions, and that can be a great chance to ask a follow-up question if you have one. I got a couple good ARC questions answered after one of the Objective-C sessions last year as well as a CoreData question so I'm really glad I did that.

9) Apple will almost certainly provide beta versions of Mountain Lion, iOS 6, and possibly any other new SDKs the first day of the conference. Make sure you're prepared to receive them. The tables in the cafeteria are all outfitted with ethernet cable drops, which is what you'll need to use to download the files. If you have a MacBook Air, make sure and bring your ethernet adapter. I also recommend setting up your laptop with a separate partition for beta SDKs, especially on the off chance that the next version of Xcode requires Mountain Lion. Last year I set up my iPad and iPhone to sync to my work laptop (not trivial) but hopefully this year that won't be necessary thanks to iCloud. Time will tell.

10) Go to parties (duh)! Half the fun of the conference is going to hang out with the other developers. Go enjoy the atmosphere and meet new friends.

Bonus) The brown liquid substance served between morning sessions in the foyer may be labeled as Coffee and may even closely resemble Coffee, but I assure you that compared to Blue Bottle Coffee it is not Coffee. Blue Bottle is only 2 blocks away, and a great way to step out and get a refreshing beverage (or a great way to start the day out if you spent too much time on number 10).

Enchanted Rock

I just got back from a trip to Enchanted Rock and I wanted to write up a trip report.  Enchanted Rock is without question one of the best hiking spots close to Austin.  It's located about 90 minutes west of Austin between Fredericksburg, TX and Llano, TX.  That's actually quite convenient because there's great food in both: German in Fredericksburg and BBQ in Llano.  This trip to Enchanted Rock was quite special because it was completely covered in wildflowers.  Here's an example of what I mean:

We've gotten a lot of rain lately and that seems to have done wonders for the wildflowers.  I have never seen Enchanted Rock like this in more than 20 years, so if you've been waiting for an opportunity to go out there I HIGHLY recommend going now.

Enchanted Rock is also very interesting from a geologic perspective.  Enchanted Rock is part of an extensive batholith, an intrusion of igneous rock, which is one of the largest such structures in the state and the country.  It is composed of Precambrian rock and is one of the oldest pieces of exposed material in the United States.  Intrusions such as Enchanted Rock form deep in the earth’s crust when magma intrudes into a pocket and cools slowly to form igneous rocks such as Granite.  You can tell by the grain of the rock that the intrusion cooled first at the center and continued cooling outward from there.

One of the lesser known facts about Enchanted Rock is that it's not just part of a batholith, but is also an exfoliation dome.  Exfoliation occurs through weathering: water seeps into pores in the rock and freezes which causes it to contract and crack the rock  Concentric shells of the exposed surface crack like a shell, and slabs of rock are removed from the outer surface in layers.  You can see the layers everywhere, some of the pieces are left behind on the surface of the dome and others have slid down to the land below.  Here's some pictures of what some of these slabs look like, as well as an exfoliation layer just beginning to peal away.

If you've ever looking for a great place to hike, camp, or picnic then I highly recommend Enchanted Rock.  In addition to the great scenery and neat rocks there's also a network of caves and several good rock climbing routes (not to mention bouldering).  It's a great place to go.  And don't forget to stop in Fredericksburg for a beer afterwards.

See more photos at my 500px.

Canon 300mm F/4L IS Lens

I've been testing out the Canon 300mm F/4L IS lens this weekend and so far the results have been amazing. It managed to handle low-light situations just fine at the NCAA Track and Field Regionals, and compared favorably to the 300 F/2.8L IS (which costs and weighs about three times as much). Below are two images of the same athlete photographed two years apart, one with the 300 F/4L and one with the 300 F/2.8L. See if you can guess which is which.

The top image was shot with the 300 F/2.8 and the bottom one with the 300 F/4. I actually prefer the bottom one, but either way, both results are perfectly usable.


It also turns out that the 300 F/4 is an EXCELLENT macro lens! I spent the morning shooting wildflowers with it and I was blown away by the results. The lens focuses down to a mere 4ft (amazing for a 300mm lens!) and the results are also very good. The lens is incredibly sharp. I was also impressed with the shallow depth of field with a smooth and pleasing background blur. This is an excellent nature lens.

I'm very happy with what I've seen from the 300mm F/4L IS lens that I rented for the weekend and I think I will be extremely happy adding one to my kit in the near future.

Check out more shots at 500px.com/cnstoll.

This review also helped inform my decision.

Comments

As I finally take my blog live, I wanted to address the lack of comments.  I decided to follow the John Gruber/Matt Gemmell model and forego comments.  I'm not so much worried about negative or adversarial commentators as I am with just keeping my site simple.  There's no extra widgets or social feeds, and I didn't feel like I needed to have comments either.  That doesn't mean I wouldn't love to hear from you though.  I plan on linking most of my articles from Twitter as well, and I would love to have you comment on my posts there!

Universal Battery Charger

As part of my preperations for WWDC I decided to get an external battery charger for my iPhone.  I never actually ran out of power last year, but I got very close almost every day and I had to make an effort to keep it charged.  I think it will be nice to have a charger available for emergencies.  I looked on monoprice for their 30-pin compatible chargers and I found a few of them.  But there are a lot of problems with these.  For one thing, they're marked up on price compared to the USB options.  For another, if you use a case you'll have to take it off to use them.  I didn't want to deal with either of those issues, so I decided to combine parts to make my own.

Here's what I got:

That is a 2800 mAh battery, a USB 2.0 A Male to mini 5 pin Female adapter, and a USB 2.0 A Female to A Female coupler.  What that let's you do is plug any Apple 30-pin cable into the battery to charge your devices.

I tested it out on my iPhone and it worked very well.  It charged my phone from 50% to 100% in 1.5 hours and used about 3/4 of the battery's charge.  I'll definitely be keeping this guy charged up and in my backpack all week long at dub dub.

Screenshot of shopping cart below:

Thoughts on Lenses

Recently I've been thinking about upgrading my photography kit and trying to decide which lens to buy.  Canon is currently running a great special on their professional-level bodies and L-series lenses so there are some great deals right now.  It's always important to consider your use-case when purchasing camera equipment.  My work covers a broad range of categories but primarilly I shoot sports, nature, and landscape.  I'd been debating between upgrading either my 17-40 F/4L or 70-200 F/4L to their 2.8 cousins, or buying a lens in a completely different focal length range.  

I use Aperture for all of my photo management, which means that I not only have access to all of my photos but a complete database of all of my photo metadata.  I decided to run some analysis on that data to see which lenses that I have used produce the best photos.  These results don't necesarily say anything about the quality of these lenses, meerely my own preferences for which lens to use in a given situation and my own satisfaction with the results.  Note that I only own two of these lenses, the rest I've merely borrowed.

Out of all of the 5 star images in my library (1300 out of 162655) here is the breakdown per lens:

300mm F/2.8L IS: 305

400mm F/2.8L IS: 151

17-40mm F/4L: 280

70-200 F/2.8L IS: 98

70-200 F4L: 84 

The rest are the 600 F/4L IS, the 16-35 F/2.8L, 24-70 F/2.8L, the 28-135 F/3.5-5.6 IS, and point-shoots.

Sadly only three of these are from my iPhone :(

That tells me that the 17-40mm F/4L is by far the best value I've ever gotten out of a lens (600 dollars for hundreds of good shots) and that 300mm is my most used-per-good-shot focal length.   

These ratios are about the same if I lower to 1 star images and above (sample size of 25000 photos).  The only exception is that there are far fewer 400mm images here (roughly 1800) meaning that the 400mm produces far more exceptional results per-image-shot (which is to be expected since it costs about $8000).  I would love to own a 400mm F/2.8L if I could afford one.  I think it's the best lens I've ever used.

Overall I think this shows that the 17-40mm F/4L is an incredible lens for the money that has served me well, and that I need to invest in a lens in the 300mm focal length range for my own use.  It also shows that my usage of the 70-200 focal length range, even though it's an exceptional range (and both are exceptional lenses) is limited and that my results in that range don't tend to be as good as those in the wider range (landscape, etc.) and at the farther end of the range (closer to action).  I'll continue to rely on my 70-200 F/4L for mid range shots, and probably invest in a 300mm F/4L IS for future long range needs.

Aperture SSD Performance

I plan to write a lot about iOS development on my blog but I wanted to kick things off with some articles about photography.  I've been a photographer for more than 12 years and I've been shooting sports professionally for 5 years.  Photography is one of my passions and it's even better when it synergizes with my other passion: computers.  Below is an article I posted on Macrumors to test my hypothesis that an SSD would improve performance in some areas of Aperture usage.


I finally made the jump to an SSD for my primary volume, so I thought I'd share some of my experience with using it for Aperture so far. A while back, a lot of people told me that they thought SSDs would have no bearing on Aperture performance. The assumption was that most Aperture tasks are CPU bound (preview processing, exporting) so the SSD wouldn't offer much benefit. I decided to put this to the test using my own setup and workflow.

First, my setup. I'm using a 2010 3.2GHz Mac Pro with 13GB of RAM. I am using a referenced master's library configuration. The library package resides on the main volume (MacPro HD) and the masters reside on a 2TB RAID-1 mirrored volume (MacPro RAID). 

My basic workflow with Aperture is this. After returning from a shoot I import everything from the CF card (using a FW800 CF reader) into a new project. I mostly shoot sports, which is on a deadline, so I am typically editing immediately without waiting for the import to finish. This means that I am scanning through thumbnails and full size images before they are processed or cached. It's critical that this process doesn't hang or lag at all because I generally don't want to wait for the import to finish (especially on projects involving 2000+ photos). 

For the test I used a 1000 photo set from a trip I just took to India. I completed my import and basic editing process first with my library on a 1TB HD, and then again with the library on a 480GB SSD. In both tests I downloaded all the images from the CF card during the import. While the import was in progress I timed several benchmarks using a stopwatch (I admit this is not very scientific). I also continually scanned through thumbnails and full sizes to gauge the overall "feel" of each system. I also took a few other non-import related measurements that I feel are worth including.

So, here's the results.

HDD:
Mac Startup Time: 56s
Aperture Startup Time: 39s
All Photos Load Time: 12s
All Projects Load Time: 22s
Import Thumbnails (and metadata): 1:28
Copy All Images to Masters Directory: 1:50
Total Import Time: 3:20 (sum of two previous steps)
Process Embedded JPEGs: 2:57
Process All Images (previews): 14:25
Load 10 Previews (select an image, wait for it to fully load, right arrow to the next, wait, repeat): 17.4s

Notes: during this process scrolling locked up frequently. It was difficult and frustrating to flip between images. Tapping an image often resulted in a 4-5 second beach ball cursor. 


SSD:
Mac Startup Time: 21s
Aperture Startup Time: 10s
All Photos Load Time: 12s
All Projects Load Time: 8s
Import Thumbnails (and metadata): 12s
Copy All Images to Masters Directory: 1:51
Total Import Time: 2:20 (sum of two previous steps)
Process Embedded JPEGs: 1:57
Process All Images (previews): 12:30
Load 10 Previews (select an image, wait for it to fully load, right arrow to the next, wait, repeat): 15.1s

Notes: There were never any hangs of any sort while flipping between images during the import process. Tapping on an image resulted in an instant preview followed 2-3 seconds later by a full quality image.


I think the summary is that there is definitely a performance benefit to having the Aperture Library metadata on an SSD. I think the initial project import time is the best example. From 88s to 12s, a 6x improvement in performance. I have no doubt the hangs in performance with the HDD during this time were a result of the disk head moving back and forth writing metadata, previews, etc. and then having to seek back to find some bit of metadata from the library for a given image before showing it's preview in the viewer. For me, the lack of hangs and freezes during import make the SSD a huge win. I also like the faster startup time for Aperture, as well as more-quickly loading large projects (or multiple projects, like all photos). So yes, while exporting (or as shown in this example, preview generation) don't really benefit from the SSD, I still think it's worthwhile to use one with Aperture.


Original:

http://forums.macrumors.com/showthread.php?t=1357118

Hello World!

Hello, my name is Conrad.  I'm 6'5", 25, and this is my first blog post.