Every morning has begun the same way since I bought a home model espresso machine last year: walk to the kitchen, and turn the machine on to start heating up. That's the first step in the relatively complex, yet fun and rewarding, process of brewing a morning espresso. I'll describe the rest of the process here, with links to some of the gear involved below.
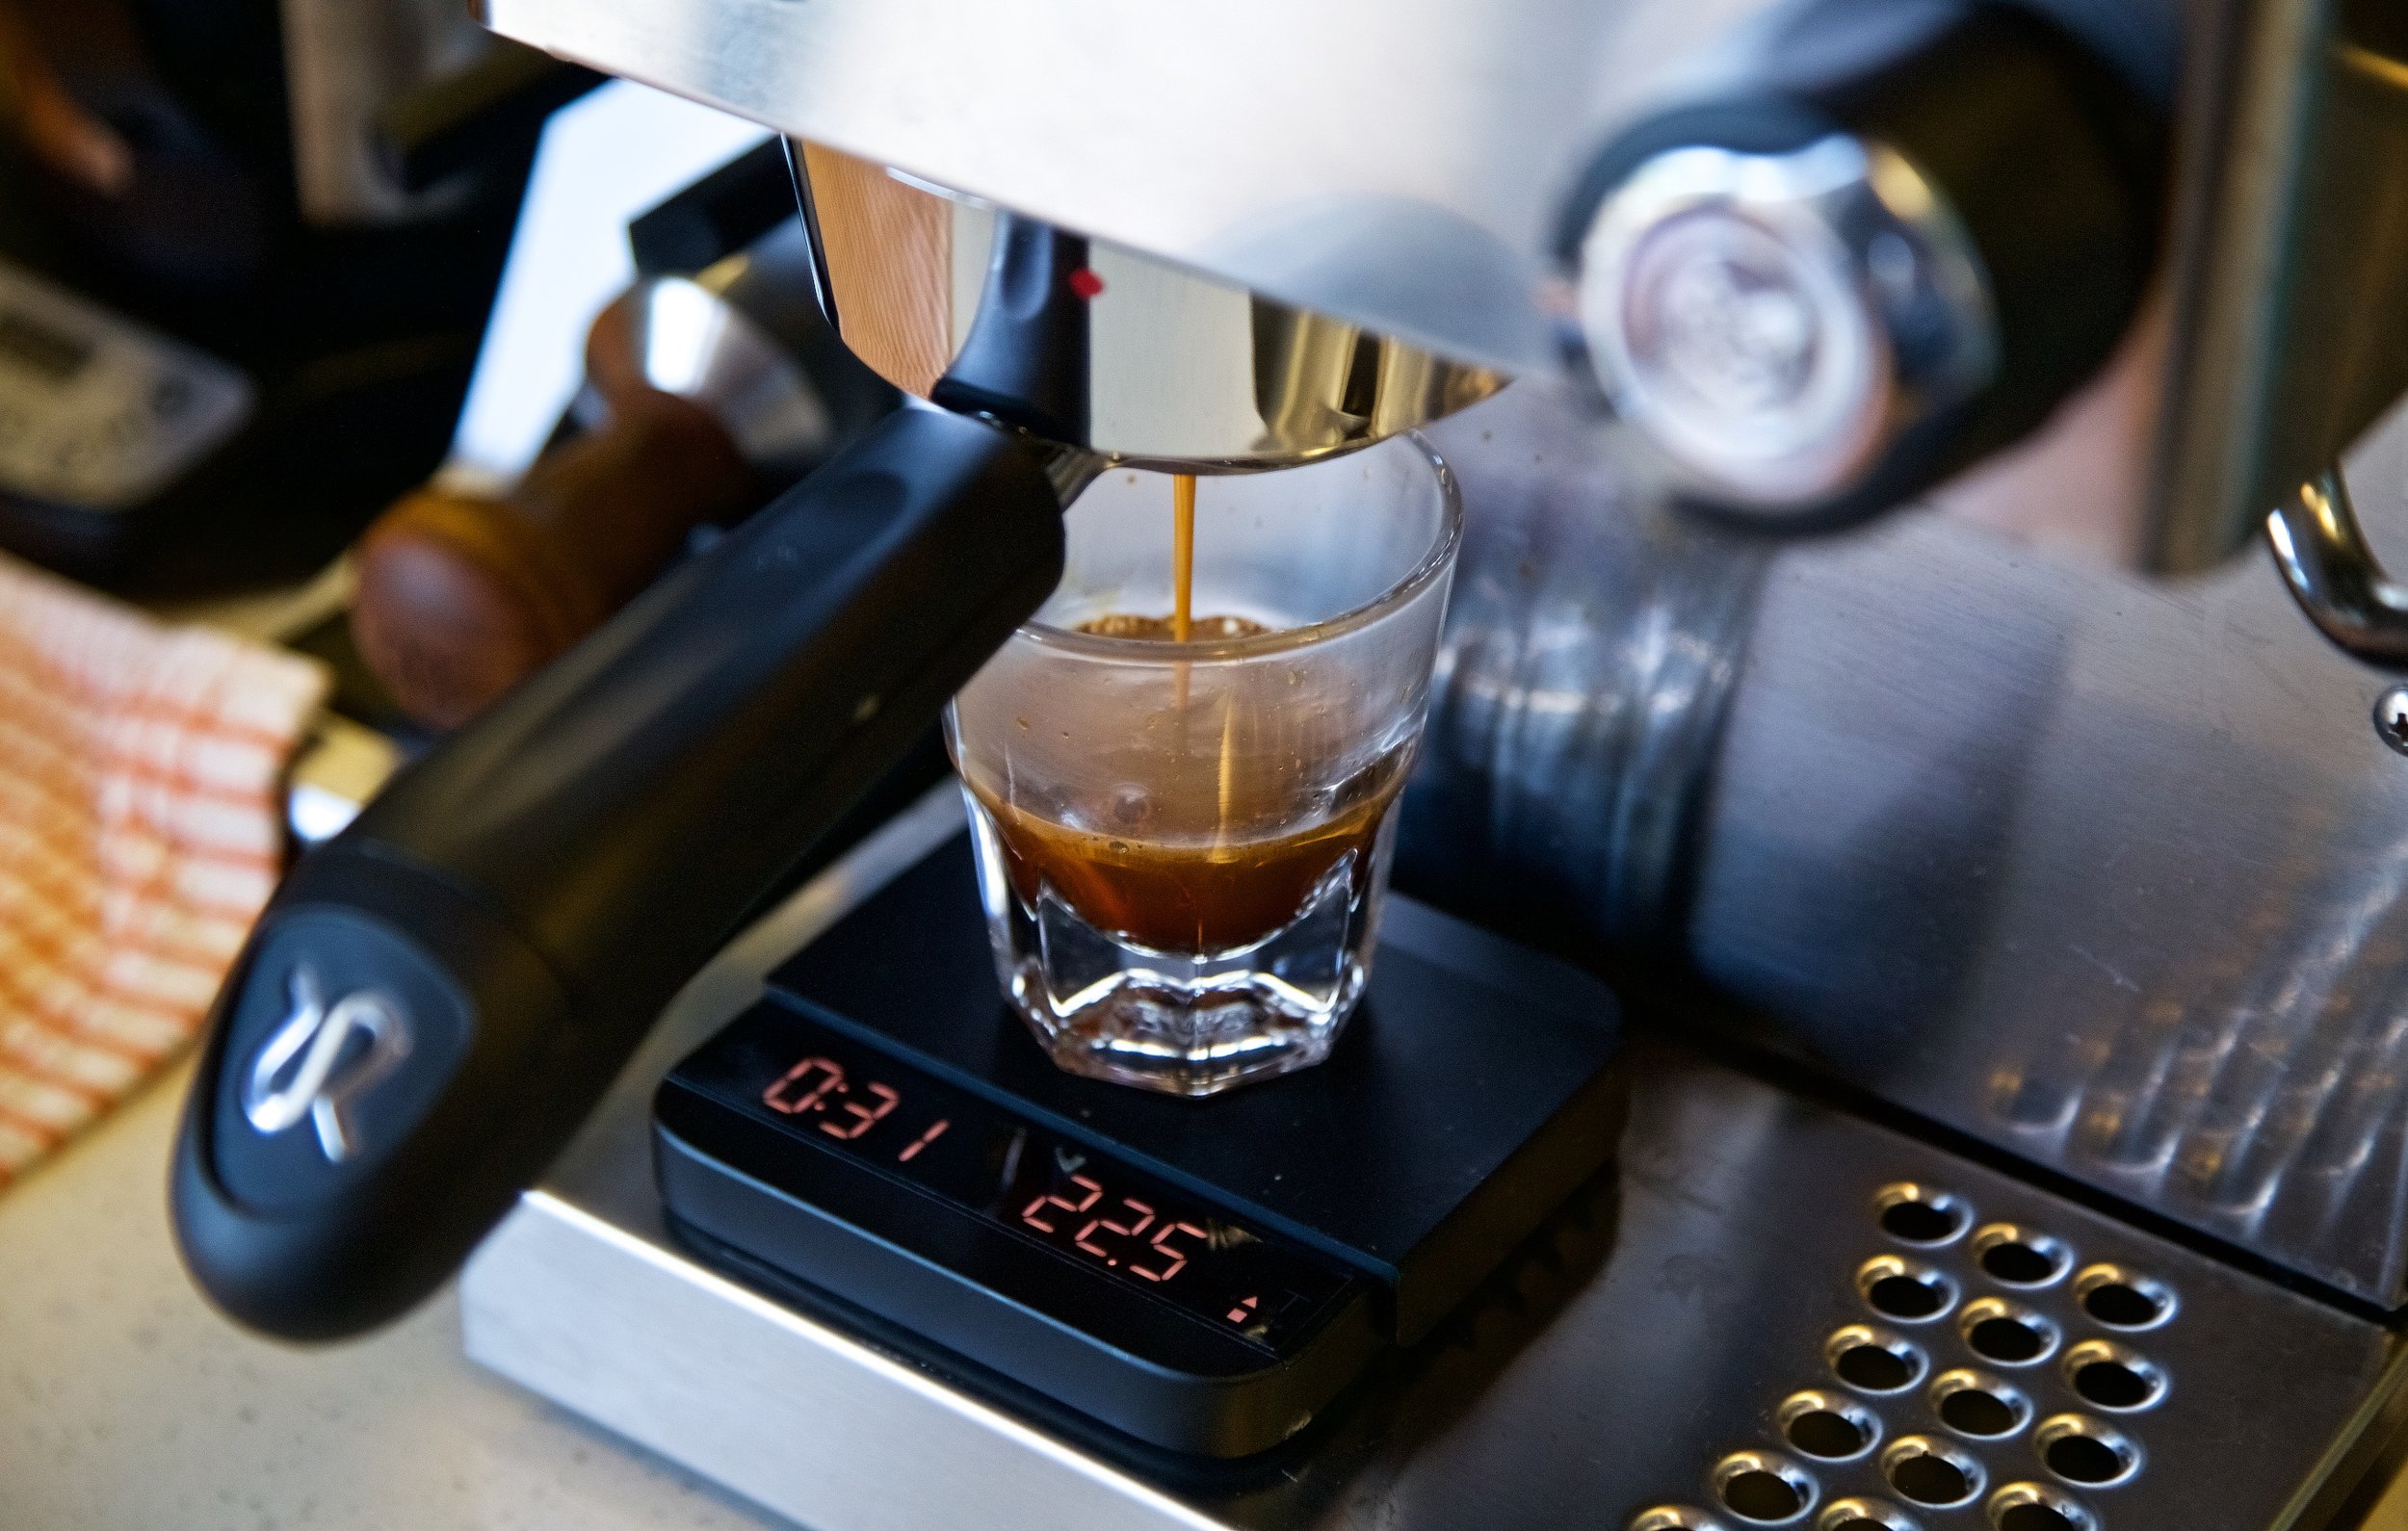
The Acaia Lunar scale measuring the extraction time and weight of espresso for the current pour. This pour is running slower than normal - ultimately reaching 30g in about 35 seconds. The slow pour actually works well for this particular coffee, with the sweetness balancing things out and not being too sour.
People that enjoy coffee all have different approaches to brewing at home. Some people don't want the fuss - and will default to the best option with only one button to press. Others welcome the fuss, and will agonize over water temperature and pouring motions to create the optimum cup. Others want to experiment, not just with brewing methods but even coffee roasts - some going so far as to roast their own beans at home.
What I enjoy about home brew espresso is the number of variables involved, and the attention to detail that the combined process requires to brew something great. It's a delicate balancing act, and a multi-variable equation between grind size, weight, time, water temperature, pressure, water volume, and a variety of other factors...not to mention coffee itself.
While the machine is heating up I grind coffee into the portafilter basket. Grinding is a key step, and most mornings when I begin my grinder is still dialed in to the specific setting that I adjusted it to when I bought the coffee I'm brewing. Dialing in a grinder is a process of trial and error, but involves finding the right setting that controls the flow of water through the finely ground coffee powder. If the grind is too coarse, then water will flow through too quickly without extracting anything from the grounds. If it's too fine, the water gets trapped by the coffee and won't flow through at all. For brewing espresso, you're looking for a grind setting that allows water to flow at a relatively slow rate of 30 seconds.
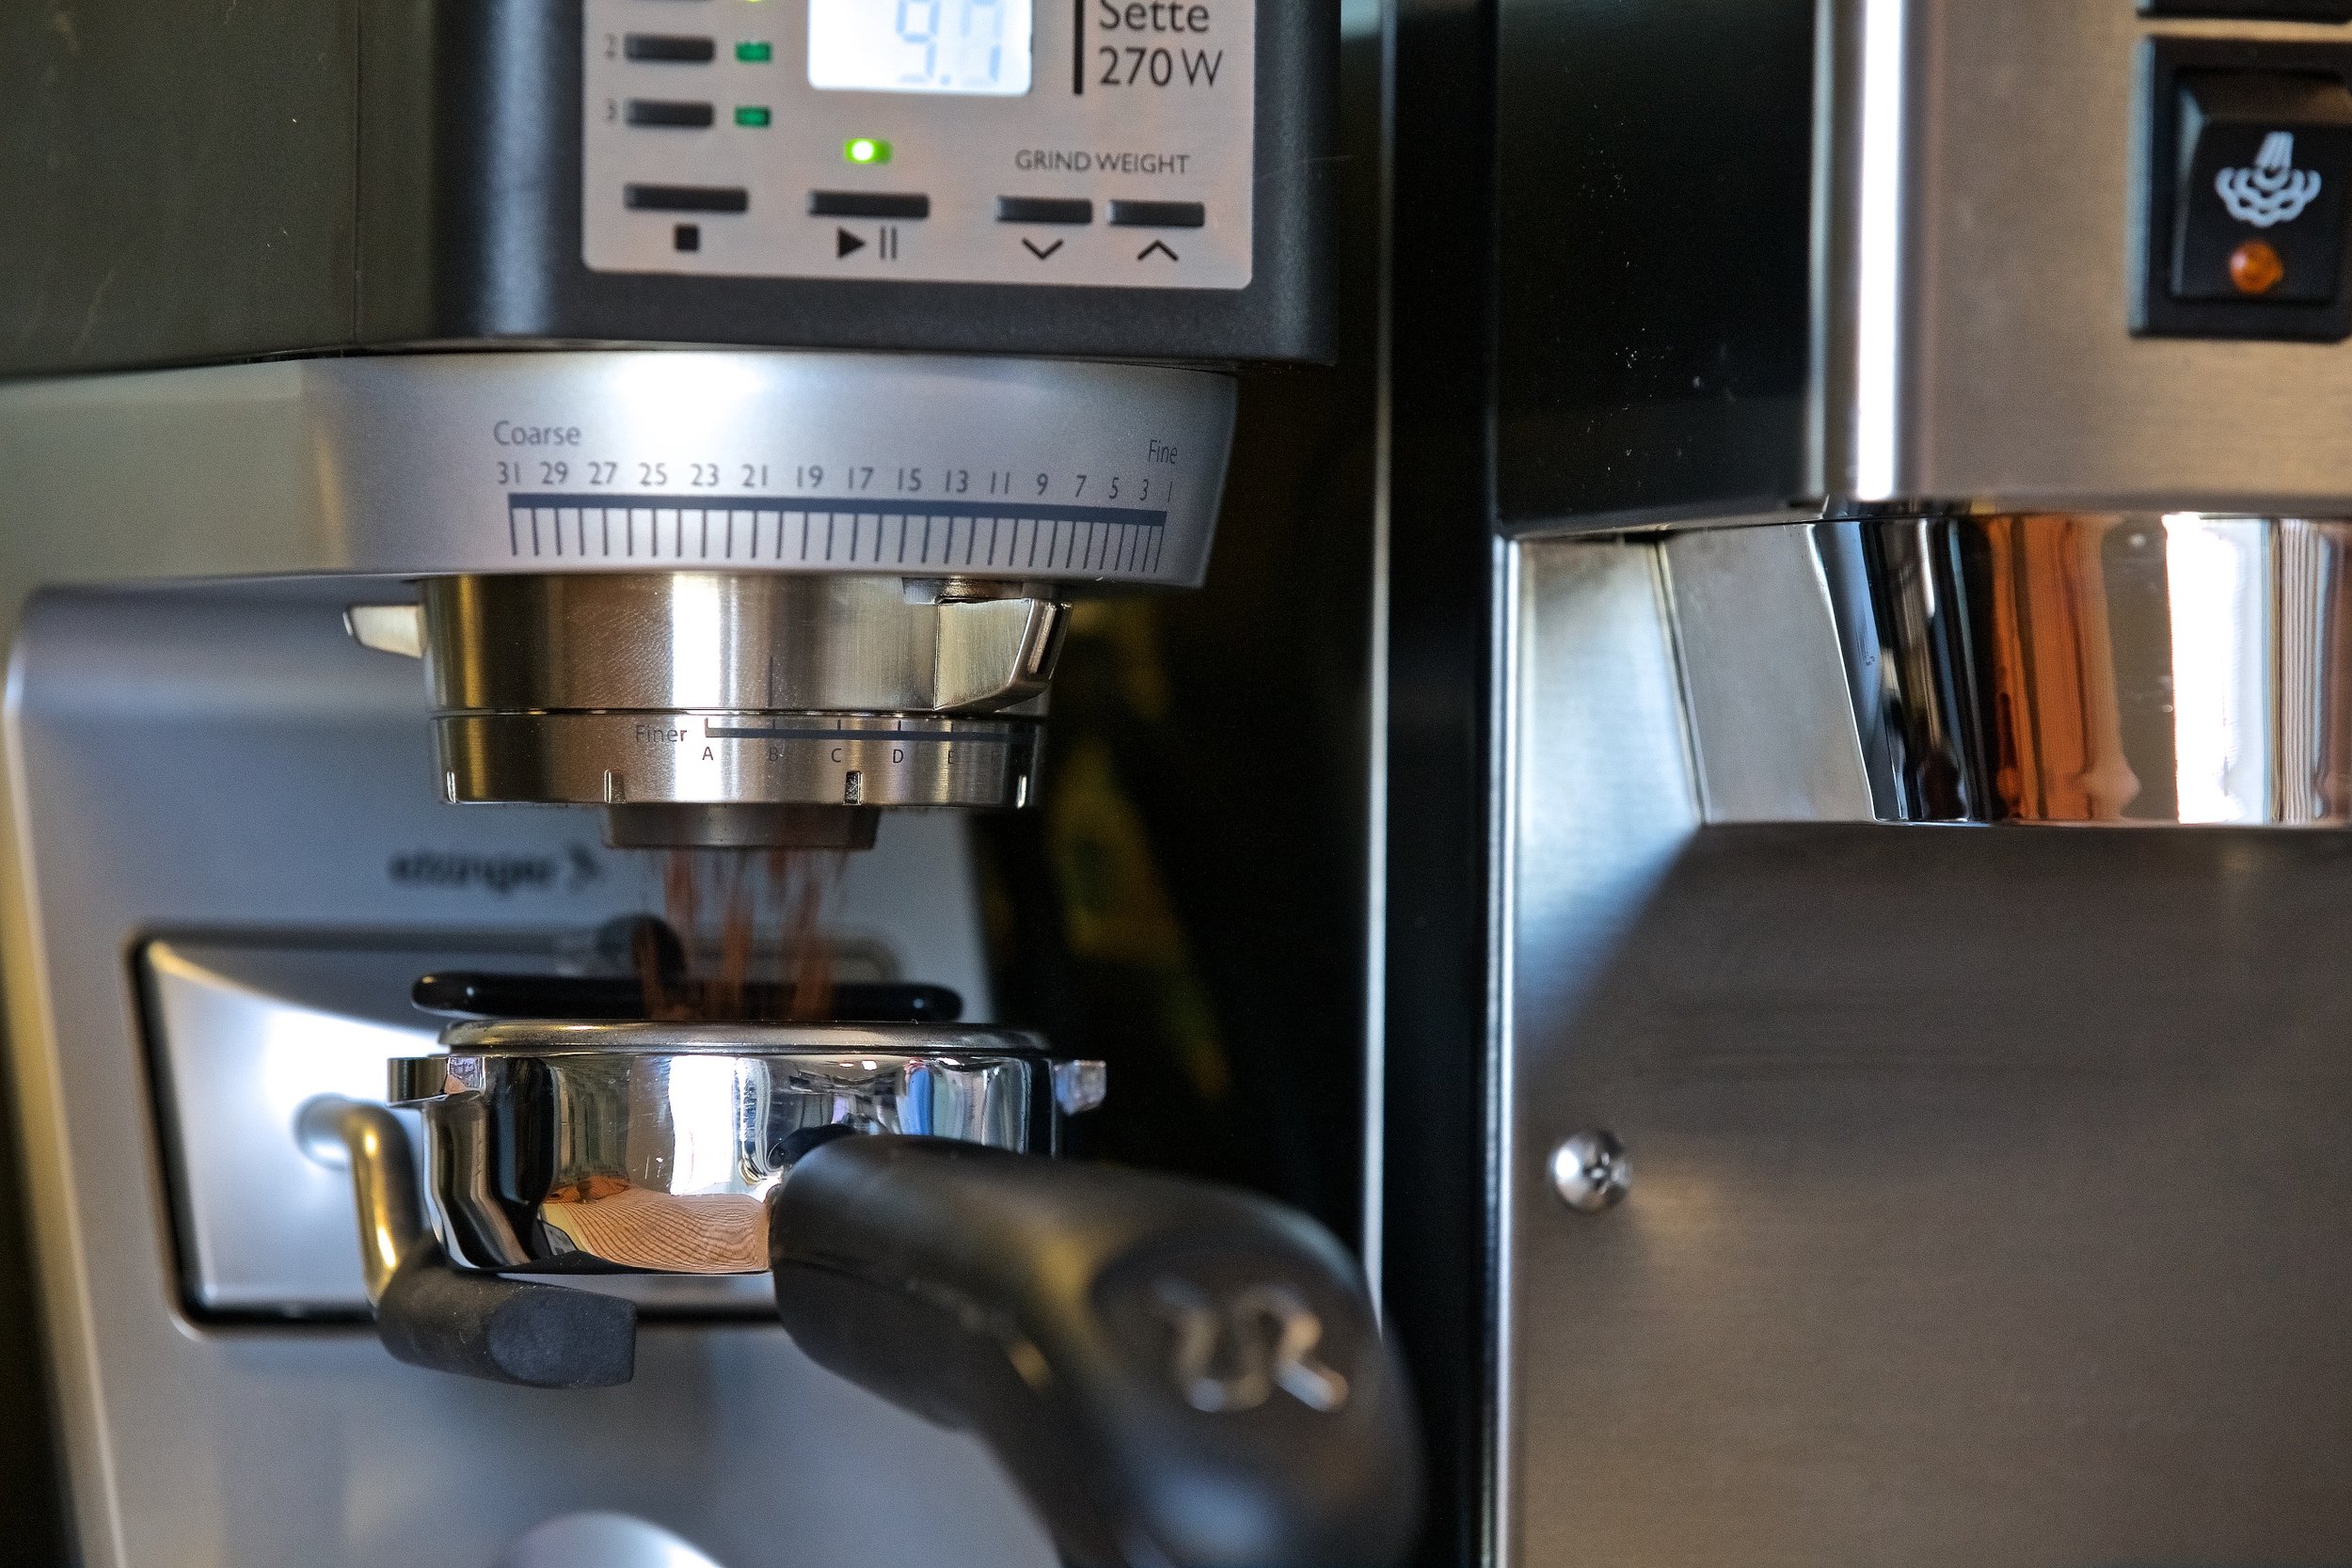
The Baratza Sette 270W grinding into the Rancilio Silvia's portafilter.
The amount of coffee grounds is very important for espresso. The standard recipe for espresso is a 1:2 ratio of ground coffee to brewed espresso. If you start with 17g of ground coffee in your portafilter basket, you should expect to end up with 34g of brewed espresso. Less than 34g, and your espresso might taste too sweet, or more and it might taste too sour or bitter. You can always adjust this to suit your own taste, but 1:2 is a good place to start.
One of the most important pieces of kit for any home brew coffee setup is a good scale (or two). The scale needs to weigh both the amount of coffee grounds, and the amount of brewed espresso. You can use the same scale for both, but many people use different ones designed for each task. The industry leader for scales designed specifically for coffee is Acaia. Their scales are water/coffee proof, extremely accurate, very sensitive down to 0.1g, and include specific software features to make brewing coffee simpler and more fun.
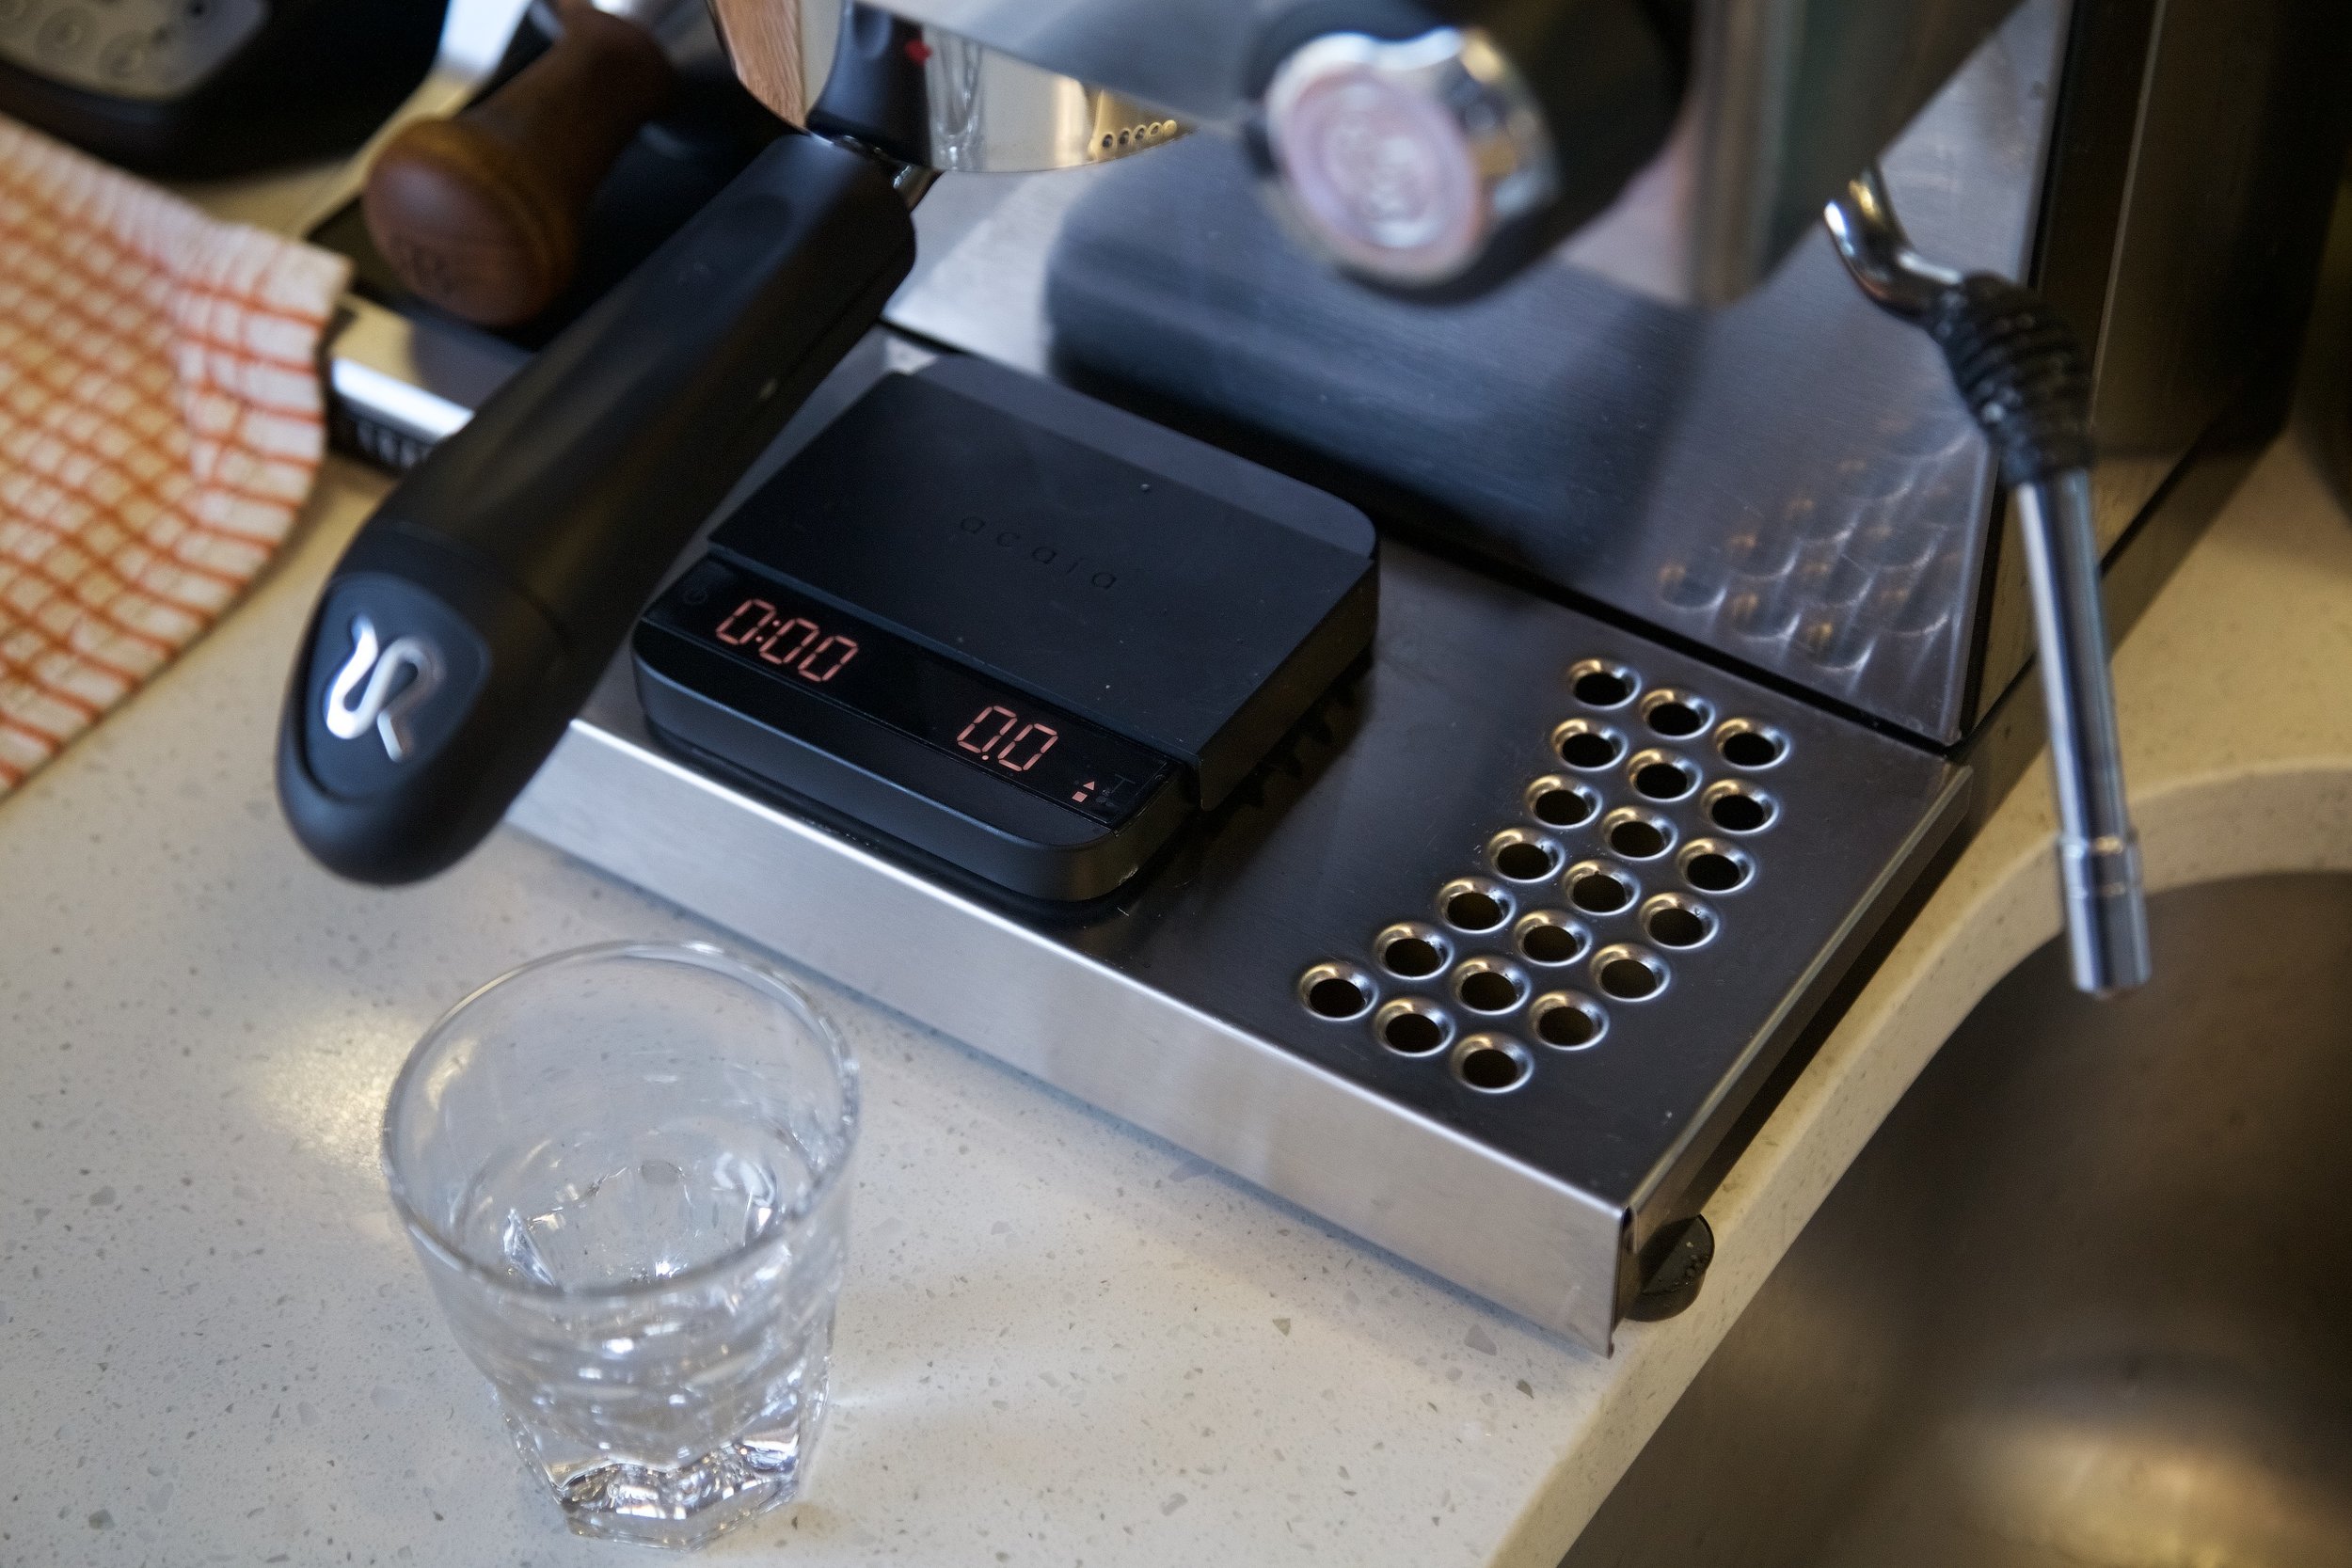
The Rancilio Silvia and Acaia Lunar scale, set up on the counter getting ready to brew.
Before brewing I make sure the grounds weight is what I'm expecting for the coffee I'm using. I usually prefer about 17g of ground coffee, but sometimes I use 16g or 18g depending on the type of coffee. Even just 1 gram actually makes a noticeable difference to flavor and quality when brewing espresso - which is why a good scale is so important. When I buy a new bag of coffee I write down the grind size and coffee weight on a small whiteboard next to the grinder so I don't forget.
The next step before brewing is to tamp the coffee grounds into the portafilter basket using a small tool called a tamper. The whole point of tamping is to uniformly distribute the coffee to make water flow through it evenly. That includes breaking up any clumps or chunks of grounds that might exist in the basket, either by running your finger through the grounds or tapping the basket lightly from the side with your hand. Then I hold the basket down on the counter with my left hand, and tamp firmly with the tool in my right hand. There's plenty of technique involved with tamping, and I don't think mine is that good yet. But I focus on creating an even surface with the tamper, and trying to let gravity do the rest.
Controlling the water temperature is important for any type of coffee brewing, including espresso. Most commercial espresso machines have special temperature controllers that allow you to set a specific temperature that the machine will hold. My home machine is a Rancilio Silvia. The Silvia is special because it is built using the same commercial-grade components that go into Rancilio's larger and more expensive machines. But it doesn't have a built in temperature controller - so you have to control the temperature manually before you brew.
Once my portafilter basket is tamped and ready, I put a cup under the machine and run hot water into it. While the hot water is running from the boiler out of the machine, cold water from a tank is refilling the boiler. This levels out the machine's temperature, and a light turns on when the temperature falls below a certain level. That's my queue to stop the water, pour the cup out in the sink, and attach the portafilter basket to the machine. It takes about 10-15 seconds for the boiler to heat back up to the correct temperature...and then the light turns off. Just like in a car race, when the lights go out, it's time to brew.
Under the portafilter basket of my Rancilio Silvia machine is an Acaia Lunar scale. This specific model of scale from Acaia is specifically designed for espresso. First, it's small enough to fit on the drip tray of most espresso machines, and thin enough to hold a normal size coffee cup below the portafilter. That means it can weigh the amount of coffee being brewed in real time as it's coming out of the machine - allowing me to monitor the progress of the brew. Second, it has a built in timer, which is the other key variable to brewing a great tasting espresso.
We talked about the recipe for espresso earlier (a 1:2 ratio of ground coffee to brewed espresso), and about the grind settings required to produce a flow rate of 30 seconds. Brewing is where we combine this multivariable equation to produce espresso. We want to brew 34g of espresso, but we want it to take 30 seconds before the scale reaches that number. If it's too fast, and reaches 34g in 20 seconds - the espresso will taste weak or bitter. If it's too slow, and takes 40 seconds to reach 34g, the espresso will taste too sweet and strong. Extraction that is too fast or too slow is my queue to start over and adjust the grinder before trying again.
What a pour will usually look like when it's just starting out.
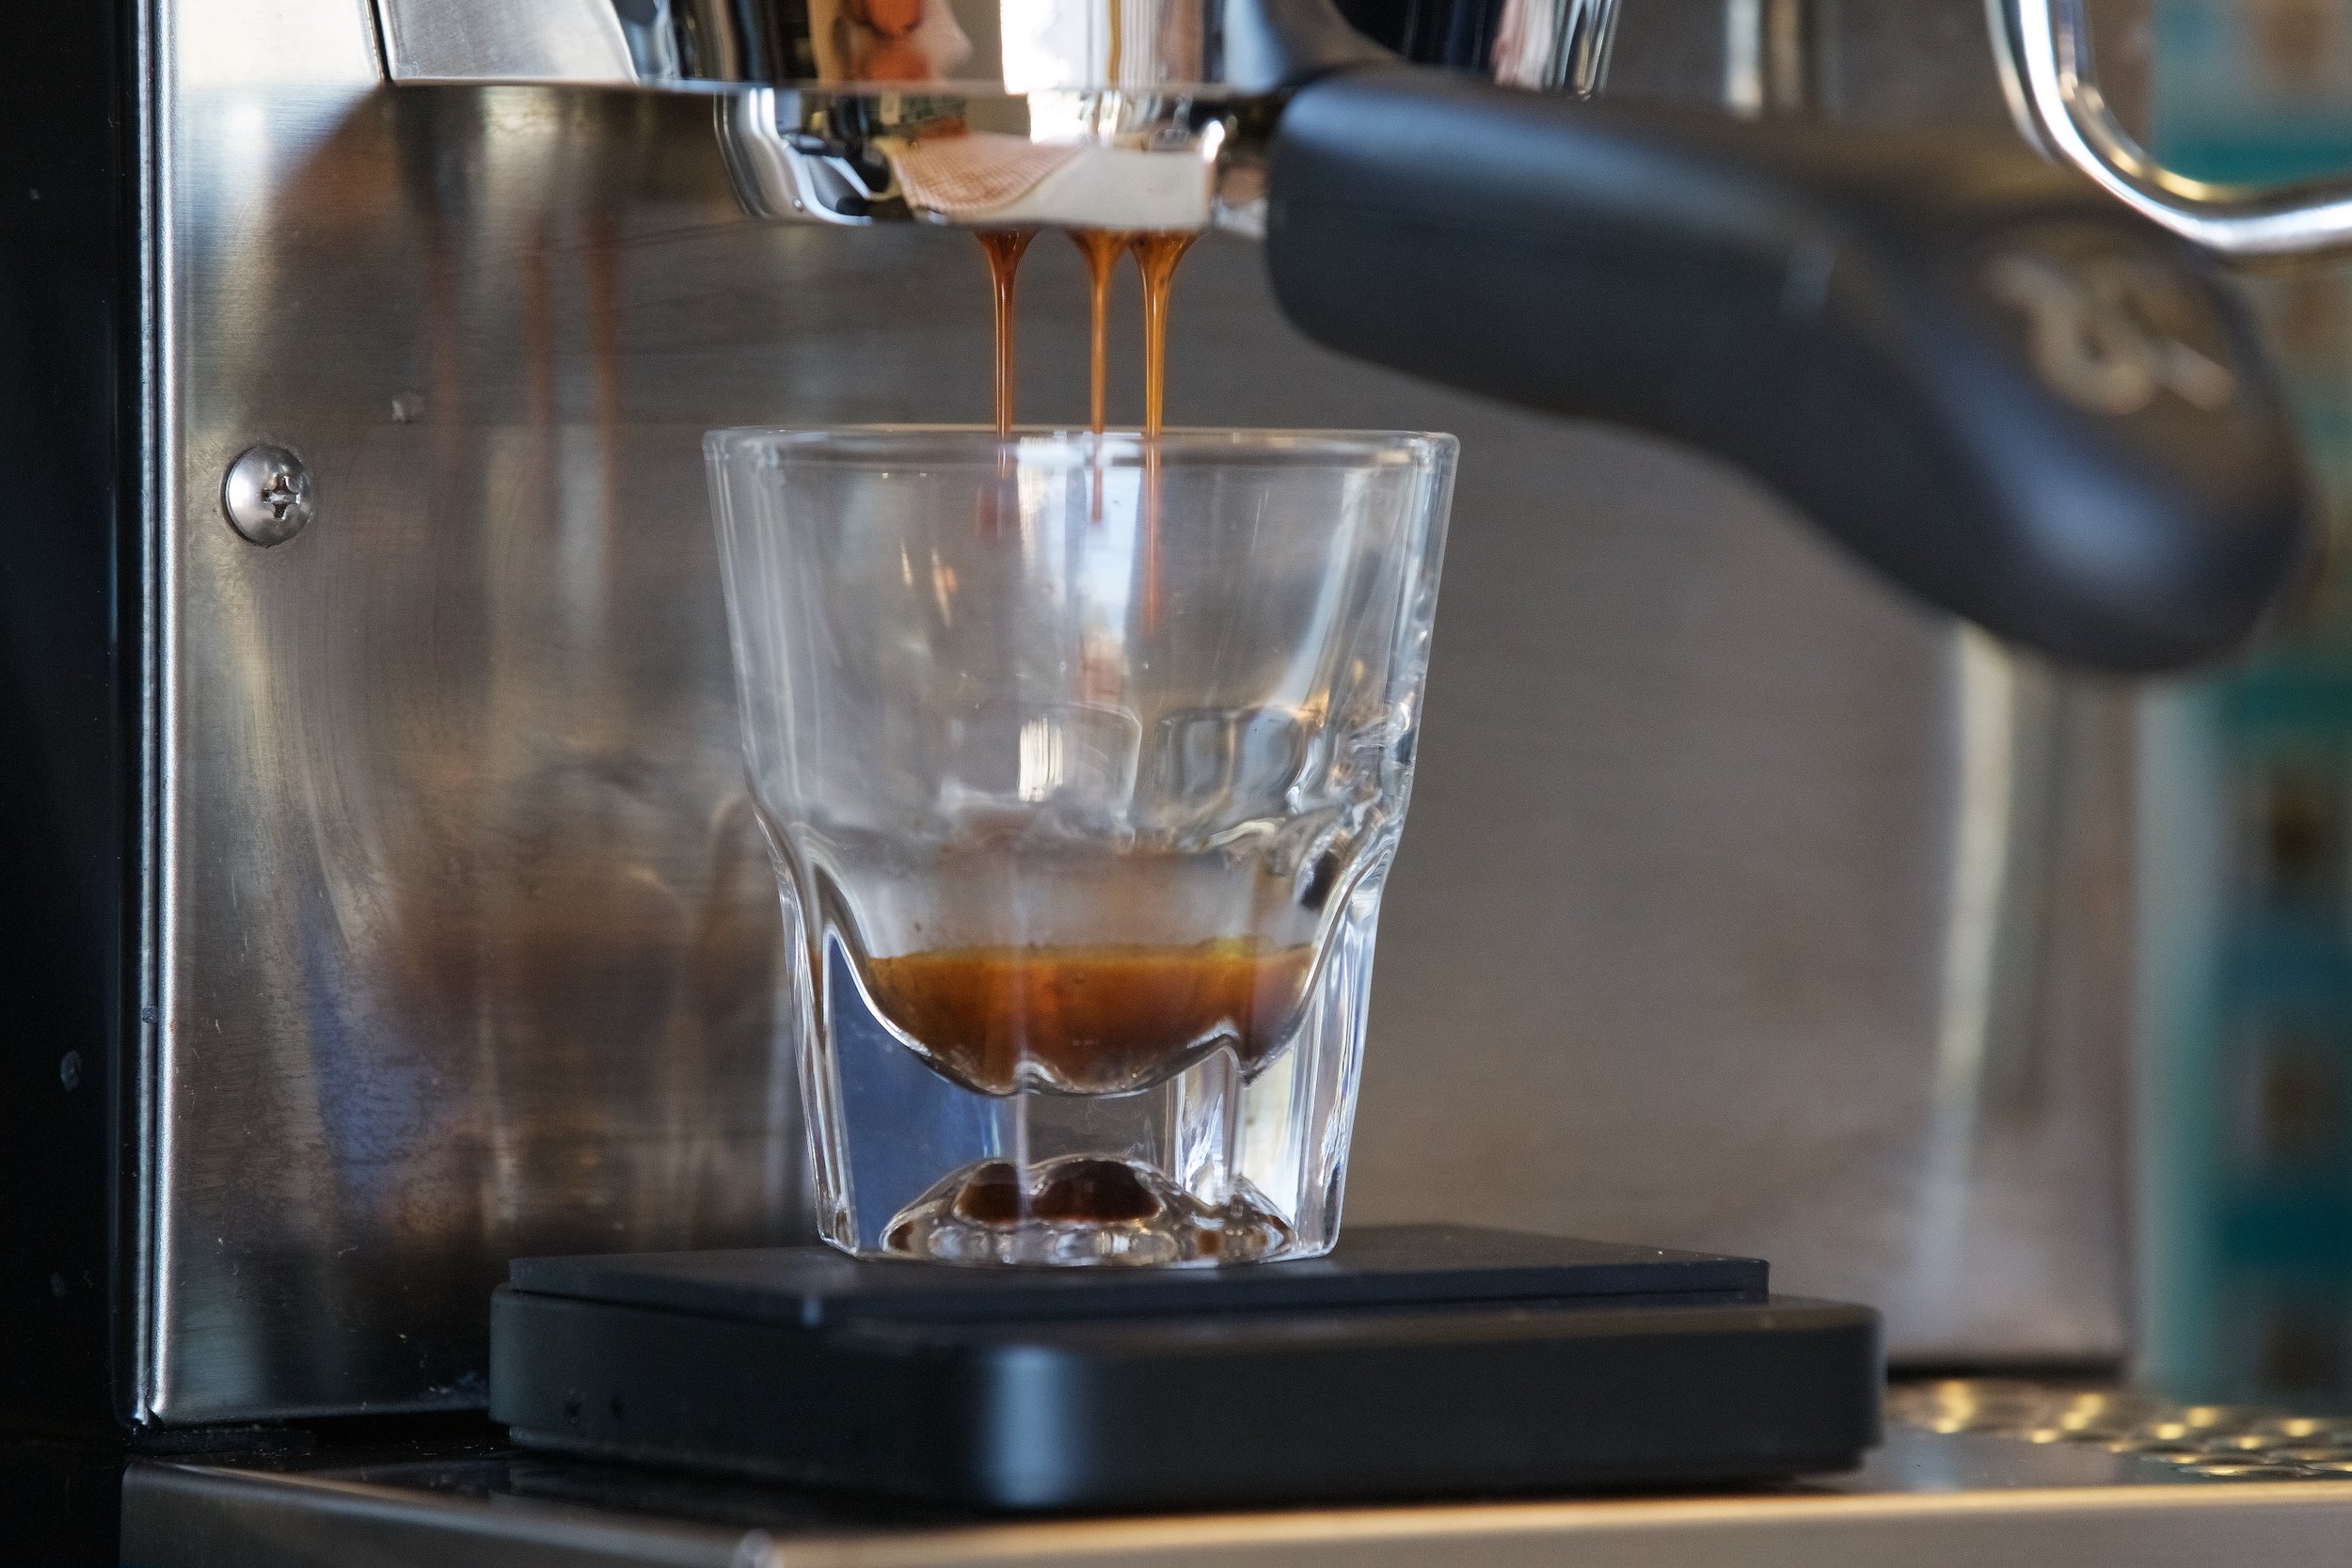
After the light goes out I start the brew. The machine starts building pressure and forcing water through the tamped coffee grounds in the portafilter basket down into the cup on top of the scale. The scale is very smart. It automatically tares out the weight of the cup, and automatically starts a timer counting up. While the machine is brewing, I watch the weight and time numbers on the scale. It should take a few seconds before any espresso drips into the cup at all, and it should progress slowly for several seconds after that before speeding up. At 15 seconds, the weight of the espresso might only be 10g. By 23 seconds though, the weight of espresso will likely have caught up, and read 23g.
When the scale reads 34g I turn the machine off. The espresso is finished brewing. Hopefully the timer on the scale reads close to 30 seconds. If it's anywhere between 26 and 34 seconds, then we have likely produced a very tasty espresso. How tasty will depend on the quality and freshness of the beans and their roast, and on some other factors that are harder to control.
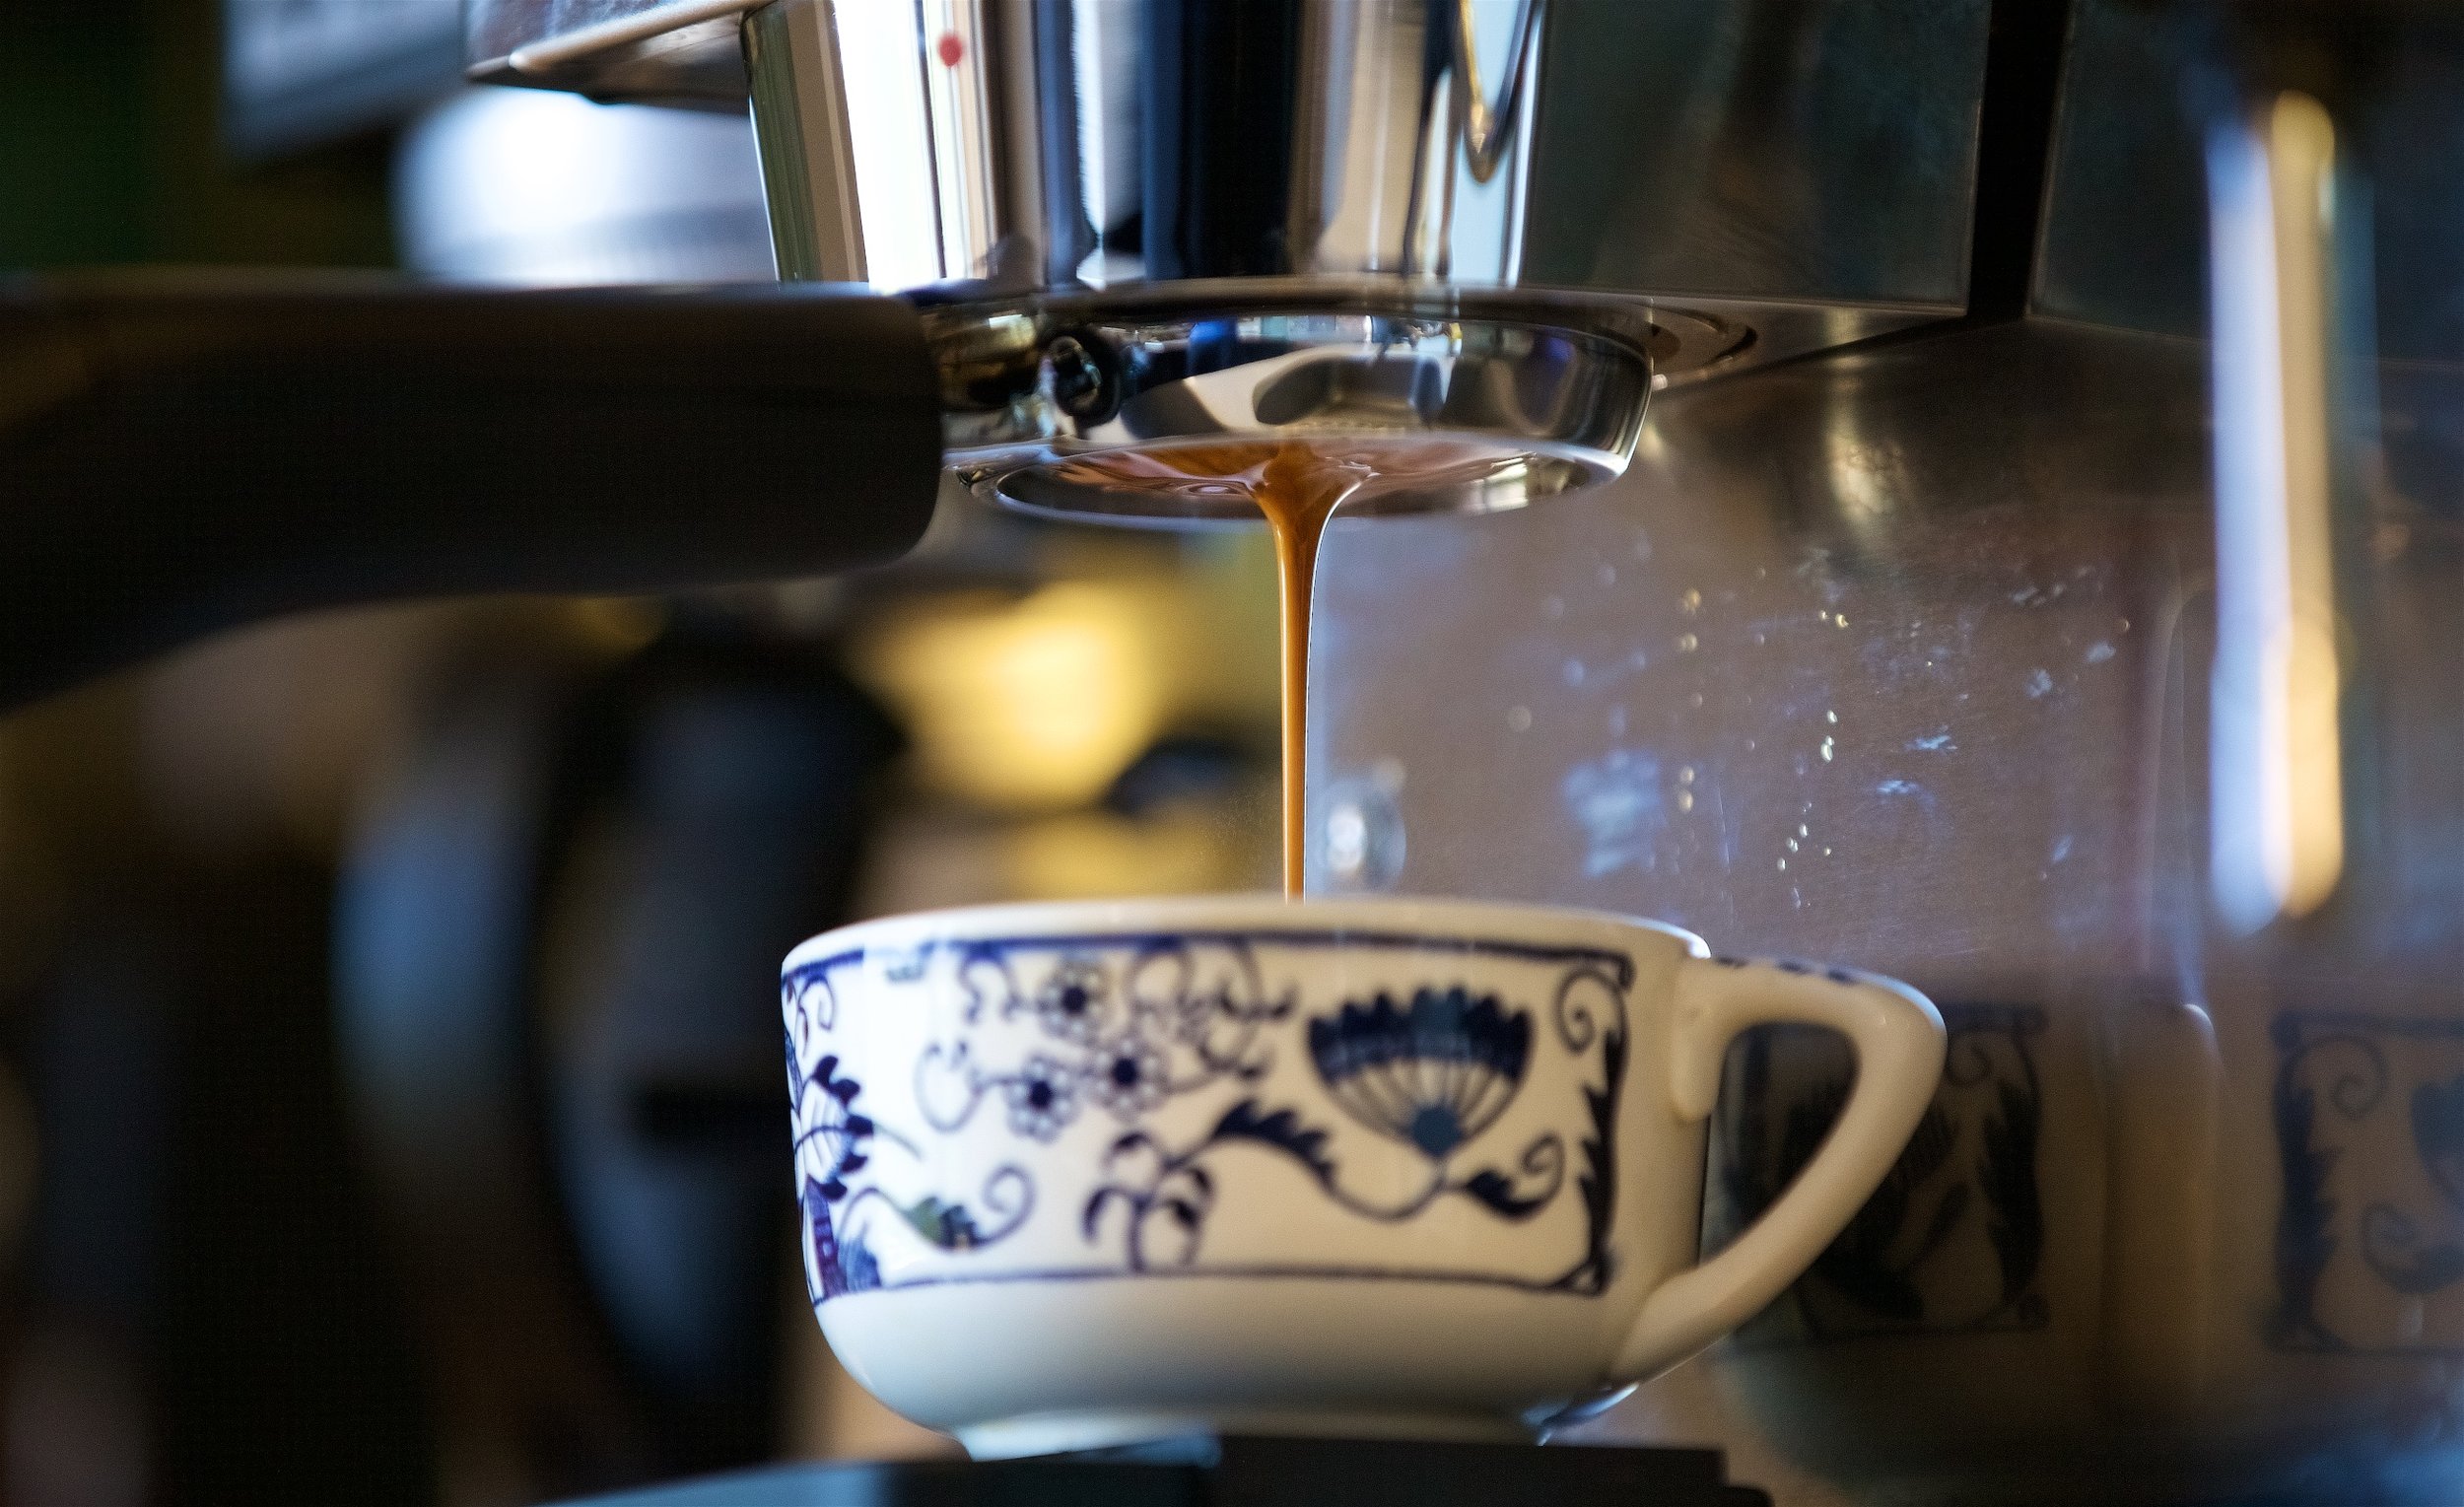
Near the end of a pour the espresso consolidates into a single thick stream of a brown color.
Once the espresso is finished brewing I'll clean out the portafilter and the machine itself, preparing it for the next cup. I'll turn the steamer on to heat water for steaming milk to pour a cappuccino. I prefer the ratio of milk to coffee in a cappuccino at home. Steaming milk takes some practice, and is harder to explain in a blog post. I've learned by trial and error, and watching several youtube videos. The Rancilio Silvia does a great job steaming milk.
This is a lot of explanation about a process that might seem foreign to anyone who hasn't brewed espresso or other types of coffee before. You have to pay close attention to the details, but it's not hard to grow accustomed to. I've really grown to love the process. I love dialing in the grinder, and monitoring all the variables, and changing some of them to see what happens to the flavor. All told, making a cappuccino in the morning only takes a few minutes, and boy does it taste good :)
Everyone needs a morning ritual of some sort, and this one is mine. Turning on the espresso machine and making a cappuccino.
All of the gear I am using at home is listed below:
- Rancilio Silvia Espresso Machine [Amazon]
- Rancilio Bottomless Portafilter [Amazon]
- VST 22g Ridgeless Basket
- Baratza Sette 270W Grinder [Amazon]
- Acaia Lunar Scale [Amazon]
- Milk Frothing Pitcher [Amazon]
- Reg Barber Tamp